
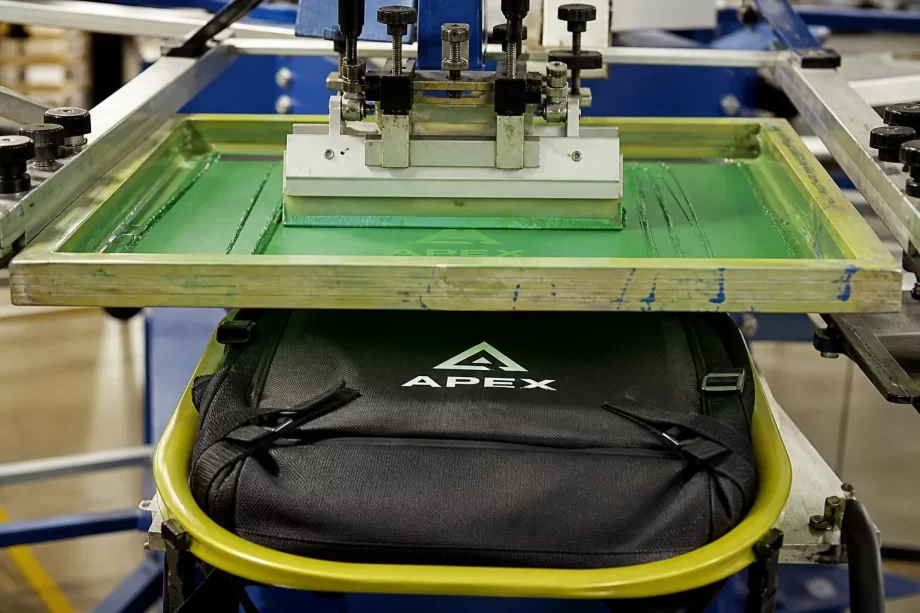
Printing and Embroidery for Backpacks: Logo Methods
The logo is the first thing a customer reads on a backpack. It is also the detail most likely to fail in production — cracked print, peeling patch, puckered embroidery, or colors that do not match the brand.
Between the design file and the finished logo stands a decision: which method applies it to which material. Screen printing, transfer printing, embroidery, woven labels, and leather patches each have their own strengths, limits, costs, and quality risks. Choosing wrong costs money in rework; choosing right protects the brand on every unit.
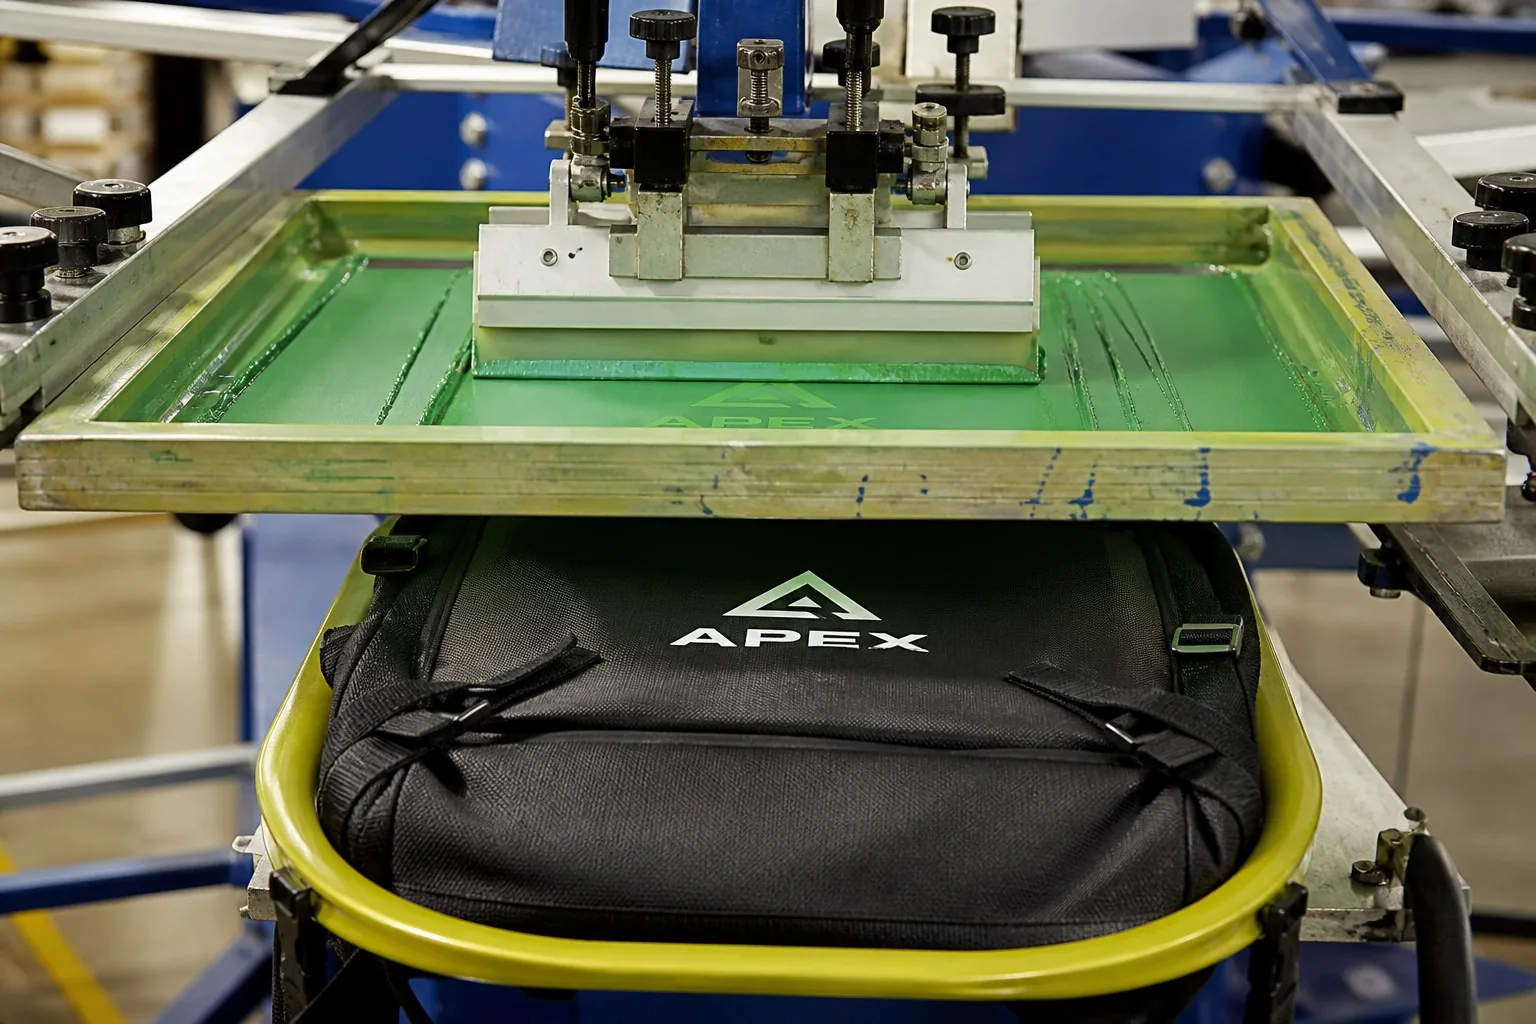
This guide explains each logo method from the factory perspective, when to choose it, what files to send, and how to control quality.
- Why Logo Method Choice Matters
- The Printing Methods
- The Embroidery Option
- Labels and Patches
- Choosing the Right Method
- Design Files: What the Factory Needs
- Position and Placement Standards
- Quality Control for Logos
- Cost Factors and Minimums
- Common Logo Defects and Fixes
- Ink Systems and Color Management
- Special Effects and Finishes
- Logo on Leather and PU Panels
- Sustainable Branding
- Working with the Factory on Branding
- Production Workflow: From Approval to Sewn Logo
- Logo Durability Testing in Detail
- Backpack Logo Trends
- Cost Estimation Examples
- Multi-Location Branding Consistency
- Choosing a Factory for Branding Work
- The Branding Disasters to Avoid
- FAQ
- Conclusion
Why Logo Method Choice Matters
A backpack carries the brand on its front panel, shoulder straps, and labels. Every logo is a brand statement.
The First Impression
| Logo state | Customer impression |
|---|---|
| Crisp, vibrant, even | Premium brand |
| Slightly off-color | Careless brand |
| Cracked or peeling | Cheap brand |
| Crooked or puckered | Poorly made brand |
What Method Choice Affects
| Factor | Method dependency |
|---|---|
| Durability | Wash and wear resistance |
| Look | Texture, gloss, depth |
| Fabric compatibility | Coated, rough, stretchy |
| Cost | Setup, per-unit, minimums |
| Lead time | Tooling and production speed |
The Printing Methods
Printing applies ink or color onto the fabric surface. Several methods compete for the job.
Screen Printing
Screen printing pushes ink through a mesh stencil onto the fabric. It is the classic method for flat panels.
Each color needs its own screen. Setup cost rises with color count; per-unit cost stays low at volume.
| Screen printing strength | Limitation |
|---|---|
| Vibrant, opaque colors | Per-color setup |
| Durable when cured well | Flat surfaces only |
| Low unit cost at volume | Not for tiny detail |
Plastisol and Thick Print
Plastisol ink sits on the surface with a slight raised feel. Thick layers give a dimensional logo.
This method suits bold logos on nylon and polyester panels. Curing temperature and time must match the fabric — overcuring damages coated fabric.
Heat Transfer (DTF and HTV)
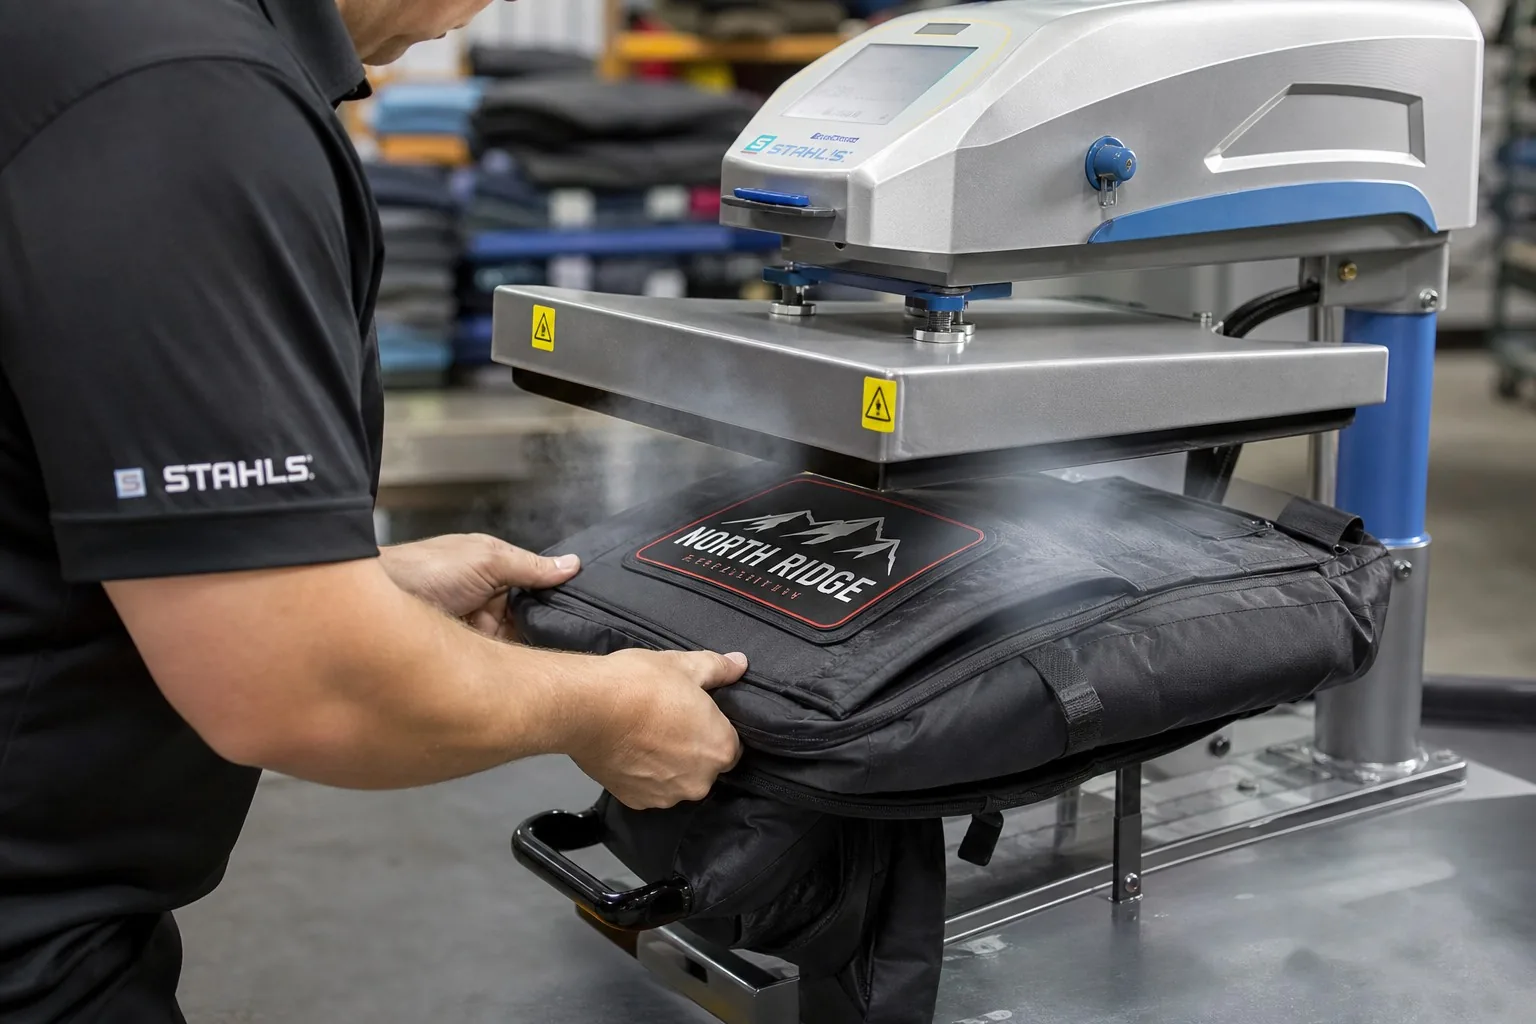
Transfer printing prints the design on film, then presses it onto the fabric with heat.
| Transfer type | Best for | Notes |
|---|---|---|
| DTF film | Full-color photos | Soft hand, durable |
| HTV vinyl | Solid shapes | Simple, matte |
| Sublimation | Polyester only | Dye into fabric |
Sublimation is permanent on polyester but invisible on cotton or nylon blends. Match the method to the fabric, not the other way around.
Digital Direct-to-Garment
DTG prints ink directly onto the fabric like a printer. It handles gradients and photos without screens.
DTG suits short runs and complex art. It works best on natural fibers; coated nylon needs pretreatment and testing.
The Print Method Comparison
| Method | Color range | Durability | Fabric limits | Setup cost | Unit cost |
|---|---|---|---|---|---|
| Screen | Limited | High | Flat panels | High | Low |
| Plastisol | Solid | High | Nylon/poly | Medium | Low |
| DTF transfer | Full | High | Most | Low | Medium |
| Sublimation | Full | Very high | Polyester only | Medium | Low |
| DTG | Full | Medium | Natural fibers | None | Medium |
The Embroidery Option
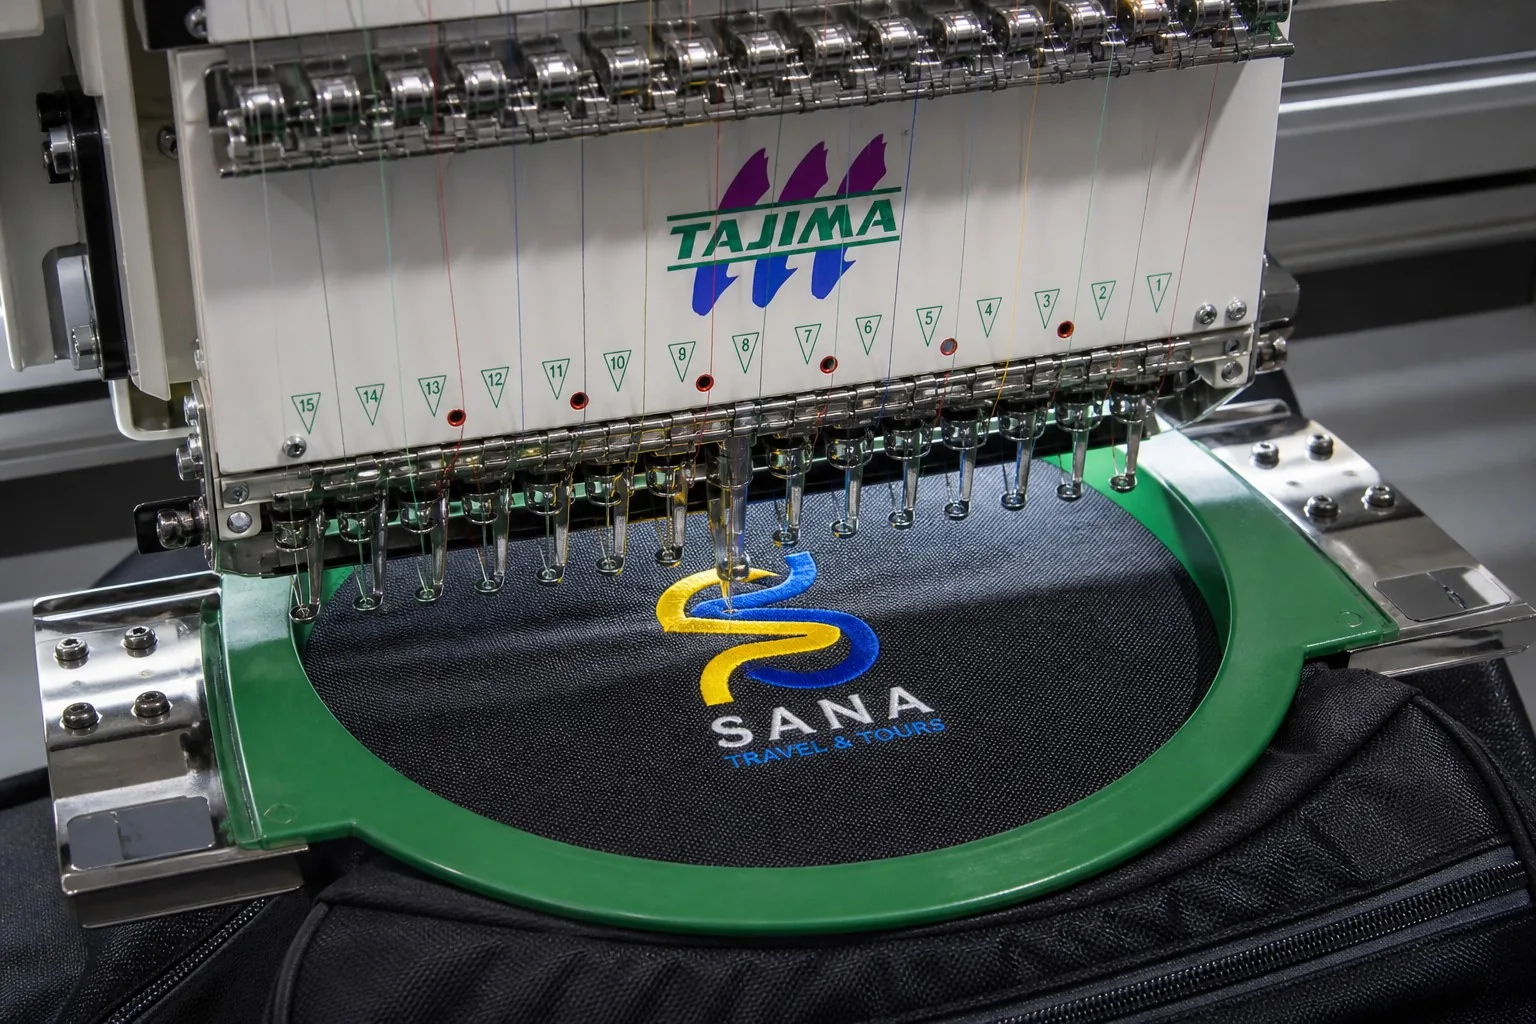
Embroidery sews the logo with thread. It reads as premium and lasts as long as the pack.
How Embroidery Works
| Element | Detail |
|---|---|
| Machine | Multi-needle computerized |
| Digitizing | Design converted to stitch file |
| Stitch density | Points per square inch |
| Layers | Underlay, fill, border |
| Thread | Rayon or polyester |
The Embroidery Strengths
| Strength | Why it matters |
|---|---|
| Premium look | Raised, textured logo |
| Durability | Thread does not peel |
| Color depth | Hundreds of thread colors |
| Fabric tolerance | Works on most weaves |
The Embroidery Limits
| Limit | Impact |
|---|---|
| Thick panels | Distortion, needle stress |
| Very small text | Threads blur detail |
| Stretchy fabric | Puckering |
| Curved surfaces | Hooping difficulty |
| Cost | Higher than most printing |
Manufacturer’s note: Embroidery is the default for premium backpacks, but it must be digitized by a specialist. Poor digitizing — too dense, wrong angles — ruins both the look and the fabric. Ask for a stitch-out sample before production.
Labels and Patches
Not every logo is printed or sewn directly. Many brands use labels and patches applied to the pack.
Woven Labels
Woven labels weave the logo in thread, usually at the neck or inside seam.
| Label type | Look | Use |
|---|---|---|
| Woven main label | Clean, classic | Inside or outside |
| Printed label | Flat, cheap | Inside only |
| Rubber label | 3D silicone | Outside, sporty |
| Leather patch | Premium, warm | Flap, front panel |
The Leather Patch
A leather patch with embossed or debossed logo adds a craft feel. PU leather patches offer the look at lower cost.
Leather patches are stitched around the edge. Placement on the flap is standard for many backpack styles.
The Applique Patch
Applique patches are embroidered separately, then sewn onto the pack.
This allows dense, detailed embroidery without hoop distortion. Patches also move between pack designs easily.
Choosing the Right Method
The method follows the fabric, the design, and the budget. A decision matrix keeps the choice rational.
Match by Fabric
| Fabric | Recommended methods |
|---|---|
| Nylon ripstop | Screen, DTF, embroidery |
| Polyester coated | Sublimation, DTF |
| Canvas | Screen, embroidery, patch |
| PU leather | Deboss, print, patch |
| Mesh | Print or narrow embroidery |
| Stretchy knit | DTF, minimal embroidery |
Match by Design
| Design trait | Favor |
|---|---|
| Fine detail and small text | Screen or DTF |
| Photographic art | DTF or sublimation |
| Bold block logo | Screen or embroidery |
| 3D depth | Thick print or embroidery |
| Few colors | Screen (cheapest) |
| Many colors | DTF or embroidery |
Match by Quantity
| Order size | Best value |
|---|---|
| Under 100 | DTF or embroidery |
| 100–1,000 | Screen or DTF |
| 1,000+ | Screen or woven label |
Design Files: What the Factory Needs
The design file decides the outcome. Factories work best from clean vector art.
The File Requirements
| Element | Requirement |
|---|---|
| Format | AI, EPS, SVG, or PDF |
| Type | Vector, not raster |
| Fonts | Outlined to curves |
| Colors | PMS or hex references |
| Minimum size | Legible at final scale |
| Mockup | Placement reference |
Raster vs Vector
| File type | Use |
|---|---|
| Vector (AI, EPS) | Best — scales cleanly |
| High-res raster (PNG, 300dpi+) | Acceptable for prints |
| Low-res raster (JPG) | Reject — blurry result |
What to Avoid Sending
| Common error | Result |
|---|---|
| Logo from a website screenshot | Blurry edges |
| Fonts not outlined | Wrong font substitution |
| Wrong color profile | Color shift |
| No clear space | Cropped design |
| Tiny embedded image | Pixelated print |
Position and Placement Standards
Where the logo sits affects both appearance and which methods work.
The Standard Placements
| Position | Typical use |
|---|---|
| Front panel center | Main logo |
| Front lower pocket | Secondary logo |
| Flap center | Patch style |
| Shoulder strap | Small woven text |
| Back panel top | Brand text |
| Inside label | Care and brand |
Placement Limits by Method
| Method | Placement limit |
|---|---|
| Screen print | Flat panels only |
| Embroidery | Thickness, seam avoidance |
| Heat transfer | Flat or gently curved |
| Sublimation | Polyester panels only |
The Seam and Zipper Rules
Logos must clear seams, zippers, and hardware by defined margins.
| Obstacle | Minimum clearance |
|---|---|
| Seams | 15 mm |
| Zipper | 20 mm |
| Buckle or webbing | 10 mm |
| Panel edge | 25 mm |
Quality Control for Logos
Logo QC prevents the most visible defects on the product.
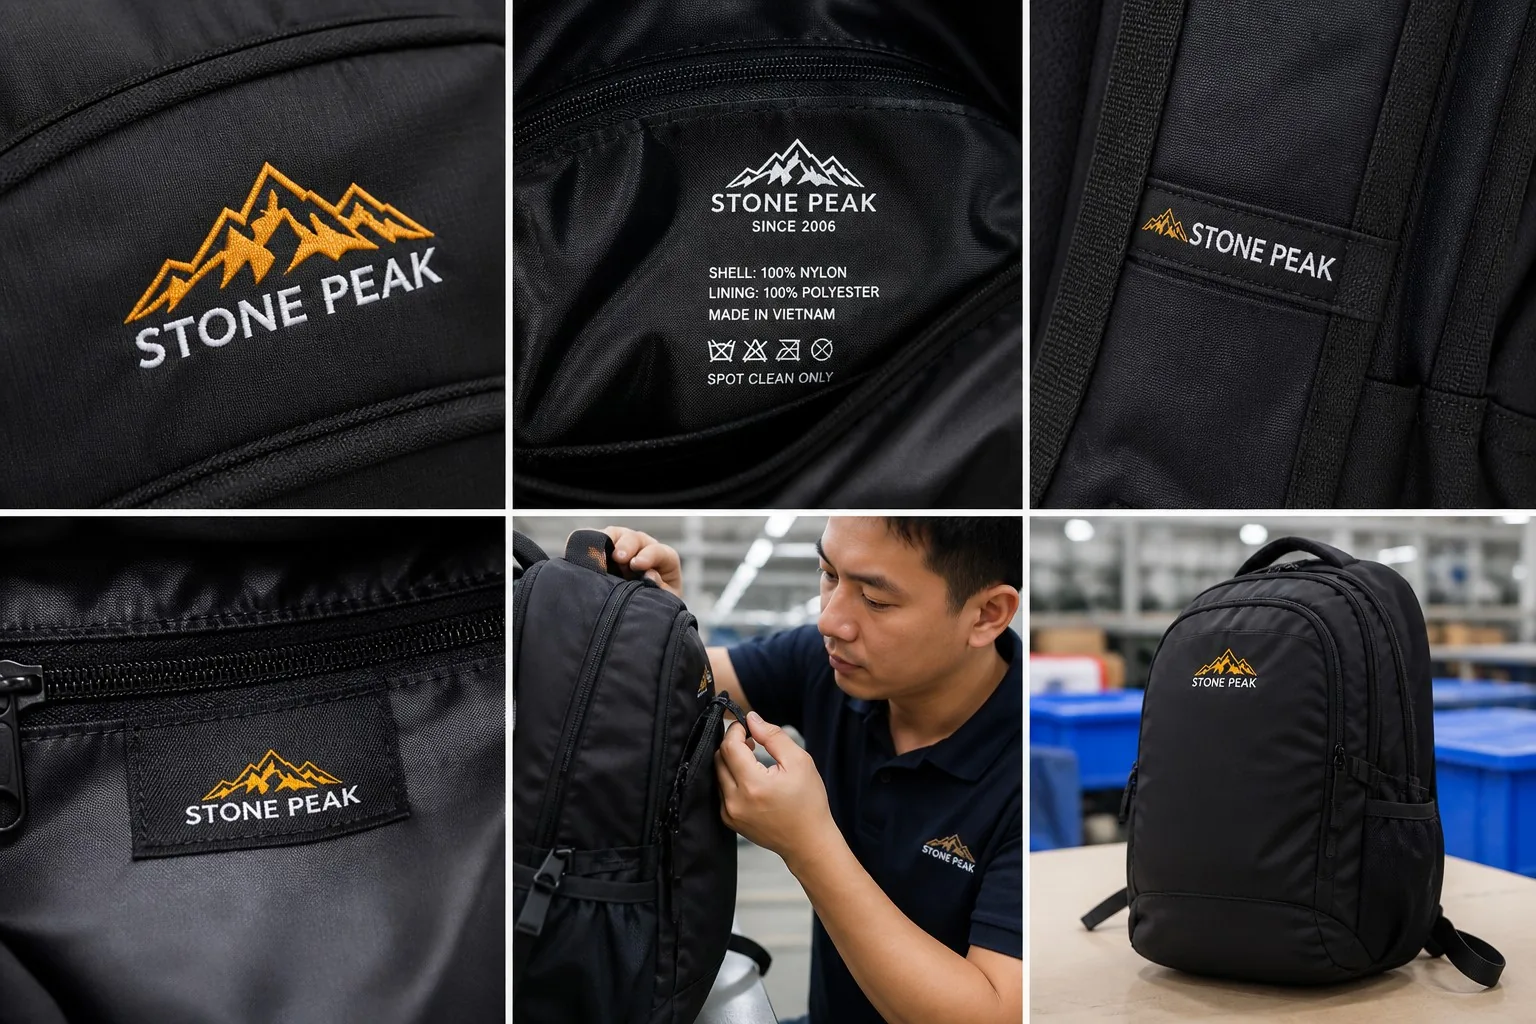
The Adhesion Test
| Test | Method | Pass |
|---|---|---|
| Cross-hatch tape | Cut grid, tape pull | No peel |
| Wash test | Launder cycles | No crack or fade |
| Flex test | Bend the print area | No cracking |
| Rubbing | Dry rub pressure | No transfer |
The Appearance Check
| Check | Standard |
|---|---|
| Color | Match approved sample |
| Position | Within tolerance |
| Alignment | Square to panel |
| Edge | Clean, no bleed |
| Surface | Even, no bubbles |
The First-Article Rule
Every new logo needs a first article approved before the line runs.
Compare it to the brand reference under daylight. Approve the physical sample, seal it, and inspect production against the seal.
Cost Factors and Minimums
Logo cost follows setup, quantity, and complexity.
The Setup Costs
| Method | Setup/ tooling |
|---|---|
| Screen | Per color screen |
| Embroidery | Digitizing fee |
| DTF | Film and profile setup |
| Sublimation | Print calibration |
| Woven label | Loom and weave setup |
| Leather patch | Mold (if embossed) |
The Quantity Effects
| Method | Break-even behavior |
|---|---|
| Screen | Cheap after ~100 units |
| Embroidery | Steady per-unit cost |
| DTF | Flat, small-run friendly |
| Patch | Cheap after mold amortized |
The MOQ Reality
| Logo element | Typical MOQ |
|---|---|
| Screen setup | 100–300 units |
| Embroidery digitizing | No unit MOQ |
| Woven label | 500–1,000 labels |
| Embossed patch mold | 300–500 units |
Common Logo Defects and Fixes
Even good methods fail under bad execution. The defect map is short and predictable.
| Defect | Root cause | Fix |
|---|---|---|
| Print cracks | Overcure or low ink quality | Adjust cure, better ink |
| Print peels | Wrong ink for fabric | Match ink to fabric |
| Bleeding edges | Poor screen tension | Retension screens |
| Embroidery puckers | Dense digitizing, thin fabric | Lighter design, stabilizer |
| Color mismatch | No approved sample | Seal the sample |
| Patch lifting | Weak adhesive or stitching | Reinforce edges |
| Label curl | Wrong heat settings | Adjust press settings |
The Inspection Rule
Inspect logos at three points: first article, mid-production, and final.
Each check compares against the sealed sample, not against memory. The sealed sample is the standard — everything else is a deviation to judge.
Ink Systems and Color Management
The ink is the paint on the canvas. Matching ink to fabric and color to brand requires system.
The Ink Families
| Ink type | Best on | Character |
|---|---|---|
| Water-based | Cotton, canvas | Soft hand, breathable |
| Plastisol | Nylon, polyester | Opaque, durable |
| Discharge | Dark cotton | Soft, no hand |
| Silicone | Technical fabrics | Stretch-proof, premium |
The Curing Discipline
Every ink has a curing window: temperature and time that locks the ink to the fabric.
| Ink | Cure temperature | Time |
|---|---|---|
| Plastisol | 150–165°C | 30–60 sec |
| Water-based | 160–180°C | 60–90 sec |
| Silicone | 130–150°C | 60 sec |
Undercuring leaves the print weak; overcuring damages coatings and causes yellowing. Factories log the cure settings on every run.
Pantone Matching in Practice
The design file carries a Pantone reference. The factory mixes ink to match, then prints a strike-off.
| Step | Action |
|---|---|
| 1 | Provide Pantone or hex reference |
| 2 | Factory mixes and prints strike-off |
| 3 | Compare under daylight |
| 4 | Approve or adjust |
| 5 | Seal the approved color chip |
Lighting changes color perception. Approve under daylight-balanced light, never under fluorescent shop lighting alone.
Special Effects and Finishes
Beyond standard logos, special effects differentiate brands. Each adds capability and cost.
The Effect Menu
| Effect | Method | Best for |
|---|---|---|
| Reflective | Reflective ink or film | Outdoor, safety |
| Glow-in-dark | Phosphorescent ink | Kids, novelty |
| 3D silicone | Molded silicone badge | Sporty premium |
| Flock | Flocked fibers | Velvet texture |
| Foil | Hot foil stamp | Metallic luxury |
| Emboss | Molded pressure | Leather panels |
Reflective Logos
Reflective logos use glass-bead or prismatic films that return light at night.
They need placement where light hits: front panels, straps, or lower back. Test the reflection angle — some films only return light from narrow angles.
3D Silicone Badges
Silicone badges are molded in a metal tool, then bonded to the fabric.
| Badge trait | Detail |
|---|---|
| Durability | Extremely high |
| Feel | Soft, rubbery |
| Colors | Solid or two-tone |
| Setup | Mold cost |
| MOQ | Higher (mold amortized) |
Silicone badges read as sporty and premium. They are common on tactical and athletic packs.
The Foil Stamp
Hot foil stamps metallic film onto flat surfaces or leather. It delivers the classic gold-on-leather luxury look.
Foil needs smooth, firm surfaces. Embossed foil combines depth with shine for premium branding.
Logo on Leather and PU Panels
Leather panels call for different methods than fabric. The material changes the rules.
Debossing and Embossing
| Method | Effect |
|---|---|
| Deboss | Logo pressed into the leather |
| Emboss | Logo raised above the surface |
| Blind emboss | Same color, textured |
| Foil emboss | Metallic + raised |
Heat and pressure create the impression. The leather’s temper decides the result — soft leather collapses detail; firm leather holds crisp edges.
Edge and Paint Details
Painted edges on leather patches add a finished craft look. Edge paint matches the leather or contrasts deliberately.
The PU Leather Question
PU leather debosses and prints well at lower cost than real leather.
| Method on PU | Look | Durability |
|---|---|---|
| Deboss | Clean, subtle | Good |
| Foil | Luxury | Medium |
| Screen print | Flat | Medium |
| Silicone badge | Sporty | High |
Sustainable Branding
Environmental requirements now reach the logo itself.
The Eco-Ink Choices
| Choice | Benefit |
|---|---|
| Water-based inks | No solvent emissions |
| PVC-free plastisol | Safer chemistry |
| Phthalate-free | Compliance with EU rules |
| Recycled embroidery thread | Lower footprint |
The Compliance Certificates
| Claim | Certificate |
|---|---|
| No harmful substances | OEKO-TEX Standard 100 |
| Safe restricted list | ZDHC or bluesign |
| Recycled thread | GRS |
The Waste Question
Screen printing wastes ink and screens; embroidery wastes thread and backing.
Factories that minimize waste — cleaning screens for reuse, recycling trims — lower the footprint without changing the logo.
Working with the Factory on Branding
Strong brand output comes from clear briefs and disciplined approvals.
The Brand Standards Page
| Item | The factory needs |
|---|---|
| Logo artwork | Clean vector file |
| Color references | Pantone numbers |
| Clear space rules | Minimum margins |
| Prohibited uses | What not to do |
| Placement guide | Where logos sit |
The Approval Flow
| Stage | Gate |
|---|---|
| Artwork check | Vector, fonts outlined |
| Method proposal | Factory recommendation |
| First article | Physical sample approval |
| Color strike-off | Color approval |
| Production start | Sealed sample released |
The Brand Book Advantage
Brands that supply a simple brand book get consistent output across factories and seasons. The book removes guesswork — the factory executes the standard instead of inventing it.
Production Workflow: From Approval to Sewn Logo
Logo production runs on a rhythm. Each stage has its own discipline.
The Sample Stage
| Sample | Purpose | Timing |
|---|---|---|
| Strike-off | Color approval | Day 1–3 |
| Stitch-out | Embroidery approval | Day 1–3 |
| Placement sample | Position approval | Day 3–5 |
| Full first article | Final approval | With first sample |
The sample stage is where mistakes are cheap. Rushing it moves mistakes to production, where they cost ten times more.
The Production Stage
| Run | Checks |
|---|---|
| First 10 units | Full inspection against seal |
| Mid-run | Hourly spot checks |
| Final | AQL inspection |
The Documentation
| Document | Content |
|---|---|
| Approved sample | Sealed, signed |
| Color chip | Pantone reference |
| Artwork file | Final vector |
| QC record | Test results |
| Placement guide | Position drawings |
Logo Durability Testing in Detail
Durability claims need test evidence. The tests below are standard in the industry.
The Wash Test
| Test element | Standard |
|---|---|
| Temperature | 30–40°C |
| Cycles | 5–20 washes |
| Detergent | Standard household |
| Evaluation | Crack, peel, fade |
| Result after 10 washes | Grade |
|---|---|
| No change | Excellent |
| Minor fade | Acceptable |
| Cracking | Fail |
| Peeling | Fail |
The Rub Test
Dry and wet rubbing simulate daily friction.
| Test | Method |
|---|---|
| Dry rub | White cloth, pressure |
| Wet rub | Damp cloth, pressure |
| Cycles | 20–50 passes |
Transferred color on the cloth means poor binding. Bleeding logos stain pockets and hands — a return-generating defect.
The Flex and Abrasion Test
| Test | What it simulates |
|---|---|
| Flex fold | Pack bending in use |
| Abrasion | Strap rubbing against logo |
| Impact | Bumps and knocks |
Run the full battery on the first article. The data answers the durability question before the market asks it.
Backpack Logo Trends
Branding on backpacks follows fashion. Knowing the direction helps plan ahead.
The Minimal Trend
Small, clean logos — a woven label, a subtle deboss, a tiny embroidery — dominate premium commuter packs.
The logo whispers instead of shouts. Placement moves to the shoulder strap or the lower corner.
The Story Label
Inside labels now carry brand stories: materials, origin, care, and QR codes linking to product pages.
| Label content | Purpose |
|---|---|
| Material composition | Compliance |
| Care instructions | Product life |
| Brand story | Connection |
| QR code | Digital bridge |
| Batch number | Traceability |
The Personalization Wave
Custom initials and small-batch personalization grow in gifting and corporate orders.
DTF and embroidery handle personalization without minimums. The factory integrates individual names into production runs with digital files.
Cost Estimation Examples
Real numbers make the choice concrete. The examples assume a 25 L commuter pack, one logo on the front panel.
The Method Comparison
| Method | Setup cost | Unit cost (1,000 pcs) | Total (1,000) |
|---|---|---|---|
| Screen, 2 colors | $80 | $0.35 | $430 |
| DTF | $30 | $0.80 | $830 |
| Embroidery | $60 digitize | $1.20 | $1,260 |
| Woven label + sew | $100 | $0.90 | $1,000 |
| PU patch + sew | $150 mold | $1.10 | $1,250 |
The Quantity Break-Even
| Method | Cheap below 200 pcs | Cheap above 2,000 pcs |
|---|---|---|
| Screen | No | Yes |
| DTF | Yes | Moderate |
| Embroidery | Moderate | Moderate |
The Hidden Costs
| Cost | When it appears |
|---|---|
| Artwork cleanup | Raster logo provided |
| Color matching rounds | Off-reference colors |
| Placement samples | Position disputes |
| Failed adhesion test | Wrong ink-fabric match |
| Rush tooling | Short lead times |
Budget for the hidden costs and the quote surprises disappear.
Multi-Location Branding Consistency
Most backpacks carry the brand in several places at once. Consistency across locations is a discipline.
The Brand Placement Set
| Location | Method | Consistency need |
|---|---|---|
| Front panel | Print or patch | Color match |
| Flap | Patch or deboss | Tone match |
| Shoulder strap | Woven text | Thread match |
| Inside label | Woven | Logo form match |
| Zipper pull | Small logo | Detail match |
The Color Consistency Problem
Different methods render the same Pantone differently.
| Method | Color character |
|---|---|
| Screen print | Flat, opaque |
| Embroidery thread | Textured, limited palette |
| Woven label | Fine, dense |
| Leather deboss | Tone-on-tone |
| Foil | Metallic sheen |
Approving each method’s color chip separately prevents visible mismatch. The front panel print and the strap label will never look identical — they must look intentional.
The Logo Form Rule
| Element | Keep identical |
|---|---|
| Proportion | Same width-height ratio |
| Clear space | Same minimum margins |
| Minimum size | Legibility floor |
| Color usage | Same palette logic |
Choosing a Factory for Branding Work
Logo quality varies by factory. The check is quick when you know what to look for.
The Capability Questions
| Question | What it reveals |
|---|---|
| “Which methods do you run in-house?” | Real capability |
| “May we see the printing room?” | Equipment condition |
| “Who digitizes embroidery?” | Skill ownership |
| “Do you run wash tests?” | Quality discipline |
| “Show us your defect records” | Honest data |
The Equipment Signals
| Signal | Meaning |
|---|---|
| Curing oven with thermometers | Controlled process |
| Tensioned screens stored flat | Professional workflow |
| Embroidery machines maintained | Clean registration |
| Label stock organized | Material control |
| Test equipment present | QC culture |
The Trial Order Strategy
Run a small trial — 50–100 units with the full logo set — before committing volume.
The trial reveals production reality: color matching, adhesion, placement, and timing. A factory that passes the trial at small scale usually delivers at scale.
The Branding Disasters to Avoid
Experience produces a short list of logo disasters. Each is preventable.
| Disaster | Prevention |
|---|---|
| Logo printed from web image | Require vector art |
| Color mismatch between seasons | Seal reference samples |
| Print on wrong fabric type | Test ink-fabric match |
| Embroidery puckers on thin panels | Stabilizer and digitizing review |
| Placement collides with seam | Clearance rules in spec |
| Patch peels in first wash | Adhesion test before production |
| Label text wrong | Proof approval before weaving |
Manufacturer’s note: The pattern behind every logo disaster is the same — approval was skipped or the reference was unclear. One approved physical sample, checked under daylight, prevents nine out of ten branding failures.
The Quick Method Selector
A one-glance guide for the most common scenarios:
| Your situation | Recommended start |
|---|---|
| Bold logo, 1,000+ units, flat panel | Screen print |
| Full-color artwork, short run | DTF transfer |
| Premium feel, any volume | Embroidery |
| Classic look, repeated orders | Woven label |
| Craft look on flap | Leather or PU patch |
| Outdoor, needs reflection | Reflective print/film |
| Stretch fabric | Silicone badge |
| Fast turnaround | DTF (no screens) |
The Lead Time Reality
| Method | Typical lead (after approval) |
|---|---|
| Screen print | 3–7 days |
| DTF | 2–4 days |
| Embroidery | 3–5 days (plus digitizing) |
| Woven label | 10–20 days (weaving) |
| Patch with mold | 15–25 days (tooling) |
Plan the branding lead into the production schedule. Woven labels and molded patches need the longest lead — order them first.
The Quality Standard to Demand
Every logo shipment should arrive with three things: a test report, a batch sample, and consistency with the sealed reference.
| Deliverable | What it proves |
|---|---|
| Test report | Adhesion and wash data |
| Batch sample | Actual production look |
| Seal consistency | Match to approval |
FAQ
Which logo method is best for backpacks?
There is no universal best — the method follows fabric, design, and volume. Screen printing suits bold logos on flat panels at volume; DTF handles full-color art on most fabrics; embroidery adds a premium raised look; woven labels and patches work for classic branding. Test the method on your actual fabric before committing.
How durable is printed vs embroidered logos?
Embroidery lasts the longest because thread does not peel or crack — it wears with the fabric. Quality screen prints and DTF transfers survive years of normal use when cured correctly. Weak prints fail fast; verify with wash and flex tests.
Why did my printed logo crack after a few washes?
Cracking usually comes from overcuring, low-quality ink, or ink not matched to the fabric. Plastisol needs the right temperature and time for the coating. Ask the factory for the cure spec and run a wash test on the first article.
Can I embroider on thin nylon backpack fabric?
Yes, with the right stabilizer and digitizing. Dense designs pucker thin fabric. Use a lighter stitch density, a backing stabilizer, and test on the actual panel. For very light fabric, a woven label or patch is safer than direct embroidery.
What file format should I send for a logo?
Vector formats — AI, EPS, SVG, or PDF with outlined fonts. Vector art scales cleanly to any size. If you only have raster, send the highest resolution PNG at 300 dpi or better. Avoid screenshots and low-res JPGs; they produce blurry logos.
What is the minimum order for custom logo printing?
It depends on the method. Screen printing typically needs 100–300 units to amortize setup. DTF and embroidery have no real unit minimum. Woven labels usually start around 500 pieces. Ask the factory for method-specific minimums before choosing.
How do I make sure the logo color matches my brand?
Give the factory a Pantone or hex reference with the design file. Approve a physical sample against the brand standard under daylight before production. Seal that sample and require production to match it — a printed Pantone number is not the same as an approved physical color.
The Specification Template for Logos
Copy this into your tech pack for every logo position:
| Element | Example entry |
|---|---|
| Logo name | Front panel main logo |
| Artwork file | front-logo.ai (vector) |
| Method | Screen print, 2 colors |
| Colors | PMS 19-4005, PMS 200C |
| Size | 90 mm wide, max |
| Position | Front panel center, 40 mm below top seam |
| Clearance | 25 mm from edges |
| Fabric | 600D polyester coated |
| Cure spec | Factory standard, verified |
| Test requirement | Wash 10 cycles, adhesion |
| Sample | Strike-off + placement approval |
The Final Approval Checklist
| Check | Done |
|---|---|
| Vector artwork received | ☐ |
| Method matched to fabric | ☐ |
| Color chips approved in daylight | ☐ |
| First article inspected and sealed | ☐ |
| Wash and adhesion tests passed | ☐ |
| Placement within clearance rules | ☐ |
| Test certificates on file | ☐ |
| QC points scheduled in production | ☐ |
The Brand Promise
A logo is a promise printed, sewn, or pressed onto fabric. The promise holds when the method fits, the color matches, and the quality is tested.
Factories that treat logos as engineering — not decoration — deliver branding that survives the first wash, the first season, and the first customer’s scrutiny.
The Simple Test Every Brand Can Run
You do not need a lab to spot weak branding. Run these three checks on any sample:
- Fold the printed area sharply and rub it — cracking or flaking means weak ink.
- Scratch the logo edge with a fingernail — lifting edges mean poor adhesion.
- Dampen a cloth and rub the print ten times — color transfer means poor binding.
Three minutes, no equipment, and most logo failures reveal themselves immediately. Run the checks on the first article and on random production units.
The Communication Protocol
Branding disputes are usually miscommunication, not bad workmanship. Prevent them with one rule: put every approval in writing.
| Communication | Format |
|---|---|
| Artwork approval | Email with the exact file |
| Color approval | Photo + Pantone reference |
| Sample approval | Signed physical seal |
| Method change | Written confirmation |
| Test results | PDF report |
Written approvals create a clear record. When a dispute appears, the record decides it in minutes instead of weeks.
Conclusion
The logo carries the brand, and the method carries the logo. Choosing well means matching the method to the fabric, sending clean vector art, approving a physical sample, and inspecting against it through production.
Every method has a place: screen for bold volume, DTF for full-color flexibility, embroidery for premium depth, labels and patches for classic craft. The factories that excel at branding treat logo production as a discipline — files checked, samples sealed, adhesion tested, color matched.
Send us your logo and fabric, and we will recommend the method, produce the first article, and show you the test results before any production order begins.