
Backpack Edge Binding and Finishing Methods Compared
A backpack is a collection of edges. Panels meet at seams, openings end in hems, and every cut edge is a potential failure point.
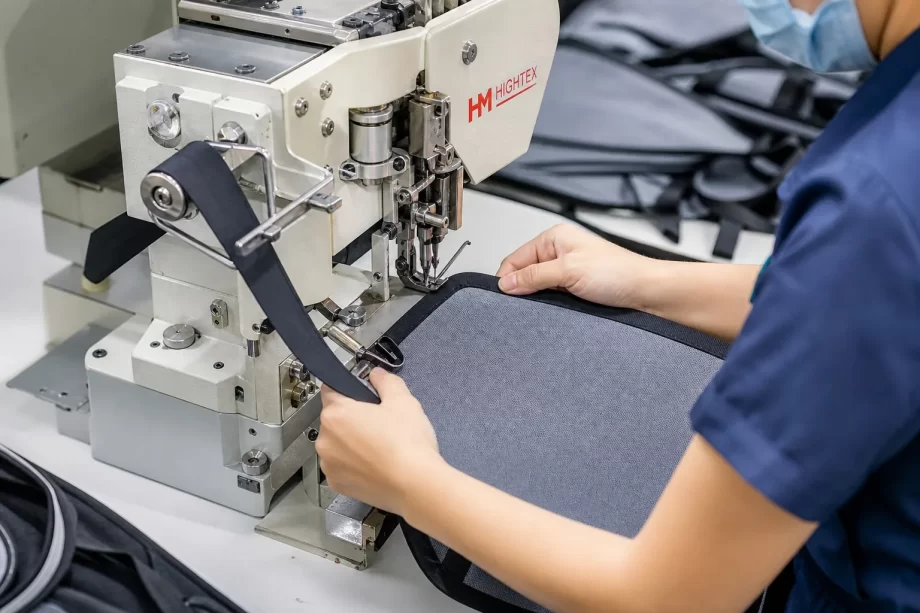
How a factory finishes those edges decides how long the pack lasts. A raw edge frays within months. A well-bound edge outlives the fabric around it.
Edge finishing is also a visible craft. Clean binding, crisp piping, and even hems signal quality at a glance. Sloppy edges signal the opposite — no matter how good the fabric is.
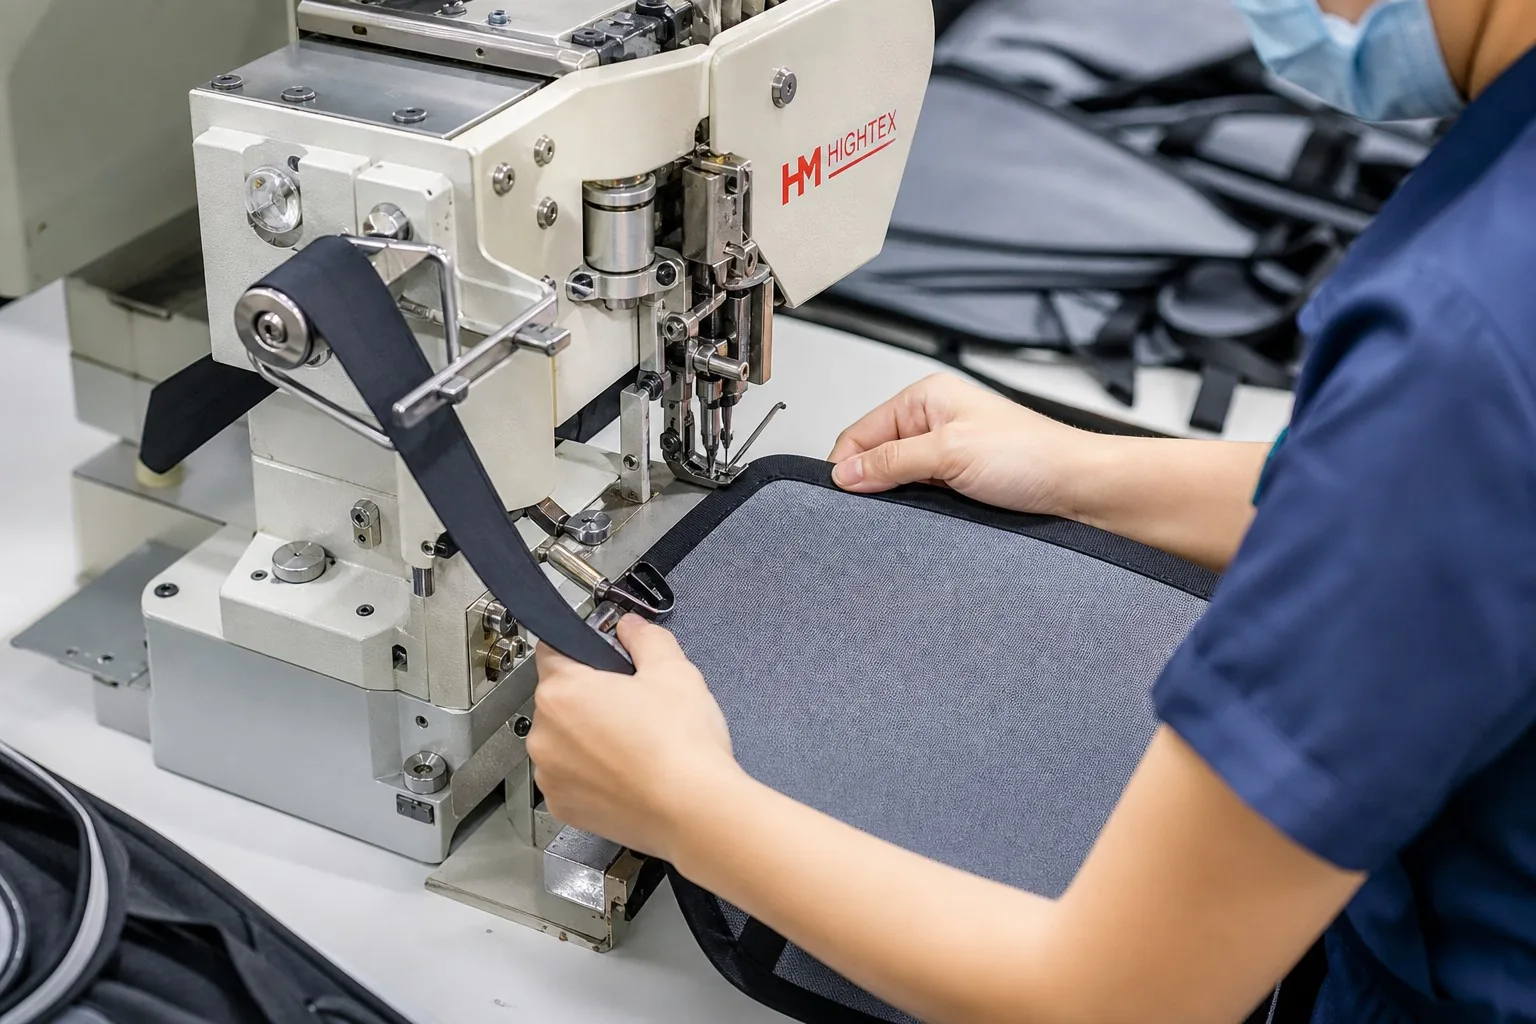
This guide compares the edge finishing methods used in backpack production, when to choose each, and how to control their quality.
- Why Edge Finishing Matters
- The Edge Finishing Methods
- Binding Materials
- Machine and Attachment Methods
- Edge Finishing by Panel Type
- Quality Control for Edges
- Cost and Efficiency
- Specifying Edge Finishing
- Binding Around Zippers and Hardware
- Edge Finishing for Different Pack Types
- Common Edge Failures in the Field
- The Making of Bias Tape
- Corner and Curve Techniques
- Edge Finishing for Waterproof Construction
- Sustainable Edge Materials
- Working with Factories on Edges
- Edge Finishing Design Trends
- Cost Modeling for Edge Finishing
- Machine Parameters That Control Binding
- The Edge Finishing Workflow in Production
- The Buyer’s Edge Audit
- Training and Skill Development
- Product Lifecycle and Edge Decisions
- The Edge Glossary
- Decision Guide for Product Teams
- FAQ
- Conclusion
Why Edge Finishing Matters
Edges are the most vulnerable part of any textile product. Understanding why helps buyers specify them correctly.
The Fray Problem
Every cut fabric edge releases yarns. Woven fabrics unravel from the edge inward.
| Fabric | Fray rate |
|---|---|
| Nylon taffeta | Medium |
| Polyester ripstop | Medium |
| Canvas | Low-medium |
| Coated fabric | Low (until coating fails) |
| Mesh | High |
The Wear Zones
Some edges take constant abuse. These need the strongest finishing.
| Edge location | Wear level |
|---|---|
| Top opening | High — daily zipper use |
| Bottom corners | High — ground contact |
| Pocket openings | Medium |
| Strap attachments | Very high |
| Internal seams | Low |
The Quality Signal
Edge finishing is the first place inspectors look.
| Edge state | Verdict |
|---|---|
| Clean, even binding | Quality construction |
| Raw fraying edge | Cost cutting |
| Puckered binding | Poor machine control |
| Crooked hem | Weak operator skill |
The Edge Finishing Methods
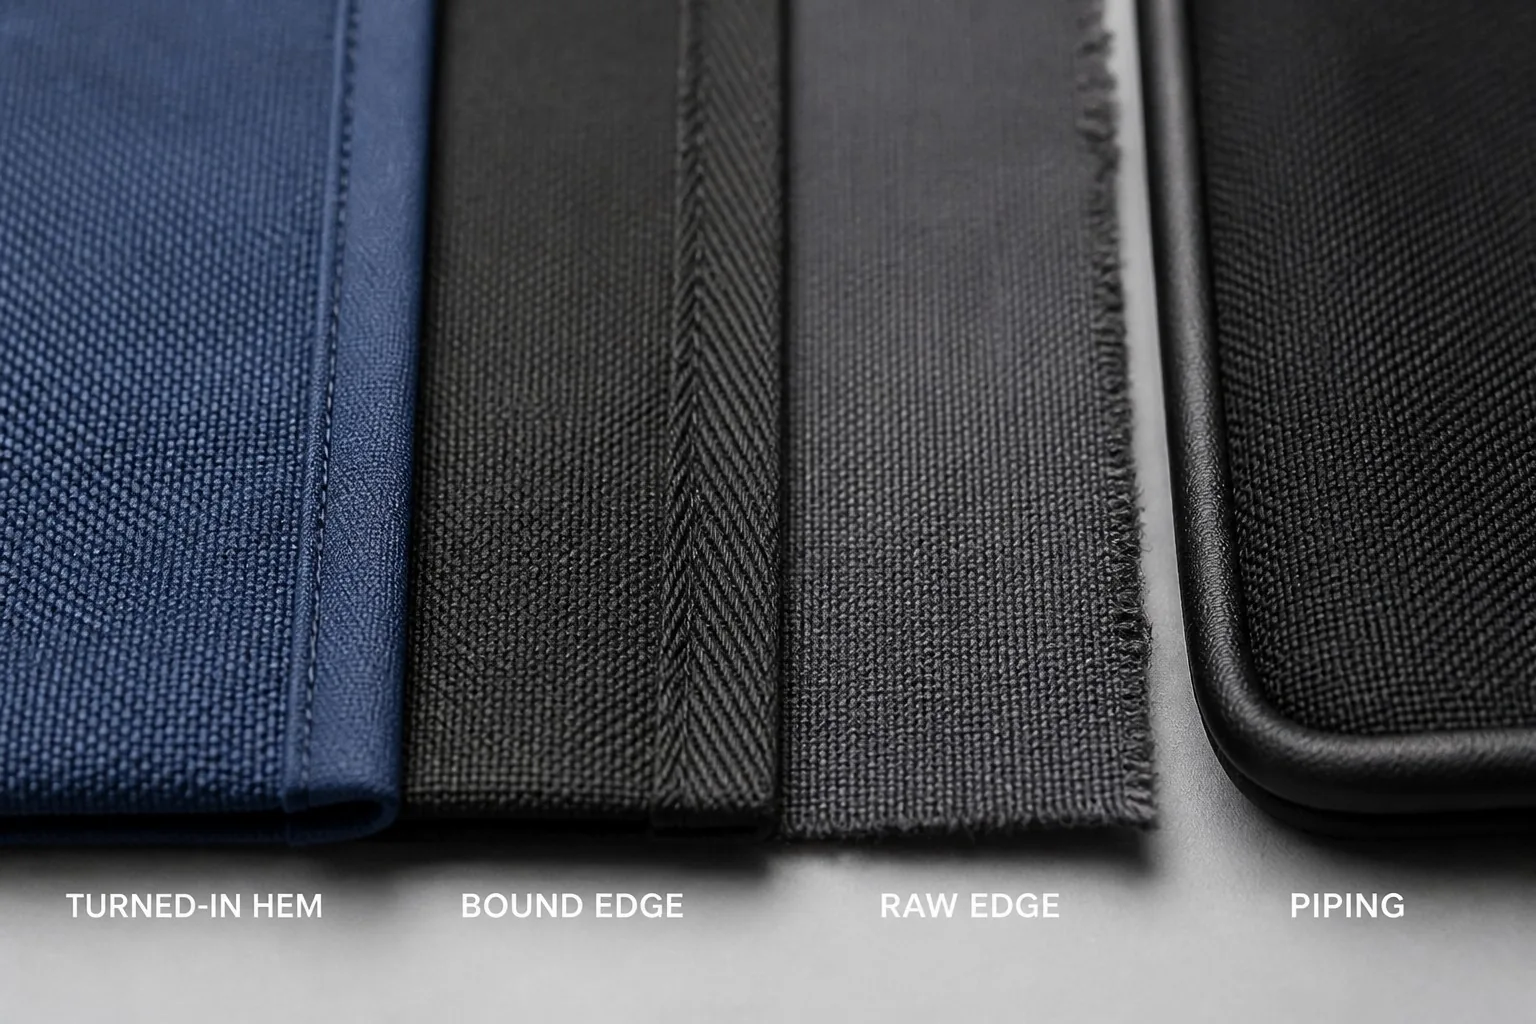
Five methods dominate backpack production. Each has a distinct look and purpose.
The Turned Hem
The fabric edge folds inward and is stitched. This is the simplest finish.
| Hem trait | Detail |
|---|---|
| Look | Clean, flat |
| Application | Openings, pocket tops |
| Machinery | Folder attachment |
| Cost | Lowest |
Turned hems suit lightweight fabrics at straight openings. Curves make folding difficult.
The Bias Binding
A strip of fabric wraps around the raw edge and is stitched on both sides.
| Binding trait | Detail |
|---|---|
| Look | Decorative, structured |
| Application | Panel edges, seams |
| Material | Cut on the bias |
| Cost | Medium |
| Durability | High |
Bias binding follows curves well because bias-cut fabric stretches. It is the classic finish for bag interiors and exterior panel joins.
The Piping
A cord or folded strip sits inside a seam, leaving a rounded ridge on the outside.
| Piping trait | Detail |
|---|---|
| Look | Rounded, sporty edge |
| Application | Panel borders, zipper frames |
| Cord | Cotton or foam core |
| Cost | Medium-high |
Piping adds structure and a tailored look. It also strengthens the seam it runs along.
The Bound Seam
A visible tape covers the seam edge after joining two panels.
| Bound seam trait | Detail |
|---|---|
| Look | Reinforced exterior |
| Application | Load-bearing seams |
| Material | Nylon webbing tape |
| Cost | Medium |
Bound seams appear on climbing and tactical packs where strength matters more than elegance.
The Raw Edge Treatment
Some edges stay raw by design, treated to stop fraying.
| Treatment | Method |
|---|---|
| Heat sealing | Melt the edge |
| Laser cutting | Seal while cutting |
| Edge paint | Liquid sealant |
| Overlock | Loop stitch over edge |
The Method Comparison
| Method | Durability | Appearance | Curve handling | Cost | Machinery |
|---|---|---|---|---|---|
| Turned hem | Medium | Clean | Poor | Low | Folder |
| Bias binding | High | Decorative | Good | Medium | Binder |
| Piping | High | Rounded | Good | Medium | Piping foot |
| Bound seam | Very high | Technical | Medium | Medium | Binder |
| Overlock | Medium | Sporty | Good | Low | Overlocker |
| Heat sealed | Medium | Clean | Limited | Low | Sealer |
Binding Materials
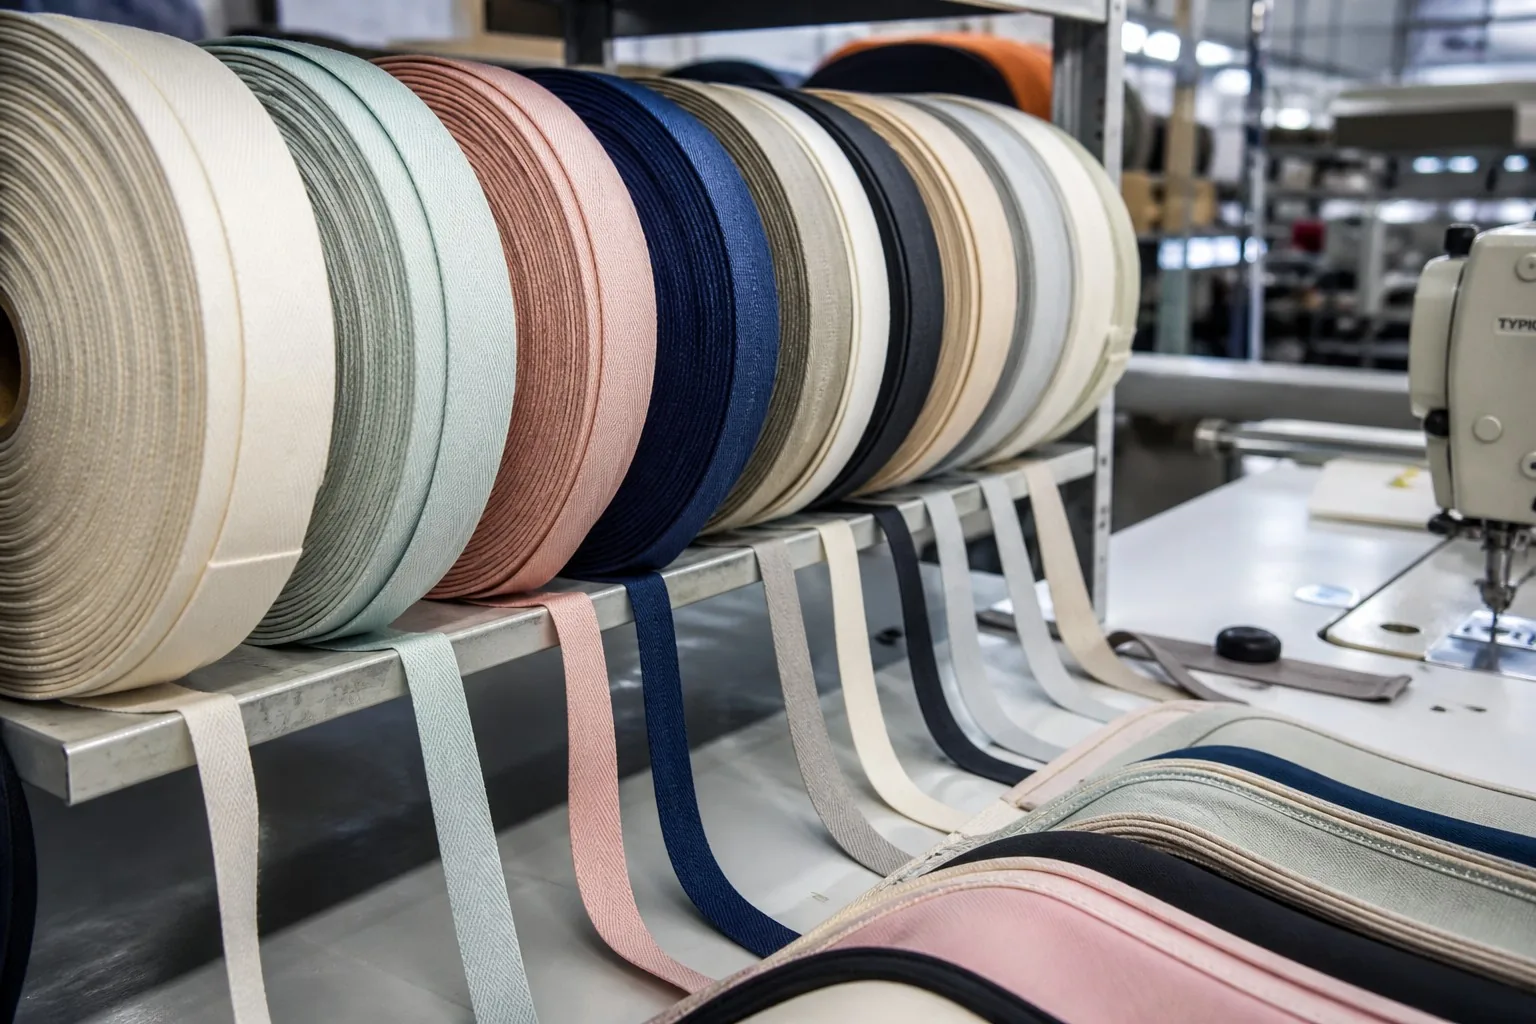
The binding strip itself is a material decision. It must match the pack’s fabric and purpose.
The Fabric Strip Choices
| Material | Best for | Notes |
|---|---|---|
| Cotton bias tape | Light packs, interiors | Soft, classic |
| Polyester tape | General use | Durable, colorfast |
| Nylon tape | Outdoor packs | Strong, abrasion resistant |
| TPU film | Waterproof packs | Sealed, welded |
| Leather strip | Premium bags | Craft look |
The Width Decision
| Tape width | Use |
|---|---|
| 12–15 mm | Small edges, pockets |
| 18–22 mm | Standard panel binding |
| 25 mm+ | Heavy seams, reinforcing |
The Color Matching
Binding color changes the look completely.
| Choice | Effect |
|---|---|
| Matching color | Invisible, clean |
| Contrast color | Decorative edge line |
| Black on dark | Standard, safe |
| White trim | Sporty, visible |
Machine and Attachment Methods
The machine and technique determine how well the binding stays.
The Binder Attachment
A binder attachment folds tape around the edge as the machine feeds it.
| Element | Role |
|---|---|
| Binder guide | Folds the tape |
| Feed dog | Pulls edge through |
| Needle position | Consistent stitch line |
| Tension | Balanced thread |
The Stitch Patterns
| Pattern | Look | Strength |
|---|---|---|
| Single needle | Simple | Adequate |
| Double needle | Two parallel lines | Better |
| Zigzag | Stretch tolerance | For knits |
| Cover stitch | Clean interior | Premium |
The Speed and Control Trade-off
Speed creates defects. Skilled operators balance both.
| Speed | Risk |
|---|---|
| Too fast | Slipped binding, crooked line |
| Too slow | Cost overrun |
| Right pace | Even, secure edges |
Edge Finishing by Panel Type
Different parts of the backpack need different finishes.
The Exterior Panels
| Panel | Recommended finish |
|---|---|
| Main body seams | Bound or raw inside |
| Front pocket edges | Bias binding or piping |
| Flap edges | Piping or bound |
| Bottom edge | Bound seam |
| Strap attachment | Reinforced binding |
The Interior
| Area | Recommended finish |
|---|---|
| Lining seams | Overlock or bound |
| Zipper tape ends | Bound or heat seal |
| Dividers | Overlock |
| Laptop sleeve edge | Bound |
The Special Cases
| Case | Treatment |
|---|---|
| Waterproof pack | TPU welded edges |
| Mesh panel | Overlock or bound |
| Leather panel | Edge paint or folded |
| Curved opening | Bias binding |
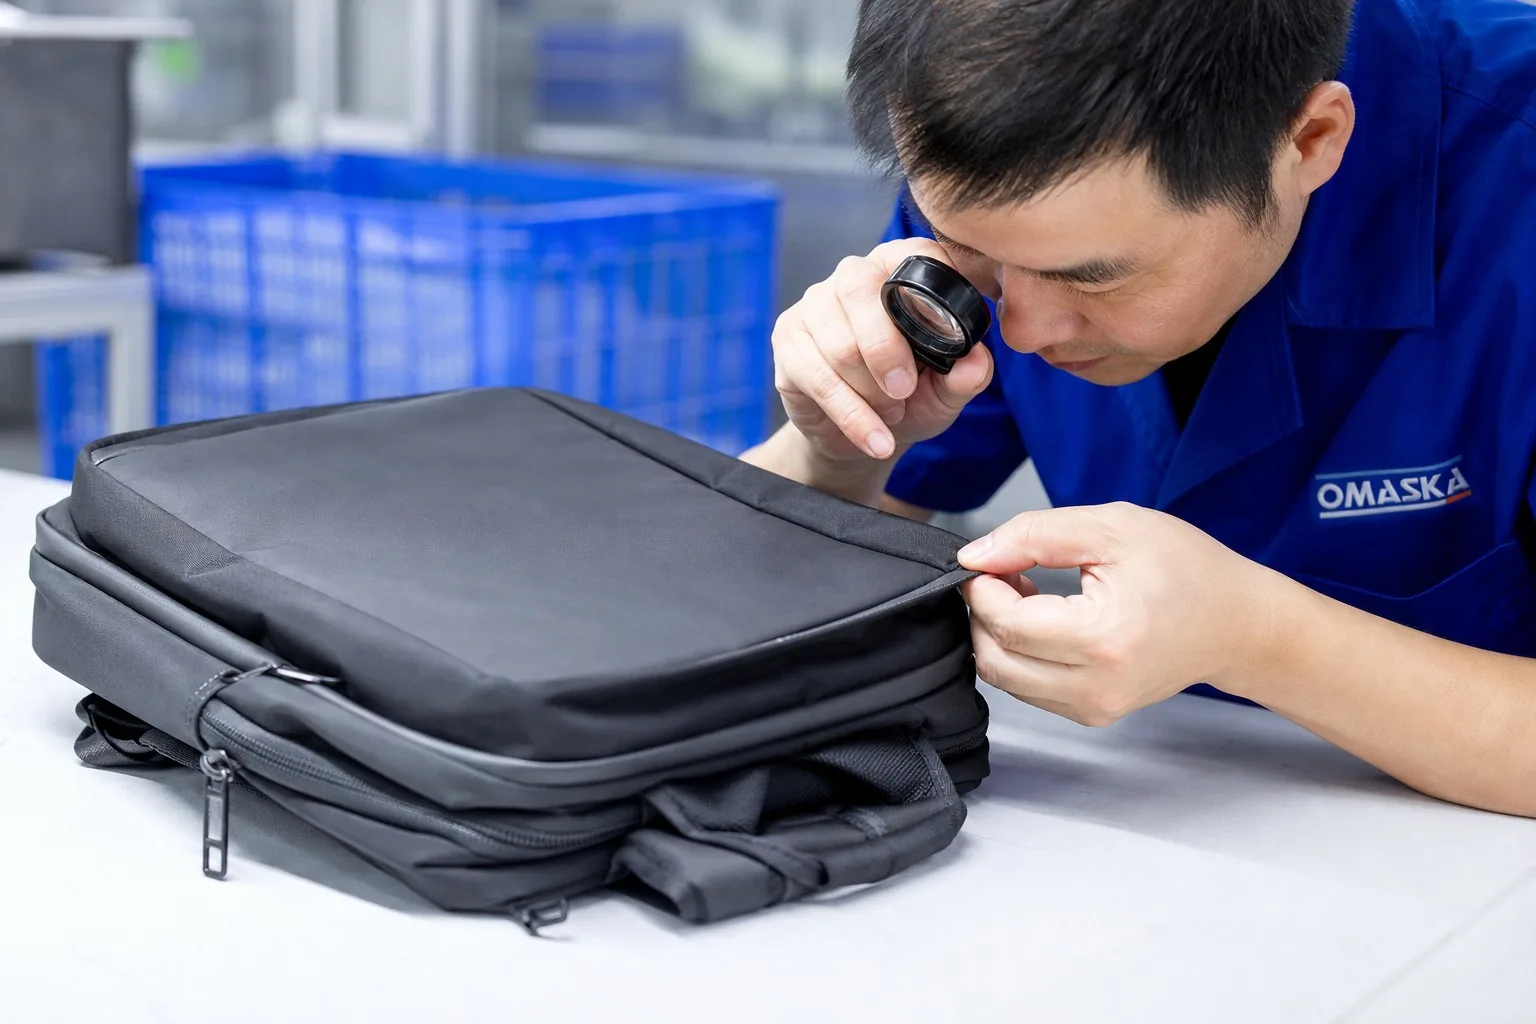
Quality Control for Edges
Edge defects are visible and measurable. A short checklist catches them all.
The Defect List
| Defect | Cause | Detection |
|---|---|---|
| Fraying | No finish or worn binder | Visual |
| Skipped stitches | Tension or needle | Visual, tug |
| Uneven binding width | Binder misaligned | Measure |
| Puckering | Speed or tension | Visual |
| Slipped binding | Feed mismatch | Tug test |
| Heat damage | Overheated sealer | Visual |
The Inspection Tests
| Test | Method |
|---|---|
| Tug test | Pull the edge seam |
| Fray check | Rub the cut edge |
| Width check | Measure binding at points |
| Wash test | Launder, inspect edges |
| Flex test | Fold and unfold |
Cost and Efficiency
Edge finishing adds labor. Choosing the right method controls cost.
The Labor Content
| Method | Added time per meter |
|---|---|
| Turned hem | 1× baseline |
| Overlock | 1.2× |
| Bias binding | 1.5× |
| Piping | 2× |
| Bound seam | 1.8× |
The Equipment Investment
| Machine | Investment level |
|---|---|
| Overlocker | Low |
| Binder machine | Medium |
| Piping machine | Medium-high |
| Edge sealer | Medium |
| Laser cutter | High |
The Efficiency Levers
| Lever | Effect |
|---|---|
| Precut binding | Faster feeding |
| Matching threads | Fewer changeovers |
| Standard widths | One binder setup |
| Batch similar edges | Fewer adjustments |
Specifying Edge Finishing
The tech pack must say exactly how each edge finishes. Ambiguity produces surprises.
The Spec Entry
| Element | Example |
|---|---|
| Location | Main body seam |
| Method | Bias binding |
| Material | 20 mm polyester tape |
| Color | Matching main fabric |
| Stitch | Double needle |
| Tolerance | ±1 mm width |
The Edge Map
A simple drawing labels every edge with its finish.
| Edge number | Location | Finish |
|---|---|---|
| E1 | Top opening | Turned hem, double stitch |
| E2 | Body side seams | Bound inside |
| E3 | Flap outer edge | Piping 3 mm |
| E4 | Bottom corners | Bound seam |
| E5 | Strap anchors | Double bound |
The First-Article Check
The first article shows every edge finish in reality.
| Check | Standard |
|---|---|
| Binding width | Even along full length |
| Stitch line | Parallel to edge |
| Corners | Cleanly turned |
| Ends | Secured, no tails |
| Color | Matches approval |
Binding Around Zippers and Hardware
Zippers and hardware interrupt edges. Their junctions need special attention.
The Zipper Opening Finish
| Area | Treatment |
|---|---|
| Zipper tape ends | Bound or heat-sealed |
| Zipper-to-panel seam | Double stitched |
| Zipper garages | Reinforced binding |
| Pocket zipper frames | Piping or bound |
The Zipper Garage Detail
A zipper garage is a fabric pocket that protects the slider when the zipper is open.
| Garage trait | Why it matters |
|---|---|
| Bound edges | No fraying at the opening |
| Reinforced stitch | Survives slider impact |
| Sealed end | Prevents fabric pull-in |
Hardware Junctions
Where webbing meets fabric, the edge finish must handle load.
| Junction | Finishing rule |
|---|---|
| Strap ends | Heat-sealed or bound |
| Buckle loops | Double folded |
| D-ring anchors | Bound and boxed |
| Handle bases | Reinforced stitching |
Manufacturer’s note: The weakest point of most packs is where a strap meets a panel. A bound, boxed, and double-stitched junction outlives the pack; a raw edge there fails within a season.
Edge Finishing for Different Pack Types
Each pack category has its own edge expectations. Match the finish to the market.
The Category Guide
| Pack type | Edge treatment | Why |
|---|---|---|
| School pack | Turned hems, overlock interior | Cost-sensitive |
| Commuter pack | Bias binding, clean interior | Daily wear |
| Laptop pack | Bound stress points | Load protection |
| Travel pack | Piping and bound seams | Structured look |
| Tactical pack | Bound seams, reinforced | Field durability |
| Leather pack | Edge paint or folded | Premium craft |
The Interior Standard
| Market level | Interior finish |
|---|---|
| Economy | Overlock, minimal |
| Mid | Bound main seams |
| Premium | Fully bound or piped |
| Luxury | French seams or leather binding |
The Visual Language
Binding color and method create a design language.
| Style | Edge choice |
|---|---|
| Minimalist | Matching, invisible binding |
| Sporty | Contrast piping |
| Technical | Exposed bound seams |
| Classic | Leather trim binding |
| Outdoor | High-visibility accents |
Common Edge Failures in the Field
Field failures trace to edge decisions made months earlier. The map is short.
| Failure | Root cause | Field symptom |
|---|---|---|
| Edge fraying | Raw edge, no finish | Loose yarns at seams |
| Binding separation | Weak tape or stitch | Tape peeling away |
| Piping collapse | Thin cord | Flat, crushed ridge |
| Corner tears | No reinforcement | Rip at corner points |
| Zipper edge pull | Weak tape end | Fabric pulling into slider |
| Hem unravel | Single stitch | Thread tails, gaps |
The Field Failure Economics
| Failure stage | Cost impact |
|---|---|
| At factory QC | 1× |
| After shipment | 10× |
| After customer use | 100× |
| As brand reputation | Uncountable |
The Prevention Rule
Test edges before production, not after complaints. A two-minute tug and fray check on the first article prevents the most expensive failures.
The Making of Bias Tape
Bias tape deserves its own explanation — its behavior drives the whole binding method.
Why Bias Matters
Fabric cut on the bias runs diagonally to the weave. That diagonal gives stretch.
| Cut direction | Stretch | Use |
|---|---|---|
| Straight grain | None | Hems on straight edges |
| Cross grain | Slight | Facing strips |
| True bias (45°) | Maximum | Binding curves |
The Tape Widths
| Folded tape size | Finished binding width |
|---|---|
| 25 mm (double fold) | 6 mm visible |
| 32 mm | 8 mm visible |
| 50 mm | 12 mm visible |
Buying vs Making Tape
| Source | Pro | Con |
|---|---|---|
| Ready-made | Consistent, cheap | Limited colors |
| Factory-cut | Custom color | Setup cost |
| In-house cutting | Flexible | Labor, waste |
Corner and Curve Techniques
Corners expose skill. The technique differs between inside and outside corners.
The Outside Corner
| Step | Action |
|---|---|
| 1 | Stitch to the corner point |
| 2 | Stop with needle down |
| 3 | Lift presser foot, pivot fabric |
| 4 | Continue along the new edge |
The Inside Corner
| Step | Action |
|---|---|
| 1 | Clip the fabric to the stitch line |
| 2 | Fold binding around the notch |
| 3 | Stitch smoothly through |
| 4 | Inspect for gaps |
The Curve Radius Rule
| Radius | Binding width limit |
|---|---|
| Above 20 mm | Any width works |
| 10–20 mm | 15 mm tape or less |
| Below 10 mm | Piping or clip first |
Edge Finishing for Waterproof Construction
Waterproof packs change the edge rules completely. Stitching leaks; welding does not.
The Welded Seam
| Element | Detail |
|---|---|
| Process | RF or hot-air welding |
| Edge | TPU film fuses |
| Strength | Seam equals material |
| Look | Clean, technical |
The Taped Seam
| Element | Detail |
|---|---|
| Process | Tape applied over stitch |
| Use | Coated fabrics |
| Width | 20–25 mm tape |
| Seal | Heat-activated adhesive |
The Hybrid Approach
Many packs combine both: stitched construction for shape, welded or taped edges for water protection.
| Zone | Method |
|---|---|
| Main seams | Stitch + tape |
| Stress points | Stitch + weld |
| Openings | Rolled or bound + seal |
| Corners | Molded or welded |
Sustainable Edge Materials
Environmental standards now cover trims too. Edge materials can carry certifications.
The Eco Options
| Material | Benefit |
|---|---|
| Recycled polyester tape | Lower footprint |
| Organic cotton bias | Renewable |
| TPU-free alternatives | PVC-free chemistry |
| Dye-free options | Less water use |
| Paper-based packaging | No plastics |
The Certification Check
| Claim | Look for |
|---|---|
| Recycled content | GRS certificate |
| Safe chemistry | OEKO-TEX / bluesign |
| Organic fiber | GOTS |
| PVC-free | Material declaration |
The Spec Impact
Specifying certified binding costs slightly more but keeps the whole pack compliant.
Working with Factories on Edges
Good edge quality depends on clear communication and early samples.
The Questions to Ask
| Question | Why |
|---|---|
| “Which edges will you bind?” | Scope clarity |
| “Show us the binder machine” | Capability proof |
| “What tape do you stock?” | Material options |
| “How do you finish corners?” | Skill assessment |
| “May we see edge samples?” | Quality evidence |
The Sample Requirements
| Sample | Check |
|---|---|
| Binding sample | Width, color, stitch |
| Corner sample | Clean turns |
| Full pack sample | All edges specified |
| Edge map sample | Matches spec |
The Batch Control
| Checkpoint | Action |
|---|---|
| First article | Full edge inspection |
| Mid-production | Width and stitch check |
| Final | AQL on edges |
| Shipment | Random tug test |
Edge Finishing Design Trends
Edge treatment follows fashion as much as function. Knowing the trends helps design teams.
The Exposed Seam Trend
Visible bound seams and contrast binding appear on urban packs as a design feature.
| Trend | Look | Execution |
|---|---|---|
| Contrast binding | Colorful edge lines | Bi-color tape |
| Exposed bound seams | Technical outside | Nylon tape on seams |
| Piping accents | Rounded color lines | Cord piping |
| Raw edge (controlled) | Deliberate fray | Waxed or sealed |
The Minimal Clean Trend
Premium commuter packs hide their edges entirely.
Matching binding, concealed hems, and folded seams make the construction invisible. The pack looks molded rather than sewn.
The Retro Details
Leather corner trim, fabric binding in heritage colors, and exposed stitch lines echo vintage luggage.
Cost Modeling for Edge Finishing
Budgeting edge finishing needs a simple model. The numbers are small per pack but scale with volume.
The Per-Pack Cost Build
| Edge type | Labor (min) | Material | Cost index |
|---|---|---|---|
| Overlock interior | 2–4 | Thread only | 1.0 |
| Turned hem | 3–5 | Thread | 1.2 |
| Bias binding exterior | 6–10 | Tape 0.5 m | 1.8 |
| Piping on flap | 4–7 | Cord + tape | 2.0 |
| Bound stress seams | 5–8 | Tape 0.8 m | 2.2 |
| TPU welded edges | 8–12 | Film | 3.0 |
The Volume Effect
| Quantity | Setup amortization |
|---|---|
| 300 | Binder setup per batch |
| 1,000 | Setup cost fades |
| 5,000 | Dedicated binder line |
The Value Trade-off
| Decision | Cost saved | Quality risk |
|---|---|---|
| Overlock instead of bind | Medium | Edge durability |
| Skip piping | Low | Visual finish |
| Raw interior seam | High | Fraying inside |
| Thin tape | Low | Early failure |
Machine Parameters That Control Binding
The same binder machine produces good or bad results depending on settings.
The Parameter Set
| Parameter | Effect |
|---|---|
| Needle size | Fabric penetration |
| Thread tension | Balanced stitch |
| Presser foot pressure | Feed consistency |
| Binder position | Tape fold accuracy |
| Stitch length | Density and strength |
| Feed dog height | Fabric pull-through |
The Tuning Routine
| Step | Action |
|---|---|
| 1 | Run a test strip |
| 2 | Check both stitch lines |
| 3 | Measure binding width |
| 4 | Tug the edge |
| 5 | Adjust and retest |
| 6 | Sign off the setup |
The Setup Sheet
Every style needs a recorded setup: machine number, needle, thread, tension, binder, and speed.
The setup sheet lets any operator reproduce the approved quality. Without it, every shift re-invents the settings — and the quality drifts with them.
The Edge Finishing Workflow in Production
Edges are finished at specific points in the production sequence. Wrong order creates rework.
The Production Sequence
| Stage | Edge work |
|---|---|
| Cutting | Edge sealing for some materials |
| Preparation | Tape cut, binders set |
| Panel sewing | Hems and binding on flat panels |
| Assembly | Bound seams, junctions |
| Lining | Overlock and hem interior |
| Final | Edge inspection and repair |
The Workflow Rules
| Rule | Reason |
|---|---|
| Bind panels before assembly | Flat panels feed easily |
| Hem openings before zipper install | Clean zipper frames |
| Finish stress points early | Inspection access |
| Overlock lining before joining | No raw edges inside |
The Line Balance
Edge finishing stations must match the line speed.
| Bottleneck | Fix |
|---|---|
| Binder station slow | Add second machine |
| Skilled operator needed | Train backup |
| Tape changeover long | Pre-cut and organize |
| Rework flooding | Fix root cause, not symptoms |
The Buyer’s Edge Audit
A five-minute audit reveals a factory’s edge discipline. No tools needed.
The Quick Checks
| Check | What to look for |
|---|---|
| Run your finger along binding | Smooth, even |
| Tug the edge seam | No give or gap |
| Look at corners | Cleanly turned |
| Inspect the interior | No raw fraying |
| Check zipper tape ends | Sealed or bound |
| Measure binding width | Consistent |
The Sample Question
Ask to see three packs from the same batch. Compare their edges.
| Deviation | Verdict |
|---|---|
| Identical edges | Controlled process |
| Minor variation | Acceptable |
| Visible differences | Setup drift |
The Red Flags
| Flag | Meaning |
|---|---|
| Binder not used | Hand folding everywhere |
| No tape stock | Binding outsourced |
| Raw edges inside | Cost cutting |
| Operator unsure of setup | No setup sheets |
Training and Skill Development
Edge finishing is a skilled trade. Operators improve with structured training.
The Skill Levels
| Level | Operator can |
|---|---|
| Beginner | Straight hems, basic overlock |
| Intermediate | Bias binding, standard corners |
| Advanced | Piping, curves, complex junctions |
| Master | All methods, setup and tuning |
The Training Path
| Week | Focus |
|---|---|
| 1–2 | Machine basics, straight lines |
| 3–4 | Folders and binders |
| 5–6 | Corners and curves |
| 7–8 | Piping and special methods |
| 9–10 | Setup sheets, quality standards |
| Ongoing | Speed and consistency |
The Certification Check
Certified operators produce consistent quality.
| Certification | Check |
|---|---|
| Stitch sample | Straight, even |
| Corner sample | Clean, tight |
| Speed test | Meets standard |
| Defect awareness | Names and fixes |
Product Lifecycle and Edge Decisions
Edge finishing affects how long a pack lasts — and how it fails at the end.
The Wear Pattern
| Pack age | Edge condition |
|---|---|
| 0–6 months | Like new |
| 6–18 months | Binding wear visible |
| 18–36 months | Wear at stress points |
| 3+ years | Bound edges fray first |
The End-of-Life Choice
| Choice | Implication |
|---|---|
| Repairable edges | Re-stitchable binding |
| Sealed edges | Disassembly harder |
| Recyclable materials | Mono-material edges |
The Spec Impact on Lifecycle
| Spec choice | Lifecycle effect |
|---|---|
| Quality binding | Pack survives years |
| Heat-sealed edges | No fray, clean end |
| Replaceable strap edges | Repairable product |
The Edge Glossary
The terminology of edge finishing confuses buyers and factories alike. A shared vocabulary prevents miscommunication.
The Core Terms
| Term | Meaning |
|---|---|
| Hem | Folded own-fabric edge |
| Binding | Separate strip over the edge |
| Bias | 45° diagonal cut |
| Piping | Cord inside a seam ridge |
| Facing | Fabric layer on an opening |
| Interfacing | Stiffening layer |
| Seam allowance | Fabric inside the seam |
| Selvedge | Woven self-finished edge |
| Overlock | Loop stitch over raw edge |
| French seam | Fully enclosed seam |
The Terms in the Tech Pack
Use the exact terms in specs. A “nice finish” means nothing; a “20 mm bias binding, double stitch” means everything.
The Translation Table
Factories describe the same operation differently across regions.
| Buyer term | Factory term |
|---|---|
| Binding | Tape finish, edging |
| Piping | Welt, cord seam |
| Hem | Fold finish |
| Overlock | Serging |
| Bound seam | Taped seam (not waterproof) |
Decision Guide for Product Teams
Product teams face the same questions every season. Here are the answers.
The Quick Decisions
| Question | Answer |
|---|---|
| Small budget? | Overlock interior, hem openings |
| Mid-range pack? | Bind visible edges, pipe flap |
| Premium line? | Full binding, piping, clean interior |
| Outdoor pack? | Bound seams, reinforced junctions |
| Waterproof? | Welded or taped edges only |
The Sign-Off Checklist
| Item | Verified |
|---|---|
| Edge map complete | ☐ |
| Materials specified | ☐ |
| Machines available | ☐ |
| Sample approved | ☐ |
| Setup sheets ready | ☐ |
| QC points scheduled | ☐ |
The Seasonal Review
After each season, review the returned and failed packs.
| Evidence | Action |
|---|---|
| Edge fraying returns | Upgrade binding spec |
| Piping collapses | Firmer cord |
| Binding color fades | Better dye |
| Seams pull apart | Stronger stitch |
FAQ
What is the difference between binding and hemming?
A hem folds the fabric’s own edge inward and stitches it. Binding wraps a separate strip of fabric around the raw edge. Hems are simpler and cheaper; binding is stronger, more durable, and follows curves better. Choose binding for visible edges and high-wear areas.
Which edge finish is strongest for backpacks?
Bound seams with nylon tape are the strongest for load-bearing edges. Piping also reinforces seams while adding a rounded look. For most pack bodies, bias binding offers the best balance of durability, appearance, and cost. Raw edges should never carry load.
Why is my binding fraying after a few months?
Fraying means the binding was cut on the straight grain instead of the bias, the tape is low quality, or the edge was not fully enclosed. Bias-cut tape resists fraying because the yarns run diagonally. Check the tape direction and the binder fold on the first article.
Can edge finishing be applied to curved openings?
Yes — bias binding is specifically designed for curves because bias-cut fabric stretches around them. Turned hems struggle on curves and pucker. For tight curves like rounded pockets, use narrow bias binding or piping.
How do I specify edge finishing in my tech pack?
Label every edge with a finish: method, material, width, color, and stitch pattern. Include an edge map drawing. Add tolerances and require a first-article check. Vague spec entries like “neat finish” produce inconsistent results across factories and seasons.
What is the cost impact of different edge finishes?
Turned hems and overlock are cheapest, adding the least labor. Bias binding adds about 50% more time per meter than a hem. Piping roughly doubles the time. The cost difference is small per pack but significant across thousands of units — specify the finish the product truly needs.
Do waterproof backpacks use the same edge finishing?
No. Waterproof packs need sealed edges — TPU welded seams or taped construction. Standard stitching creates needle holes that leak. If the pack promises waterproofing, the edge finishing must be part of the sealing system, not an afterthought.
The Edge Finishing Decision Matrix
One final matrix ties the whole guide together:
| Product need | Weight | Method choice |
|---|---|---|
| Lowest cost | High | Turned hem, overlock |
| Durability first | High | Bound seams, reinforced |
| Premium look | High | Piping, clean binding |
| Waterproof | High | Welded or taped |
| Curved design | High | Bias binding |
| Repairability | High | Stitched, replaceable binding |
| Sustainability | High | Certified recycled tape |
The Five Rules of Good Edges
Every good edge follows five rules:
- Every raw edge gets a finish — no exceptions.
- The finish matches the edge’s job — not the factory’s convenience.
- Binding width is even and measured.
- Corners are turned cleanly, never bunched.
- The approved sample is the standard for every batch.
The Edge Audit Schedule
| When | What |
|---|---|
| Design stage | Edge map in tech pack |
| Sampling | All edges tested |
| First article | Full inspection |
| Production | Daily spot checks |
| Pre-shipment | AQL edge check |
| Post-season | Return analysis |
The Questions Factories Ask Buyers
Good factories push back on vague edge specs. Expect these questions:
| Question | What the factory needs |
|---|---|
| “Which edge exactly?” | The edge map |
| “What tape width?” | The spec |
| “Which color match?” | Pantone or swatch |
| “Bound or overlocked?” | The method |
| “Interior too?” | The scope |
| “What stitch density?” | The standard |
Answer them completely and the sample will match the intent. Leave them open and the factory fills the gaps with its own judgment — which may not be yours.
The Final Edge Standard
Whatever methods you choose, hold every pack to the same standard:
| Standard | Requirement |
|---|---|
| No raw edges | Every edge finished |
| Even binding | ±1 mm width |
| Secure stitching | No skipped stitches |
| Clean corners | No bunching |
| Matching color | Approved reference |
| Passing tests | Tug, fray, wash |
The Binding Care Guide
Binding needs little care, but a few habits extend its life.
| Habit | Benefit |
|---|---|
| Wash inside out | Protects binding edges |
| Avoid high-heat drying | Prevents tape shrink |
| Monthly edge check | Early fray detection |
| Store unfastened | Relaxed zipper tapes |
| Repair early | Small fix, longer life |
These habits cost nothing and add seasons of life to any pack. Share them with customers through the care label and the warranty terms.
Conclusion
Edge finishing is the quiet craft of backpack production. It protects the fabric, carries the load, and signals quality to every customer who inspects the seams.
The method should follow the edge’s role: hems for simple openings, binding for visible curves, piping for tailored structure, bound seams for load, and sealed edges for waterproof packs. Materials, machines, and inspection complete the system.
Specify every edge, approve the first article, and inspect against it. Factories that master edges deliver backpacks that last — and brands that specify them well avoid the fraying, puckering, and premature failure that cheaper construction produces.
If you are developing a new pack, start the conversation with the edge map. Send the design, and we will recommend the binding system, produce samples of each finish on your fabric, and show test results before production. The edges you approve in sampling are the edges your customers will rely on for years.