Heat Pressing, Welding and Seam Sealing in Production
Heat Pressing, Welding and Seam Sealing in Production
A backpack is only as water resistant as its seams. Fabric can carry a ten-thousand-millimetre waterproof rating and still leak through a single needle hole, and the three processes that solve that problem — heat pressing, welding, and seam sealing — are among the least understood operations on a bag line.
They are also the operations most likely to be specified loosely. A brand asks for “waterproof seams” in a tech pack, the factory references its usual method, and the resulting product is tested for the first time by the end user in the rain.
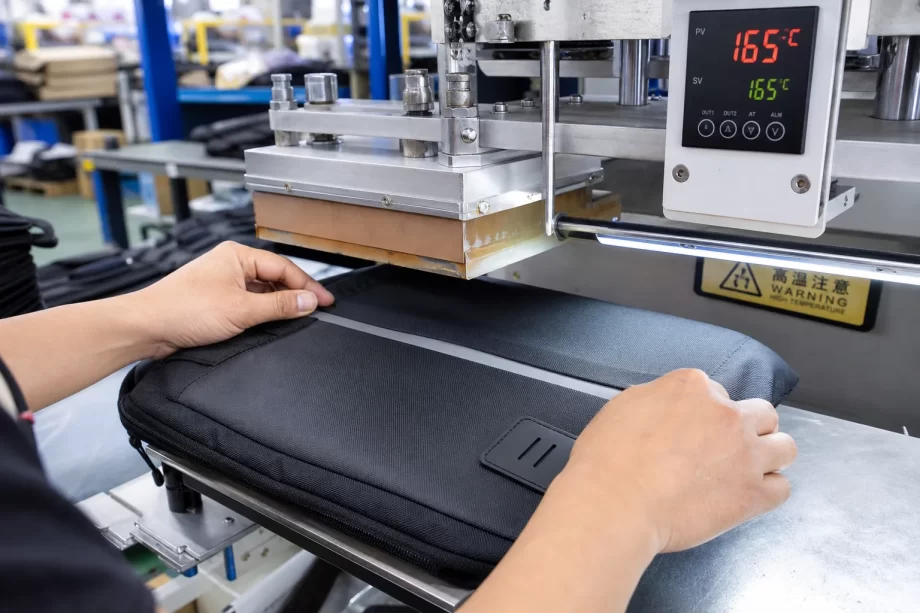
Industrial heat press machine sealing a backpack panel
This guide covers the three processes from a manufacturing perspective: what each one actually does, the machine and parameter requirements, the materials that suit each method, how they are inspected and tested, the failure modes that appear in production, and how to specify them in a tech pack so the factory can deliver a repeatable result.
Heat pressing, welding, and seam sealing are not interchangeable. Each addresses a different problem, and a bag may use two or three of them.
The Process Definitions
Process
Function
Heat pressing
Applies heat and pressure to bond or set a material
Welding
Fuses two surfaces into one continuous material
Seam sealing
Closes needle holes left by stitching
The Problem Each Solves
Problem
Correct process
Sealing stitch perforations
Seam sealing tape
Joining coated fabric without stitching
Welding
Setting a heat transfer logo
Heat pressing
Attaching a reinforcement patch
Heat pressing
Making a dry bag body
Welding
Waterproofing a stitched seam
Seam sealing
The Comparison Table
Aspect
Heat pressing
Welding
Seam sealing
Energy type
Conductive heat
Heat, ultrasound, or radio frequency
Conductive heat
Joins materials
Usually no
Yes
No
Covers stitch holes
No
Not applicable
Yes
Typical cycle
10–60 seconds
1–10 seconds
15–45 seconds
Skill requirement
Moderate
High
Moderate
Equipment cost
Low to moderate
Moderate to high
Low to moderate
Failure visibility
Low, hard to see
Low, hidden inside the joint
High, visible on the surface
The Application Matrix
Bag type
Typical process use
Urban commuter pack
Logo heat press, occasional seam tape
Hiking pack
Critical seam sealing
Dry bag
Full welding
Hydration pack
Welding plus sealing
Laptop sleeve
Logo pressing only
Cooler bag
Welded liner plus taped seams
Travel pack
Selective sealing at exposed seams
The Construction Decision Table
Requirement
Recommended construction
Light rain resistance
Coated fabric, unsealed seams
Rain resistance
Critical seams taped
Waterproof
All seams taped or welded
Submersible
Fully welded, no stitched body seams
Logo durability
Heat press at specified parameters
The Process Selection Rules
Rule
Reason
Seal only what needs sealing
Cost and labour
Weld only weldable materials
Material compatibility
Press only heat-stable materials
Damage prevention
Test the actual construction
Parameters differ by material
Document parameters per material
Repeatability
The Cost Structure Table
Process
Relative cost per unit
Logo heat press
Lowest
Critical seam taping
Low to moderate
Full seam taping
Moderate
Partial welding
Moderate to high
Full welded construction
Highest
The Failure Cost Table
Failure
Consequence
Untaped seam leaks
Warranty claims
Tape peels in the field
Returns
Press mark on fabric
Rejected goods
Welded joint splits
Structural failure
Inconsistent parameters
Variable quality
Factory note: Seam sealing is the process most often specified in words and least often specified in numbers. “Waterproof seams” is not an instruction. “Seal all body seams with a 20 mm three-layer tape at 140 degrees Celsius and 0.3 megapascals for 25 seconds” is an instruction the line can follow, inspect, and repeat.
Heat Pressing in Bag Production
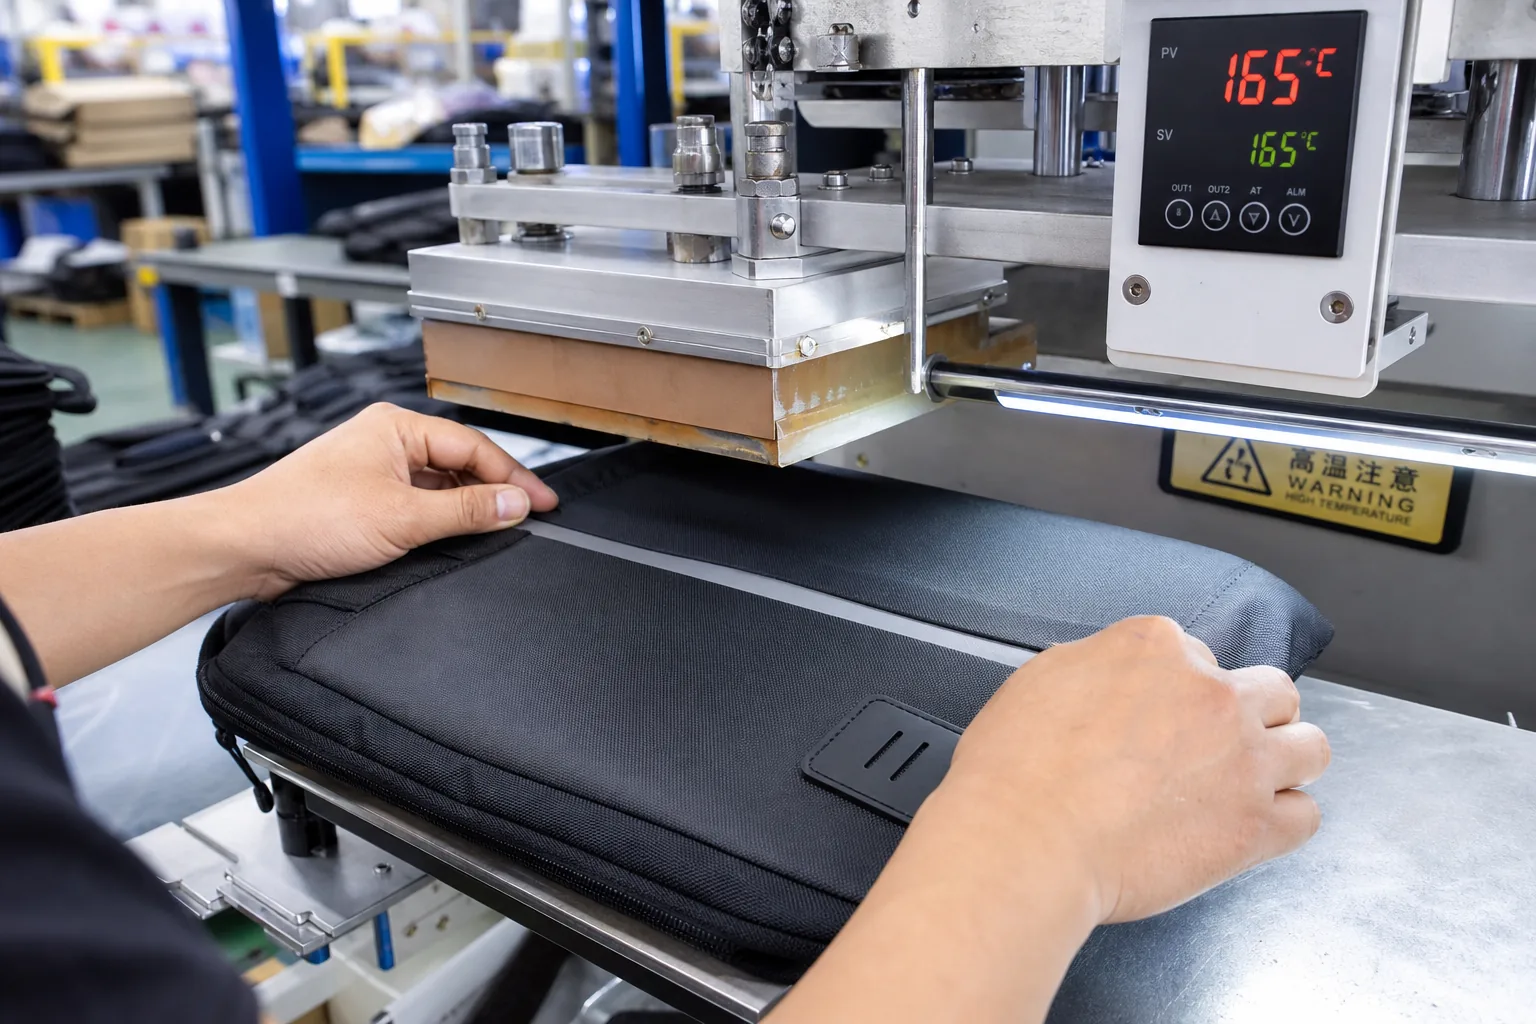
Heat pressing applies controlled heat and pressure for a defined time. In bag manufacturing it performs two distinct jobs: bonding flat components and setting decorative or functional transfers.
Operator using heat press equipment in a bag workshop
The Two Applications
Application
Purpose
Bonding press
Attach tape, patch, or film
Transfer press
Set a logo or graphic
Laminating press
Combine layers with adhesive
Forming press
Set a fold or crease
The Machine Types
Machine
Character
Flat bed press
Most common, manual loading
Rotary press
Continuous, high volume
Roller press
Tape application
Pneumatic press
Consistent pressure
Hydraulic press
High pressure bonding
Continuous fusing machine
Large panels
The Machine Comparison Table
Machine
Pressure consistency
Throughput
Cost
Manual flat bed
Low
Low
Lowest
Pneumatic flat bed
High
Moderate
Moderate
Hydraulic
Very high
Moderate
High
Roller
Moderate
High
Moderate
Continuous fuser
Moderate
Highest
High
The Critical Parameters
Parameter
Effect
Temperature
Bond strength and material safety
Pressure
Contact and penetration
Dwell time
Heat transfer completion
Cooling
Set and dimensional stability
Platen condition
Even pressure distribution
The Parameter Interaction Table
If you change
Then compensate
Temperature up
Reduce time
Pressure up
May reduce time
Thicker material
Increase time or temperature
Denser coating
Increase all three
Larger area
Increase time
The Temperature Guide
Material
Typical range
Polyester fabric
130–160 degrees Celsius
Nylon fabric
130–150 degrees Celsius
TPU film
120–150 degrees Celsius
PVC coated
110–140 degrees Celsius
PU coated
130–155 degrees Celsius
Heat transfer logo
Per supplier specification
The Pressure Guide
Material
Typical pressure
Thin coated fabric
0.2–0.3 megapascals
Thick coated fabric
0.3–0.5 megapascals
Foam backed panel
0.2–0.4 megapascals
Heat transfer film
Per supplier specification
The Dwell Time Table
Application
Typical dwell
Small logo transfer
10–20 seconds
Large logo transfer
20–40 seconds
Tape application
15–30 seconds
Patch bonding
20–45 seconds
Lamination
30–60 seconds
The Material Compatibility Table
Material
Press suitability
Polyester
Good
Nylon
Good
Coated polyester
Good with control
Coated nylon
Good with control
Thin PU coating
Careful, heat sensitive
PVC
Lower temperature needed
PE
Not suitable
Silicone coated
Poor adhesion
Water repellent finish
Reduced adhesion
The Press Defects Table
Defect
Cause
Edge lifting
Insufficient dwell or pressure
Blistering
Too much heat
Fabric glazing
Platen too hot
Colour shift
Heat beyond material limit
Incomplete transfer
Low pressure or cold spot
Adhesive squeeze-out
Excess pressure
Warping
No cooling under load
The Parameter Development Steps
Step
Activity
1
Obtain the material specification
2
Obtain the tape or transfer specification
3
Run a parameter trial across a range
4
Peel test each result
5
Select the lowest energy that passes
6
Record the parameters
7
Verify on a production run
The Peel Test Table
Bond
Result
Adhesive fails, tape intact
Adhesive bond weak
Tape tears
Bond stronger than the tape
Fabric fibres lift
Strong bond
Clean separation
Bond failure
The Press Log Table
Field
Content
Date and shift
Traceability
Operator
Responsibility
Material and lot
Traceability
Temperature
Set and actual
Pressure
Set and actual
Dwell time
Set and actual
Result
Pass or rework
The Press Maintenance Table
Item
Frequency
Platen surface check
Daily
Temperature calibration
Weekly or monthly
Pressure check
Weekly
Timer verification
Weekly
Platen cleaning
Daily
Factory note: Heat press parameters drift. A machine that ran at 150 degrees last month may be running at 138 degrees today without any visible indication. Calibration records and a daily platen check are what keep a documented parameter from becoming a historical document.
Welding in Bag Manufacturing
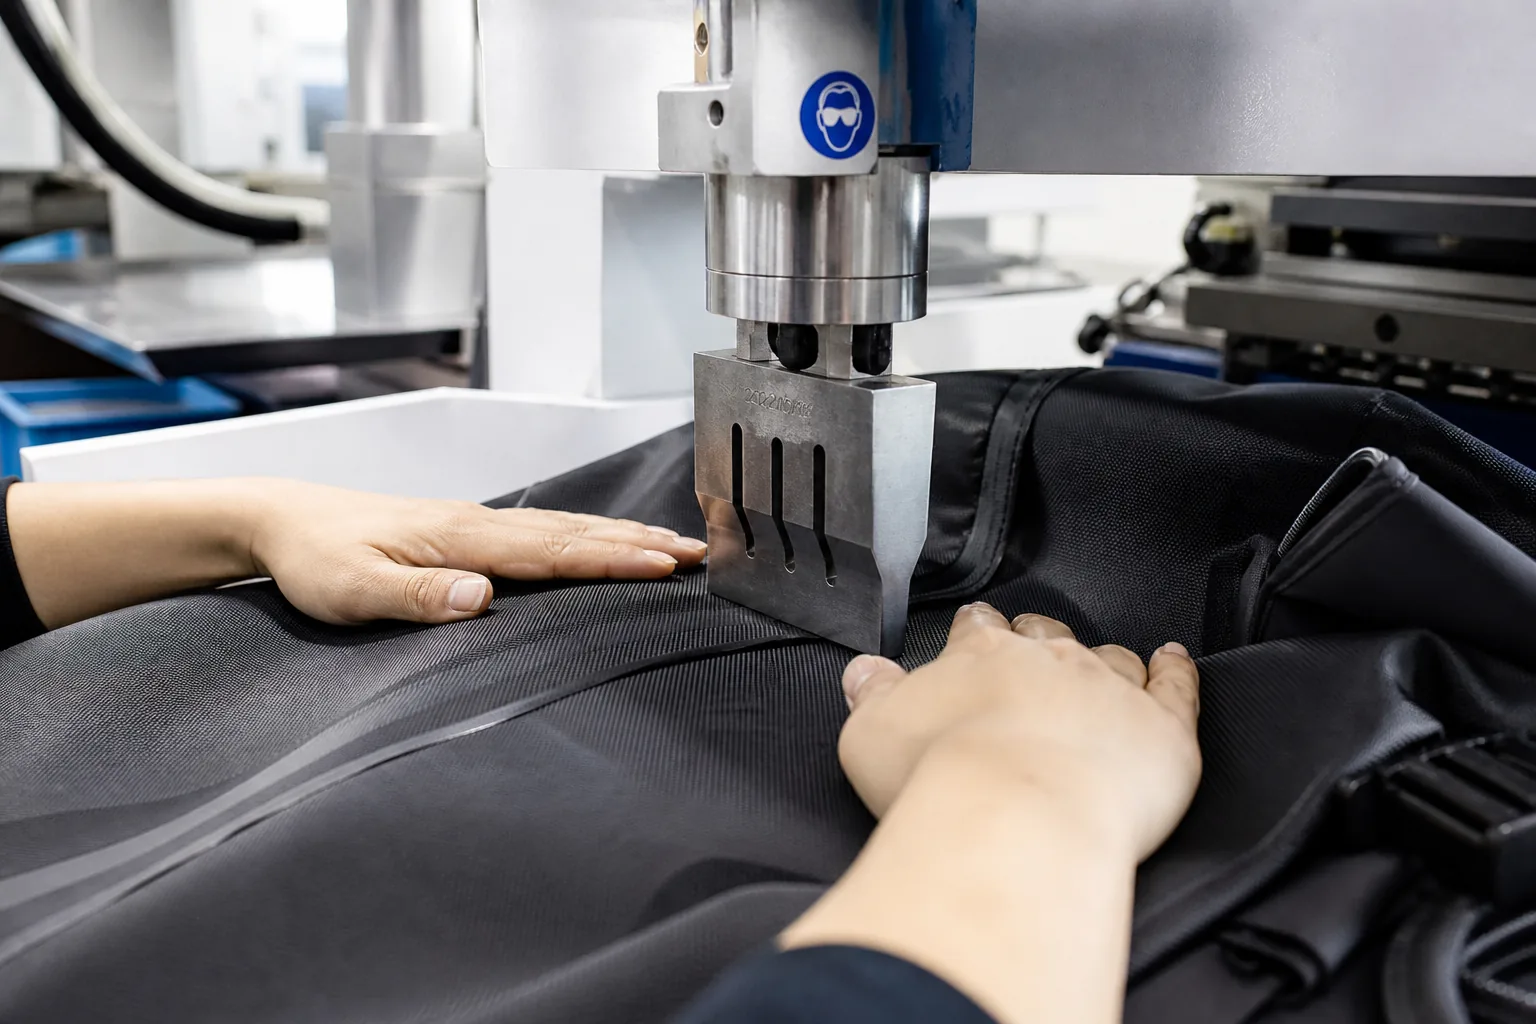
Welding joins two material surfaces by fusing them, producing a joint with no needle holes. It is the foundation of genuinely waterproof construction.
The Welding Methods
Method
Principle
Hot air welding
Heated air plus pressure roller
Hot wedge welding
Heated wedge melts and joins
Ultrasonic welding
High-frequency vibration generates heat
Radio frequency welding
Dielectric heating of polar materials
Impulse welding
Short high-current pulse
Hot plate welding
Direct contact with a heated plate
The Welding Method Comparison
Method
Materials
Speed
Equipment cost
Hot air
Most thermoplastics
Moderate
Moderate
Hot wedge
Coated fabrics
Moderate to fast
High
Ultrasonic
Thin thermoplastics
Fast
High
Radio frequency
PVC, PU
Fast
Highest
Impulse
Films
Slow
Low
Hot plate
Films and sheets
Slow
Low
The Material Weldability Table
Material
Weldability
TPU coated fabric
Excellent
PVC coated fabric
Excellent
PU coated fabric
Good
PE coated fabric
Good
Silicone coated
Poor
Uncoated nylon
Not weldable
Uncoated polyester
Not weldable
Mixed coating types
Difficult
The Weld Parameters
Parameter
Effect
Temperature
Melt initiation
Pressure
Material contact
Speed
Heat exposure time
Overlap width
Joint strength
Surface cleanliness
Bond quality
The Weld Parameter Table
Material
Typical temperature
Typical speed
TPU coated
300–400 degrees Celsius air
2–5 metres per minute
PVC coated
250–350 degrees Celsius air
2–6 metres per minute
PU coated
300–380 degrees Celsius air
2–4 metres per minute
Ultrasonic, thin film
20–40 kilohertz
Continuous
The Joint Designs
Design
Strength
Lap joint
Standard, strongest
Butt joint
Weaker, cosmetic
Fold-over joint
Reinforced edge
Double-welded lap
Highest
The Joint Design Table
Design
Overlap
Application
Standard lap
10–15 mm
General construction
Reinforced lap
15–25 mm
Load-bearing seams
Fold-over
10 mm plus fold
Edges and openings
Double welded
Two passes
Critical joints
The Weld Defects Table
Defect
Cause
Incomplete fusion
Temperature too low or speed too high
Coating burn-through
Temperature too high
Channel leak
Pressure or speed inconsistency
Wrinkling
Material feed alignment
Delamination
Insufficient heat penetration
Weak edge
Insufficient overlap
The Weld Quality Tests
Test
Method
Peel test
Pull the joint apart
Shear test
Load along the joint
Air pressure test
Inflate and check for leaks
Water immersion
Submerge and inspect
Visual inspection
Uniform fusion line
The Weld Test Criteria Table
Test
Acceptance
Peel
Material failure before joint failure
Shear
Meets the specified load
Air pressure
No pressure loss over the period
Immersion
No bubbles or water ingress
Visual
Continuous, uniform fusion line
The Welding Equipment Requirements
Requirement
Reason
Temperature control
Consistent fusion
Speed control
Consistent heat exposure
Pressure roller alignment
Uniform contact
Nozzle condition
Even heat distribution
Calibration
Traceable parameters
The Welding Production Controls
Control
Frequency
Temperature verification
Start of shift
Speed setting check
Start of shift
Peel test
Start, middle, end of lot
Air test on finished unit
Per unit for waterproof products
Parameter log
Every run
Factory note: Welding quality is invisible from the outside. An incompletely fused joint looks identical to a perfect one until it is tested or used. This is why a welded product needs a documented peel test at the start, middle, and end of every production lot — the sample is the only evidence that the parameters held.
Seam Sealing: Taping Stitched Seams
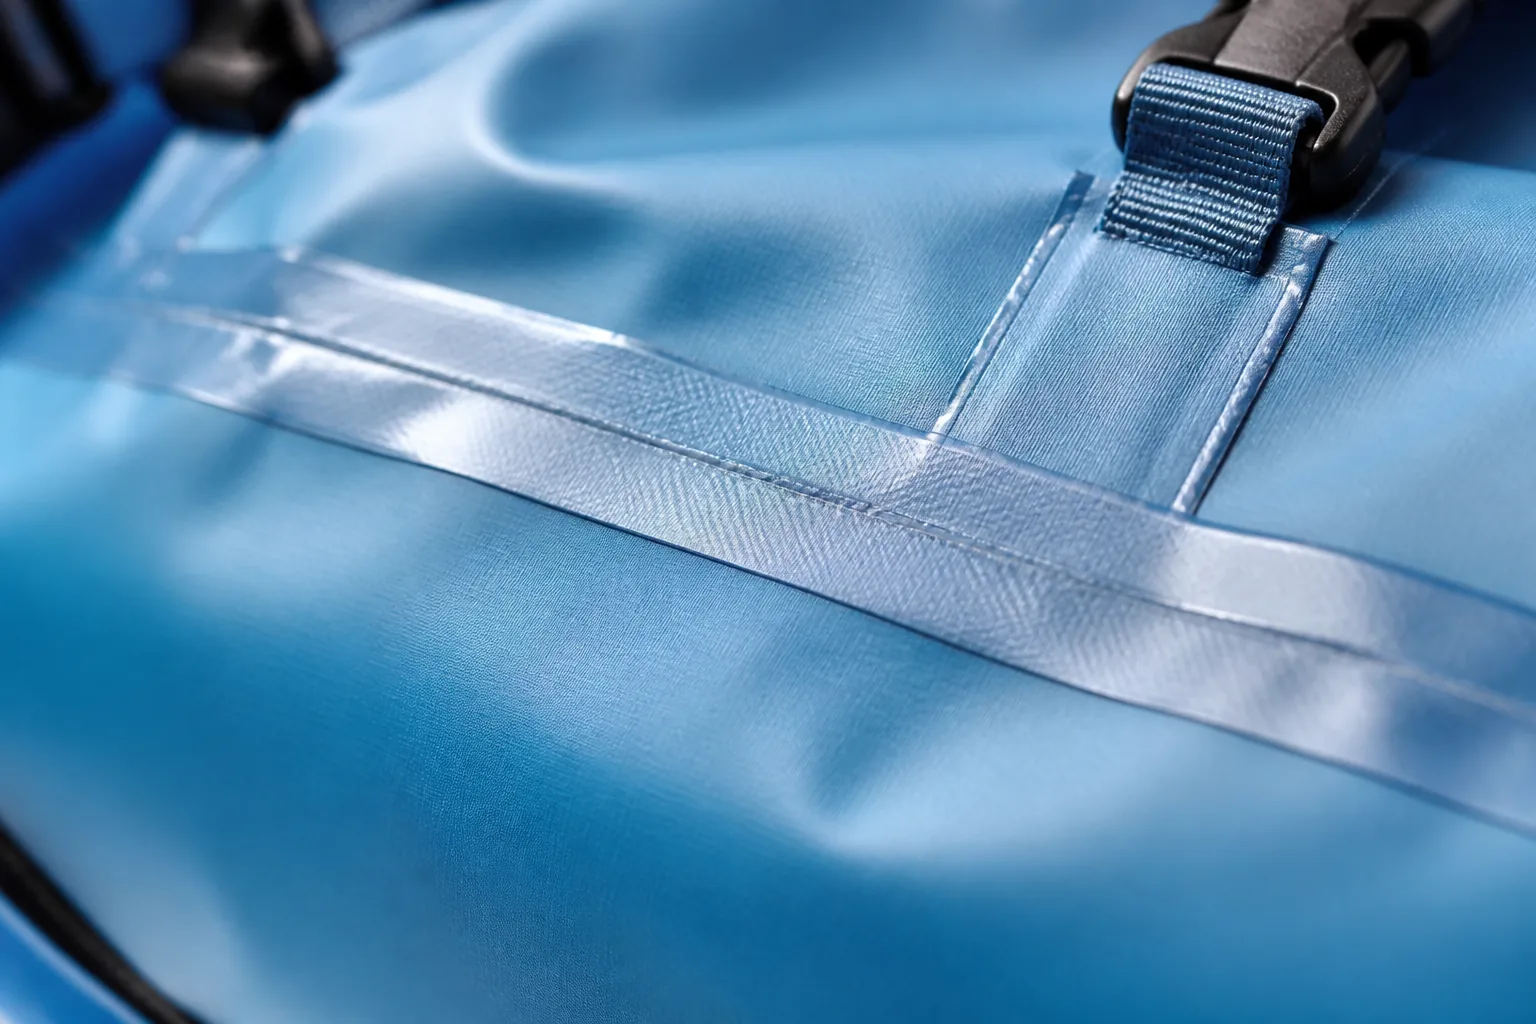
Seam sealing covers the needle holes created by stitching. It is the only way to make a stitched seam water resistant without removing the stitching.
Seam sealing tape applied along a waterproof backpack seam
The Tape Types
Type
Construction
Single-layer tape
One adhesive layer on a film
Two-layer tape
Film plus adhesive
Three-layer tape
Film, adhesive, and a reinforcing layer
Knit-backed tape
Fabric backing for flexibility
Transparent tape
For visible seams
Reflective tape
Added visibility
Elastic tape
For stretch seams and softshell
The Tape Comparison Table
Type
Adhesion
Flexibility
Cost
Single layer
Moderate
High
Lowest
Two layer
Good
High
Low
Three layer
Best
Moderate
Moderate
Knit backed
Good
Highest
Moderate
Transparent
Good
Moderate
Moderate
Reflective
Good
Moderate
High
The Tape Width Guide
Seam type
Recommended width
Lightweight shell
15–20 mm
Standard backpack
20–25 mm
Load-bearing seam
25–30 mm
Curved or complex seam
15–20 mm narrow tape
Wide seam allowance
25 mm or more
The Tape Dimension Rule
Rule
Reason
Tape must cover the stitch line with margin
Prevents wicking
Margin of at least 5 mm each side
Adhesion area
Wider is not always better
Harder to conform
Narrow tape on curves
Prevents wrinkling
The Application Parameters
Parameter
Typical value
Temperature
130–160 degrees Celsius
Pressure
0.2–0.4 megapascals
Dwell time
15–45 seconds
Cooling
Under pressure where possible
Tape tension
Slight, not stretched
The Parameter Application Table
Fabric type
Temperature
Dwell
Lightweight nylon shell
130–145 degrees Celsius
15–25 seconds
Standard coated polyester
140–155 degrees Celsius
20–35 seconds
Heavy coated fabric
150–165 degrees Celsius
30–45 seconds
PU coated
135–150 degrees Celsius
20–30 seconds
PVC coated
120–140 degrees Celsius
15–25 seconds
The Seam Preparation Steps
Step
Requirement
1
Seam is flat and correctly stitched
2
Thread ends trimmed
3
Surface clean and dry
4
Seam lies straight, not twisted
5
Fabric supported under the seam
6
Tape positioned with equal margins
The Preparation Defects Table
Defect
Effect
Twisted seam
Tape bridges, weak adhesion
Raised seam ridge
Poor contact
Loose thread
Wick path
Dust or oil
Adhesion failure
Damp fabric
Blistering
The Sealing Methods
Method
Character
Manual flat press
Flexible, slower
Roller sealing machine
Continuous, consistent
Hot air taping
For complex seams
Ultrasonic taping
Tape-free sealing
Hand ironing
Field repair only
The Sealing Method Table
Method
Consistency
Throughput
Complex seams
Manual flat press
Moderate
Low
Good
Roller machine
High
High
Poor
Hot air taping
Moderate
Moderate
Best
Ultrasonic
High
High
Moderate
The Seam Types and Treatment
Seam type
Sealing approach
Plain seam
Tape over the seam line
Flat-felled seam
Tape over the fold
Bound seam
Tape or binding
French seam
Not taped, redesigned
Overlock
Must be taped
Double-stitched
Tape covers both lines
The Critical Seam Identification Table
Seam
Waterproof priority
Top of the bag / lid
Highest
Shoulder strap attachment
High
Main body vertical seams
High
Base seams
Highest
Side pocket seams
Moderate
Interior organiser seams
None
Lining seams
None
The Sealing Coverage Table
Level
Seams sealed
Basic
None
Selective
Lid and base
Rain resistant
All exterior seams
Waterproof
All seams including internal baffles
The Tape Defects Table
Defect
Cause
Edge lifting
Cold platen or short dwell
Bubbles under tape
Moisture or trapped air
Tape wrinkling
Over-stretching or curve
Adhesive bleed
Excess pressure or heat
Tape distortion
Temperature too high
Incomplete coverage
Misalignment
The Rework Rules
Situation
Action
Small edge lift
Re-press with support
Bubbles
Re-press or replace the tape
Wrinkled tape
Remove and retape
Tape damaged by heat
Replace the panel section
Adhesive bleed
Clean and inspect
The Rework Table
Rework
Acceptability
Re-press
Acceptable if the seam is flat
Remove and retape
Acceptable with clean adhesive removal
Patch over
Acceptable for internal seams
Replace the panel
Required for visible heat damage
Factory note: Tape adhesion is more sensitive to moisture than to temperature. A seam pressed on a humid day, or on fabric that has not fully dried after washing or coating, will blister within weeks. Controlling the workshop humidity and confirming the fabric is dry costs nothing and prevents the most common field failure.
Materials and Construction Fit
Welding and sealing only work with the right material combinations. This is decided at the design stage, not on the line.
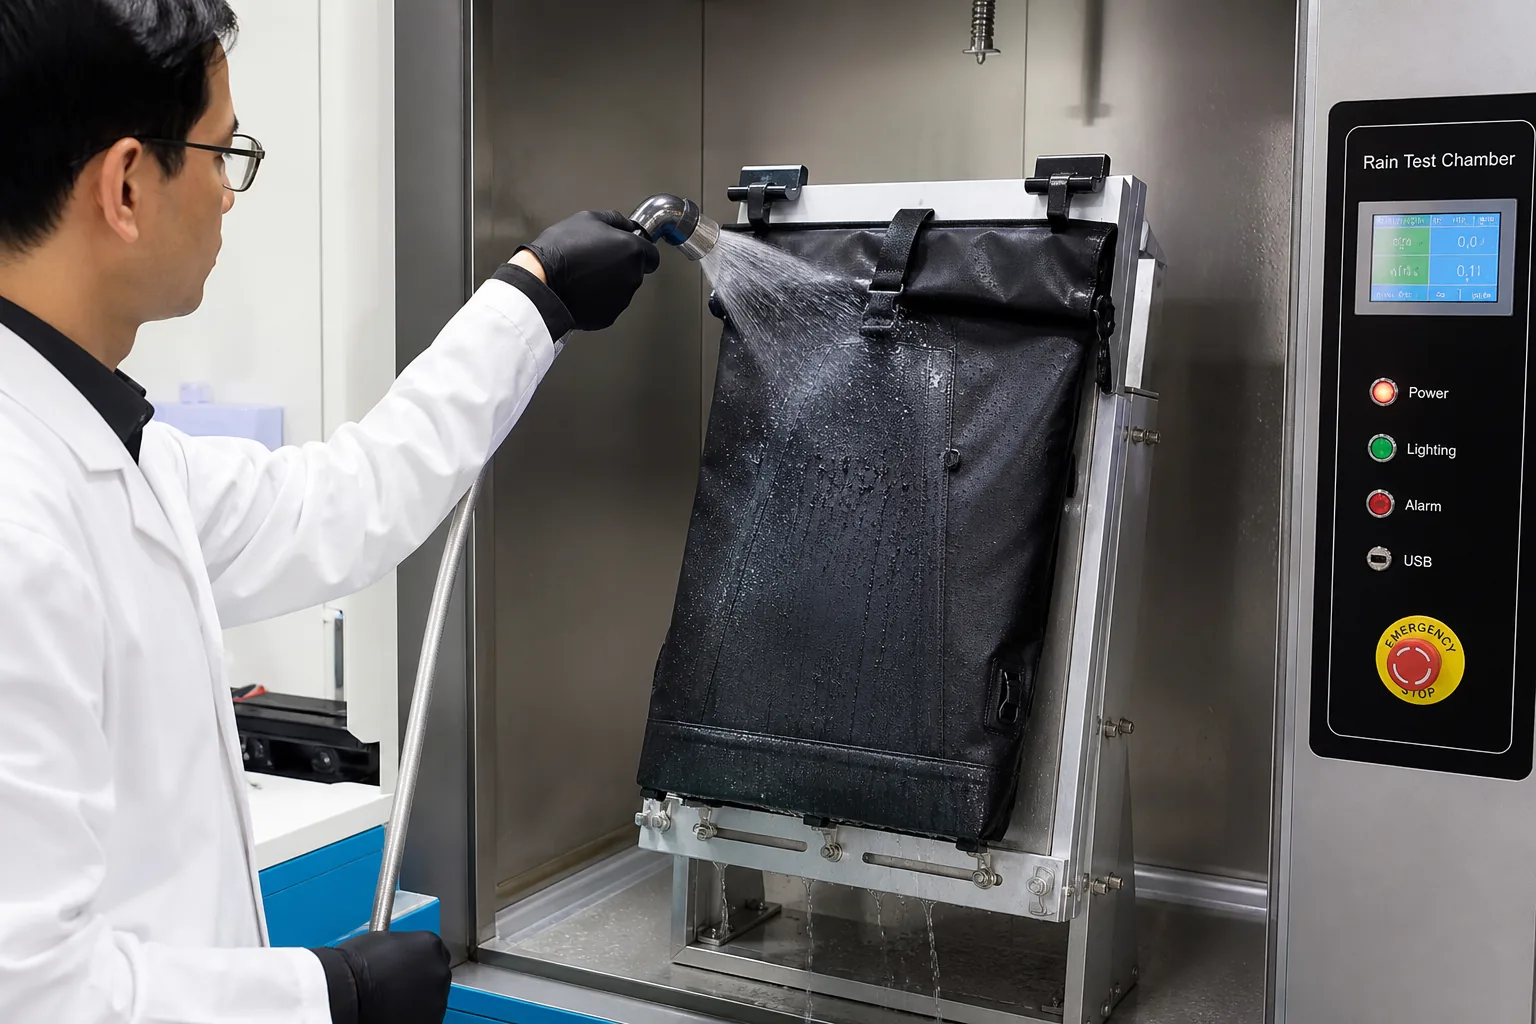
Water resistance spray test on a seam sealed panel
The Coating Compatibility Table
Coating
Heat press
Weld
Tape
TPU
Good
Excellent
Excellent
PU
Good
Good
Good
PVC
Moderate
Excellent
Good
PE
Moderate
Good
Moderate
Silicone
Poor
Poor
Poor
Acrylic
Poor
Poor
Moderate
PTFE membrane
Do not press directly
Not weldable
Compatible tape needed
The Membrane Consideration Table
Membrane
Constraint
PU membrane
Sensitive to high heat
PTFE membrane
Requires lower temperature and care
TPU membrane
Heat compatible
Coated only
Broad compatibility
The Fabric Weight Table
Fabric
Sealing consideration
70 denier
Needs lower temperature, careful support
210 denier
Standard parameters
420 denier
Standard to higher parameters
600 denier and above
Higher temperature, longer dwell
Laminated multi-layer
Follow the membrane limit
The Thread Consideration
Thread
Sealing effect
Bonded nylon
Standard
Bonded polyester
Standard
Cotton
Wicks water, avoid in sealed seams
Textured thread
Bulkier seam, harder to seal
The Needle Hole Table
Needle and stitch
Sealing difficulty
Fine needle, small stitch
Easier
Standard needle
Standard
Large needle, coarse stitch
Harder, larger holes
Double-stitched
Two rows must be covered
The Design Constraint Table
Design decision
Effect on sealing
Simple seam lines
Easier to seal
Multiple intersecting seams
Harder, more tape
Curved seams
Narrow tape needed
Bound edges
Additional process
Pleats and darts
Very difficult to seal
Strap anchors
Need reinforcement plus sealing
The Construction Sequence
Step
Operation
1
Cut panels
2
Press logos and transfers
3
Assemble seams
4
Seal exterior seams
5
Attach hardware and straps
6
Seal anchor points
7
Assemble lining
8
Final water test
The Sequence Table
Order
Reason
Press before assembly
Flat panels press evenly
Seal before hardware
Avoids pressing on metal
Seal before lining
Access to the seam reverse
Test after final assembly
Catches all leak paths
The Zipper Consideration Table
Zipper
Water resistance
Standard coil
Not water resistant
Reverse coil
Water resistant
Water repellent finished
Rain resistant
Waterproof zipper
Waterproof
Zipper with a flap
Additional protection
The Hardware Seal Table
Element
Sealing approach
Strap anchor
Reinforcement plus sealing
Side release buckle
No sealing needed
Cord exit
Grommet or sealed port
Hydration port
Sealed port
Stud or rivet
Seal or avoid penetration
Testing and Quality Verification
Sealing and welding quality can only be confirmed by testing. Visual inspection alone is not evidence.
The Test Types
Test
Purpose
Visual inspection
Surface defects
Peel test
Adhesion strength
Air pressure test
Leak detection
Water spray test
Surface water resistance
Immersion test
Water ingress
Shower test
Simulated rain
Hydrostatic head test
Fabric and seam resistance
The Test Comparison Table
Test
Coverage
Speed
Cost
Visual
Surface only
Fast
Lowest
Peel
Joint strength
Moderate
Low
Air pressure
Full sealed body
Fast
Low
Spray
Surface
Moderate
Low
Immersion
Full unit
Slow
Moderate
Hydrostatic
Material and seam
Moderate
High
The Hydrostatic Head Guide
Rating
Typical use
Under 1,500 mm
Light rain, urban
1,500–5,000 mm
General outdoor
5,000–10,000 mm
Sustained rain
10,000–20,000 mm
Heavy rain, technical
Above 20,000 mm
Extreme conditions
The Seam Hydrostatic Requirement
Product level
Seam requirement
Urban
No requirement
Outdoor general
Sealed to 80 percent of fabric rating
Technical
Sealed to the full fabric rating
Waterproof
Exceeds the fabric rating after sealing
The Spray Test Rating Table
Rating
Observation
5
No sticking or wetting
4
Slight sticking, no wetting
3
Wetting at the spray points
2
Wetting of half the surface
1
Wetting of the whole surface
The Sampling Table
Production stage
Sampling
Parameter trial
Multiple trials across the range
Start of lot
One unit per line
Middle of lot
One unit per line
End of lot
One unit per line
Finished goods
Per AQL plan
The Inspection Points Table
Point
Check
Seam preparation
Flatness and cleanliness
Tape placement
Centred with equal margins
Adhesion
No lifting at the edges
Surface
No bubbles, wrinkles, or burns
Coverage
All required seams sealed
Colour
Consistent after pressing
The Defect Classification Table
Class
Definition
Action
Critical
Leak path present
Reject
Major
Visible tape defect
Rework
Minor
Cosmetic deviation
Accept or rework per plan
The Root Cause Table
Failure
Likely cause
Leaking seam
Coverage gap or incomplete adhesion
Tape peel
Low temperature or short dwell
Blister
Moisture under the tape
Fabric burn
Temperature too high
Weld channel leak
Speed or pressure inconsistency
Joint failure
Insufficient overlap or fusion
The Corrective Action Table
Failure
Correction
Coverage gap
Retrain and add inspection
Tape peel
Recalibrate and retest
Blister
Control humidity and drying
Fabric burn
Verify the material limit
Weld leak
Adjust speed and pressure
Joint failure
Revalidate parameters
Factory note: An air pressure test on the finished unit is the single most useful quality gate for a waterproof product. It detects leak paths that no visual inspection will ever find, it takes seconds per unit, and it produces a pass or fail result rather than an opinion.
Specifying These Processes in the Tech Pack
The tech pack is where a waterproof claim becomes a manufacturable instruction. Vagueness here is the origin of most field failures.
The Required Fields
Field
Example
Process per seam
Taped, welded, or unsealed
Tape specification
20 mm three-layer tape
Tape brand and code
Approved supplier reference
Temperature
145 degrees Celsius
Pressure
0.3 megapascals
Dwell time
25 seconds
Seam list
Which seams require sealing
Test requirement
Air pressure test per unit
Acceptance criteria
No leak, no lifting
The Seam Specification Table Format
Seam
Process
Tape width
Parameters
Main body vertical
Taped
20 mm
145 degrees, 25 seconds
Base
Taped, double pass
25 mm
145 degrees, 30 seconds
Lid
Taped
20 mm
145 degrees, 25 seconds
Strap anchor
Reinforced and taped
20 mm
145 degrees, 25 seconds
Interior baffle
Not sealed
Not applicable
Not applicable
The Drawing Requirements
Drawing
Content
Seam map
Every seam with a process code
Tape placement
Position and margin
Weld joint detail
Overlap width and design
Section view
Layer order at the joint
Logo placement
Position with press parameters
The Change Control Table
Change
Revalidation
Fabric or coating
Full parameter redevelopment
Tape supplier
Peel and water test
Adhesive type
Peel and water test
Machine change
Parameter verification
Operator change
First-off approval
The Approval Sequence
Step
Output
1
Parameter trial completed
2
Peel test passed
3
Water test passed
4
Parameters recorded
5
Sample approved
6
Specification frozen
7
First-off approval in production
Organising the Line Around These Processes
Sealing and welding are bottlenecks in most bag factories because they are single-station operations with fixed cycle times. How they are positioned on the line determines throughput.
The Line Layout Options
Layout
Character
Inline sealing
Following the sewing station
Batch sealing
Collected and processed together
Dedicated cell
Separate sealing area
Outsourced
Sent to a specialist
The Layout Comparison Table
Layout
Throughput
Quality control
Flexibility
Inline
Highest for simple seams
Best, immediate
Low
Batch
Moderate
Moderate
High
Dedicated cell
High
Good
Moderate
Outsourced
Depends on the partner
Hardest
Highest
The Cycle Time Table
Operation
Typical cycle
Logo heat press
20–45 seconds
Seam tape, 200 mm
25–40 seconds
Seam tape, 500 mm
45–90 seconds
Weld, 500 mm
20–40 seconds
Air pressure test
20–60 seconds
The Capacity Calculation Table
Factor
Consideration
Cycle time per seam
Measured, not estimated
Number of seams per unit
From the seam map
Machine availability
Shift and maintenance
Rework allowance
3–8 percent typical
Operator skill
Curve at start-up
The Labour Skill Table
Role
Skill level
Heat press operator
Moderate
Seam taper
Moderate to high
Welding operator
High
Parameter setter
High
Quality inspector
High
The Workstation Requirements
Requirement
Reason
Flat, heat-safe table
Even support
Support arm or form
Holds the seam flat
Temperature display
Operator verification
Timer
Consistent dwell
Cleaning materials
Platen maintenance
Documentation
Parameter log
The Operating Discipline Table
Practice
Effect
Verify parameters at shift start
Catches drift
First-off approval
Catches setup errors
Peel test at intervals
Confirms the process
Parameter log
Traceability
Platen cleaning schedule
Consistent heat transfer
The Bottleneck Table
Bottleneck
Mitigation
Single sealing machine
Add a second station
Long seams
Split across two operators
Complex curves
Assign to a skilled operator
Rework volume
Fix upstream preparation
Testing queue
Add a parallel test station
The Training Table
Topic
Content
Machine operation
Safe use and settings
Parameter control
Temperature, pressure, time
Seam preparation
Flatness and cleanliness
Defect recognition
What to reject
Documentation
What to record
Factory note: Sealing stations should be measured on first-pass yield, not on units per hour. A station pushing volume with a five percent rework rate costs more than one running twenty percent slower with clean output, because rework in sealing usually means removing tape and re-pressing the same seam, which risks heat damage to the panel.
Cost and Capacity Considerations
The cost of these processes is driven by cycle time and consumables more than by equipment.
The Cost Elements
Element
Share
Labour
40–55 percent
Tape or film consumables
20–30 percent
Equipment depreciation
10–20 percent
Energy
5–10 percent
Rework
Variable
The Consumable Cost Table
Consumable
Relative cost per metre
Single-layer tape
Lowest
Two-layer tape
Low
Three-layer tape
Moderate
Reflective tape
High
Heat transfer film
Moderate
Weld rod or film
Low
The Cost Driver Table
Driver
Effect
Number of sealed seams
Linear cost increase
Seam length
Linear cost increase
Tape width
Material cost
Complexity of the seam
Labour cost
Rework rate
Multiplier on all costs
The Value Engineering Table
Option
Saving
Seal only exposed seams
Reduced tape and labour
Simplify seam geometry
Fewer complex passes
Use a narrower tape
Material
Group seams for one pass
Labour
Standardise tape widths
Inventory
Reduce tape waste
Material
The Quality Cost Table
Cost
Character
Prevention
Training and calibration
Appraisal
Testing and inspection
Internal failure
Rework
External failure
Warranty and returns
The Investment Decision Table
Investment
Payback driver
Roller sealing machine
Volume above a threshold
Calibration equipment
Consistency requirement
Test station
Waterproof product claims
Climate control
Adhesion reliability
Operator training
Rework reduction
The Capacity Planning Table
Product level
Sealing time per unit
Urban pack, no sealing
Zero
Urban pack, selective
2–5 minutes
Hiking pack, full sealing
6–12 minutes
Dry bag, welded
10–20 minutes
Technical shell
15–30 minutes
Troubleshooting Common Problems
Problems in these processes follow patterns. Most have a parameter or preparation cause rather than a material cause.
The Problem Matrix
Symptom
Likely cause
Correction
Tape peels at the edges
Low temperature or short dwell
Increase and retest
Tape lifts in the field
Moisture or contamination
Control humidity and cleaning
Bubbles under the tape
Trapped air or moisture
Support the seam, dry the fabric
Tape wrinkles on curves
Tape too wide or stretched
Narrower tape, reduce tension
Fabric glazing
Platen too hot
Lower temperature, check calibration
Heat mark on the face
Pressure on the wrong side
Add a protective sheet
Weld splits
Insufficient fusion
Increase temperature or slow speed
Channel leak
Inconsistent speed
Stabilise the feed
Logo lifting after washing
Wrong transfer parameters
Follow the supplier specification
Colour change
Heat beyond the limit
Verify the material limit
Adhesive bleed
Excess pressure
Reduce pressure
Seam ridge visible
Fabric bulked at the seam
Flatten before sealing
The Diagnostic Order
Order
Check
1
Temperature calibration
2
Pressure setting and platen condition
3
Dwell time and timer accuracy
4
Seam preparation and flatness
5
Moisture and surface cleanliness
6
Tape or film specification
7
Material and coating compatibility
The Quick Reference Table
If the result is
Then check first
Weak everywhere
Temperature or pressure
Weak in patches
Platen flatness or support
Weak on curves only
Tape width or feed tension
Weak after washing
Adhesion or moisture
Leaking but adhered
Coverage or stitch density
Damaged fabric
Temperature or dwell
The Preventive Maintenance Table
Item
Frequency
Platen cleaning
Daily
Temperature calibration
Weekly
Pressure verification
Weekly
Timer check
Weekly
Roller condition
Monthly
Nozzle inspection, welding
Daily
Full machine service
Annually
The Documentation Table
Record
Content
Parameter sheet
Settings per material
Production log
Actual settings per run
Test results
Peel and water test data
Rework record
Quantity and cause
Calibration record
Dates and results
Training record
Operators certified
The Continuous Improvement Table
Metric
Target direction
First-pass yield
Increase
Rework rate
Decrease
Water test pass rate
100 percent for waterproof products
Tape consumption per unit
Decrease
Parameter drift incidents
Zero
The Buyer’s Checklist for Sealed and Welded Construction
A checklist covering the decisions that determine whether a waterproof claim survives production and field use.
Before Development
Item
Done
Water resistance level defined
☐
Seam map drawn with process per seam
☐
Tape or weld specification stated
☐
Parameters specified numerically
☐
Test method and acceptance criteria defined
☐
Material compatibility confirmed
☐
Before Sampling
Item
Done
Fabric coating type confirmed
☐
Membrane heat limit obtained
☐
Tape supplier samples approved
☐
Logo transfer parameters from supplier
☐
Machine capability verified
☐
Operator training planned
☐
At Sample Review
Item
Done
All specified seams sealed
☐
Tape centred with even margins
☐
No lifting, bubbles, or wrinkles
☐
No heat marks on visible panels
☐
Logo adhesion tested after washing
☐
Peel test on the weld or tape
☐
Water or air test performed
☐
Results documented
☐
Before Production
Item
Done
Parameters frozen in the tech pack
☐
Test station available
☐
Sampling plan agreed
☐
Rework rules agreed
☐
Parameter log template in place
☐
Calibration schedule agreed
☐
The Eight Rules
Rule
Reason
Specify parameters numerically
Removes interpretation
Draw a seam map
Prevents forgotten seams
Match the process to the material
Compatibility first
Test the finished unit, not just the fabric
Seams are the leak path
Require peel tests during production
Confirms the process held
Control humidity and dryness
Adhesion depends on it
Log every parameter
Traceability
Keep the lowest energy that passes
Protects the material
FAQ
What is the difference between welding and seam sealing?
Welding fuses two material surfaces together into a continuous joint with no needle holes, so it replaces stitching entirely. Seam sealing applies a heat-activated tape over a stitched seam to close the needle holes. A dry bag is typically welded; a waterproof hiking pack usually uses stitched seams with sealing tape. Some products combine both, welding the liner and taping the outer seams.
What temperature is used for seam sealing tape?
It depends on the fabric coating, but a common working range is 130 to 160 degrees Celsius with 0.2 to 0.4 megapascals of pressure and a dwell of 15 to 45 seconds. Lightweight nylon shells sit at the lower end; heavy coated fabrics need the higher end. The correct parameters are the lowest energy that passes a peel and water test on the actual material.
Why does seam tape peel off after a few weeks?
Moisture is the most common cause. Tape pressed onto fabric that has not fully dried, or pressed in a workshop with high humidity, will blister and lift. Contamination from oils, dust, or softening agents is the second cause, and insufficient temperature or dwell time is the third. Controlling humidity, cleaning the seam, and verifying calibration addresses nearly all of them.
Can any fabric be welded?
No. Welding requires a thermoplastic coating or film that melts and fuses, such as TPU, PVC, or PU. Uncoated nylon and polyester cannot be welded, and silicone-coated fabrics bond poorly. Mixed coating types in one product make welding difficult because the two surfaces melt at different temperatures. Weldability is a design decision made when the fabric is selected.
Do I need to seal every seam to make a backpack waterproof?
No, and doing so adds cost without proportional benefit. Seal the seams that are actually exposed to water: the lid, the base, the main body vertical seams, and the strap anchor points. Interior organiser seams and lining seams do not need sealing. A selective approach usually delivers the same field performance at a lower unit cost.
How do you test whether seams are properly sealed?
The most useful production test is an air pressure test on the finished unit, which reveals leak paths that visual inspection cannot see and takes seconds per unit. For joint strength, a peel test on the tape or weld at the start, middle, and end of each lot confirms the parameters held. Material and seam resistance can be measured with a hydrostatic head test in a laboratory.
Why does a heat-pressed logo lift after washing?
Either the press parameters did not match the transfer supplier’s specification, or the fabric’s water repellent finish reduced adhesion. Heat transfer films are formulated for specific temperature, pressure, and time combinations, and the supplier’s specification should be followed rather than approximated. Where a durable finish is required, wash testing before approval is the reliable check.
Does heat pressing damage coated fabric?
It can. Exceeding the coating’s heat limit causes glazing, colour shift, coating damage, or delamination, and the damage is often invisible until the product is used. The material’s heat limit should come from the mill specification, and every parameter trial should stay below it. Where a visible panel must be pressed, a protective sheet between the platen and the fabric reduces marking.
How much does seam sealing add to unit cost?
Labour dominates, typically 40 to 55 percent of the process cost, followed by tape consumables at 20 to 30 percent. The cost scales with the number of sealed seams and their length rather than with the bag’s size. Sealing only the exposed seams, simplifying seam geometry, and reducing rework are the most effective ways to control it.
Conclusion
Heat pressing, welding, and seam sealing are the processes that convert a water-resistant fabric into a water-resistant product. Each solves a different problem, and confusing them is the origin of most specification errors: welding replaces stitching, seam sealing covers it, and heat pressing bonds or sets a component.
The technical discipline is the same across all three. Parameters must be numeric rather than descriptive. Materials must be matched to the process rather than assumed compatible. The lowest energy that passes a test should be the one recorded, because excess heat damages coatings in ways that only appear in the field. And every parameter must be verified against a calibration record, because presses and welding nozzles drift without any visible sign.
The quality discipline is equally specific. Welded and sealed results are invisible from the outside, so a pass or fail test is the only real evidence: a peel test at intervals through each production lot to confirm the process held, and an air pressure test on the finished unit to catch leak paths that no inspection would find.
For factories, competence in these processes is a market position. Welded construction and reliable seam sealing are capability claims that not every plant can make, and brands building waterproof ranges return to the plants that can document parameters and produce test evidence.
For buyers, the leverage is in the tech pack: a seam map, a numeric parameter set, and a stated acceptance test turn a vague waterproof claim into an instruction the line can follow, inspect, and repeat.