
Ergonomics in Backpack Design: What Manufacturers Must Consider
A backpack is one of the few products people carry against their bodies for hours every day. It is a wearable load-bearing structure, and the way it fits and transfers load determines whether the wearer finishes the day comfortable or aching. This is ergonomics — the science of fitting the product to the human body — and in backpack design it is not a luxury feature. It is the core function.
For a manufacturer, ergonomics is also a manufacturing discipline. An ergonomic back panel is not just a shape — it is a sub-assembly with specific foam densities, frame channels, and attachment points that must be built precisely and consistently. An ergonomic shoulder strap is not just padding — it is a layered construction with specific curves, widths, and load-lifter anchors. Ergonomics that works in a designer’s sketch must survive the transition to the production line, or it does not exist in the finished product.
This guide covers the ergonomics of backpack design from a manufacturer’s perspective: the anatomy of the human load-carrying system, the ergonomic principles that govern each component — back panel, shoulder straps, hip belt, sternum strap, and load management — the specific manufacturing considerations that turn ergonomic designs into producible reality, and how to specify and verify ergonomic quality in production.
- The Human Load-Carrying System: What the Design Must Respect
- The Back Panel: Structure, Ventilation, and Fit
- Shoulder Straps: The Secondary Load Path
- The Hip Belt: The Real Load Carrier
- The Sternum Strap: Small Part, Big Effect
- Load Management: Keeping the Load Close and Stable
- Fit and Adjustability: One Design, Many Bodies
- From Ergonomics to Manufacturing: The Production Perspective
- Ergonomics by Product Category: Different Jobs, Different Priorities
- Specifying Ergonomics: The Buyer’s Checklist
- Measuring Ergonomics: Pressure Mapping and Fit Testing
- Common Ergonomics Mistakes in Backpack Design
- FAQ
- The Future of Backpack Ergonomics
- Conclusion
The Human Load-Carrying System: What the Design Must Respect
The human body has a highly evolved load-carrying system, and the best backpacks work with it rather than against it. Understanding the basics of that system is the foundation of every ergonomic decision.
The Three Load Zones
| Zone | Anatomy | Role in load carrying |
|---|---|---|
| Shoulders | Trapezius, deltoid muscles | Primary support for most pack types; limited tolerance for sustained load |
| Upper back | Thoracic spine, shoulder blades | Load transfer path between straps and body |
| Hips/pelvis | Pelvis, iliac crest, hip muscles | The strongest load-bearing zone; designed to carry body weight all day |
The Key Ergonomic Facts
- The hips are the strongest load carriers — the human body is built to carry weight on the pelvis. This is why hiking packs with hip belts are so much more comfortable under heavy loads than shoulder-only packs.
- The shoulders fatigue fast — sustained load on the shoulders causes fatigue, pain, and poor posture. The design goal is to transfer as much load to the hips as possible.
- The spine does not like compression — a pack that presses directly on the spine creates discomfort and long-term problems. This is why back panels are contoured and ventilated rather than flat.
- Movement matters — the pack must move with the body, not against it. A rigid pack that shifts with every step is an ergonomic failure regardless of padding.
Manufacturer’s note: Ergonomics is not about adding more padding — it is about load distribution. A pack with 20 mm of foam everywhere but no hip belt will still hurt under a heavy load, because the load never reaches the hips. The design decision that matters most is where the load goes, not how thick the padding is.
Load Distribution Targets
A well-designed pack distributes load approximately as follows:
| Pack type | Shoulder load | Hip load |
|---|---|---|
| Light daypack (no hip belt) | 100% | 0% |
| Commuter pack (light hip support) | 70–80% | 20–30% |
| Hiking pack (full hip belt) | 20–30% | 70–80% |
| Heavy expedition pack | 20% | 80% |
The numbers tell the design story: if the product needs to carry more than a few kilograms comfortably, the hip belt is not optional — it is the core ergonomic feature.
The Back Panel: Structure, Ventilation, and Fit
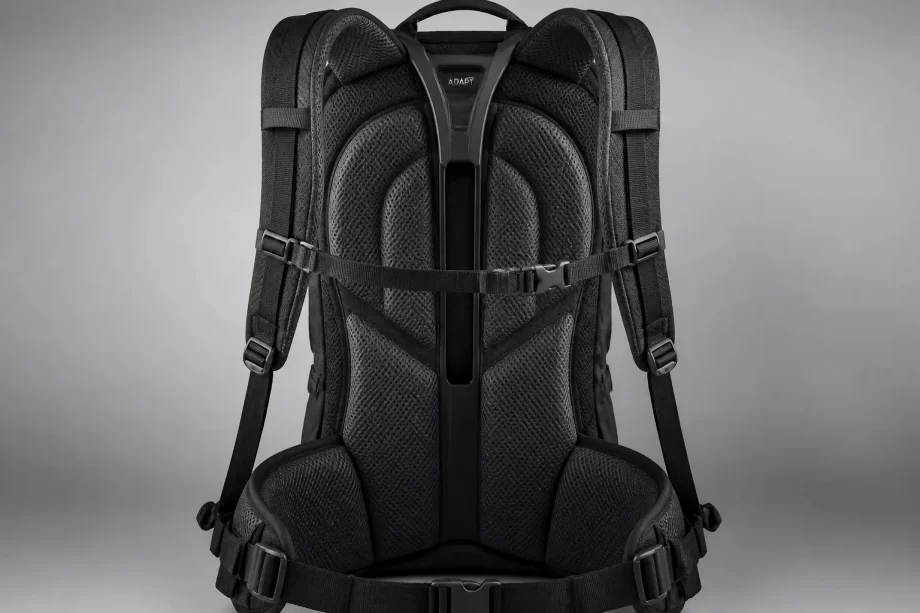
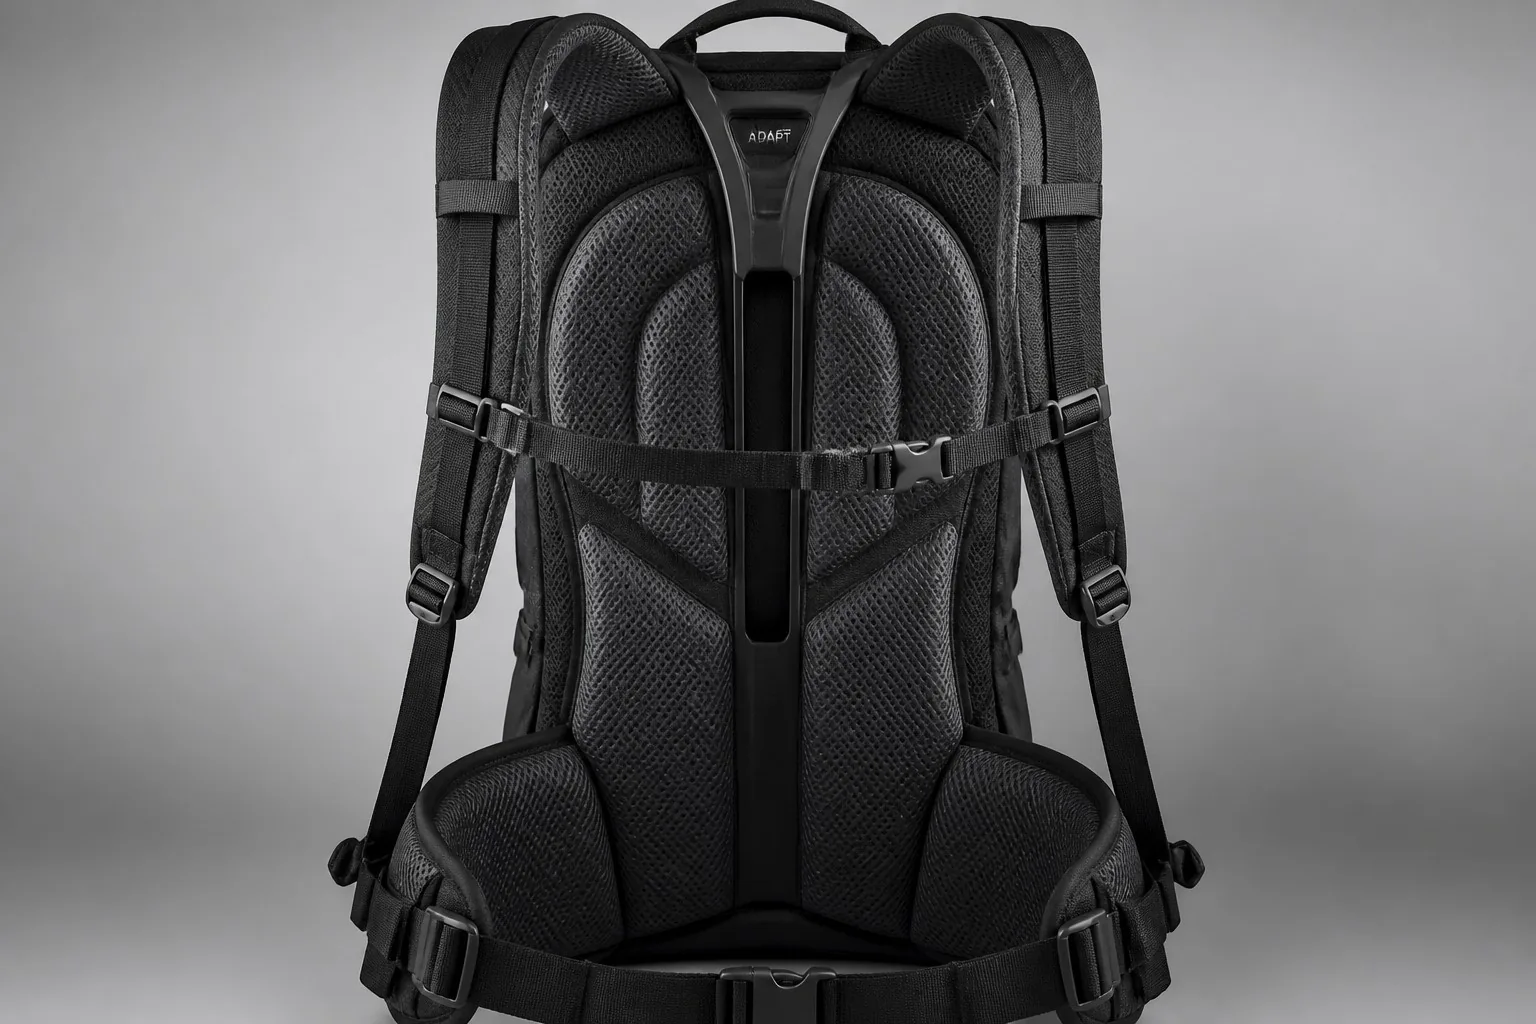
The back panel is the interface between the pack and the wearer’s back. It has three jobs: distribute load evenly, keep the pack stable against the body, and manage heat and sweat.
Load Distribution: The Frame and Contour
- Frame systems — an internal frame (aluminum stays or a molded frame sheet) stiffens the pack and transfers load from the shoulders down to the hip belt. Without a frame, the pack bulges and the load presses unevenly.
- Contoured panels — the back panel is contoured to match the natural curves of the back, with relief channels along the spine so the pack does not press directly on the vertebrae.
- Torso length adjustment — people have different torso lengths; adjustable torso systems (sliding shoulder yoke or adjustable hip belt position) let the pack fit different bodies.
Ventilation: The Sweat Problem
A pack pressed flat against the back traps heat and sweat. The solutions:
| Ventilation system | How it works | Trade-off |
|---|---|---|
| Air-mesh over channels | Mesh suspended over foam channels with air gaps | Excellent airflow; adds depth and cost |
| Molded channel panels | Foam with deep molded channels | Good airflow; less suspension |
| Perforated foam | Holes punched through padding | Moderate airflow; lower cost |
| Flat foam | Simple flat padding | Poor airflow; cheapest |
Manufacturer’s note: The ventilated back panel is one of the hardest sub-assemblies to manufacture well. The mesh must be tensioned correctly over the channels, the foam must be positioned precisely, and the whole unit must attach to the pack without gaps. A sloppy assembly produces a panel that looks ventilated in photos and performs like flat foam in use.
The Manufacturing Reality of Back Panels
A quality back panel is a layered assembly:
- Outer mesh (breathable, durable)
- Channeled foam (air gaps, load distribution)
- Frame channels (pockets for aluminum stays or frame sheet)
- Inner lining (contact with pack interior)
- Attachment points (straps, load-lifter anchors, hip belt mounting)
Each layer has its own material spec and placement tolerance. The panel is typically built as a sub-assembly, then attached to the pack body — a process that requires precise alignment to avoid lumpy panels and misaligned anchors.
Shoulder Straps: The Secondary Load Path
Shoulder straps are the most visible ergonomic feature — and the most commonly misunderstood. The goal is not maximum padding; it is correct shape, placement, and load transfer.
The S-Curve Design
Anatomical shoulder straps are S-curved to follow the shape of the shoulders and chest:
- The curve wraps the shoulder — a straight strap slides off the shoulder; an S-curve stays in place.
- The strap edges roll outward — the edges of a quality strap are rolled or rounded so they do not dig into the neck and arms.
- The strap widens at the shoulder — more width at the contact point spreads the load; the strap tapers toward the pack.
Strap Dimensions That Matter
| Parameter | Typical range | Effect |
|---|---|---|
| Width at shoulder | 60–100 mm | Load distribution on the shoulder |
| Padding thickness | 10–20 mm | Comfort and pressure reduction |
| Strap length (adjustable) | 400–900 mm | Fit across torso sizes |
| Strap spacing (top) | 80–150 mm | Neck clearance; must not pinch |
| Strap spacing (bottom) | 100–200 mm | Chest/underarm clearance |
The Load-Lifter Straps
Load-lifter straps connect the top of the shoulder straps to the top of the pack. Their function is often misunderstood: they pull the top of the pack toward the body, keeping the load close to the center of gravity and transferring some load from the shoulders to the hips.
- Placement — the load-lifter anchor on the strap must sit at roughly 45° above the shoulder for correct function.
- Adjustment — the straps must be adjustable in length (typically 150–300 mm of range).
- Manufacturing — the anchors must be reinforced (bar-tacked, load-tested); this is a high-stress attachment point.
Shoulder Strap Manufacturing
The strap is a layered construction:
- Outer fabric (durable face)
- Padding foam (multiple densities: firmer at the top, softer at contact)
- Inner lining (breathable mesh)
- Load-lifter webbing anchors (sewn in at the correct angle)
- Edge stitching (locks the layers, rolls the edges)
The manufacturing challenge is consistency: each strap must have the same curve, the same padding distribution, and the same anchor placement. This requires jigs and templates, not freehand sewing.
The Hip Belt: The Real Load Carrier
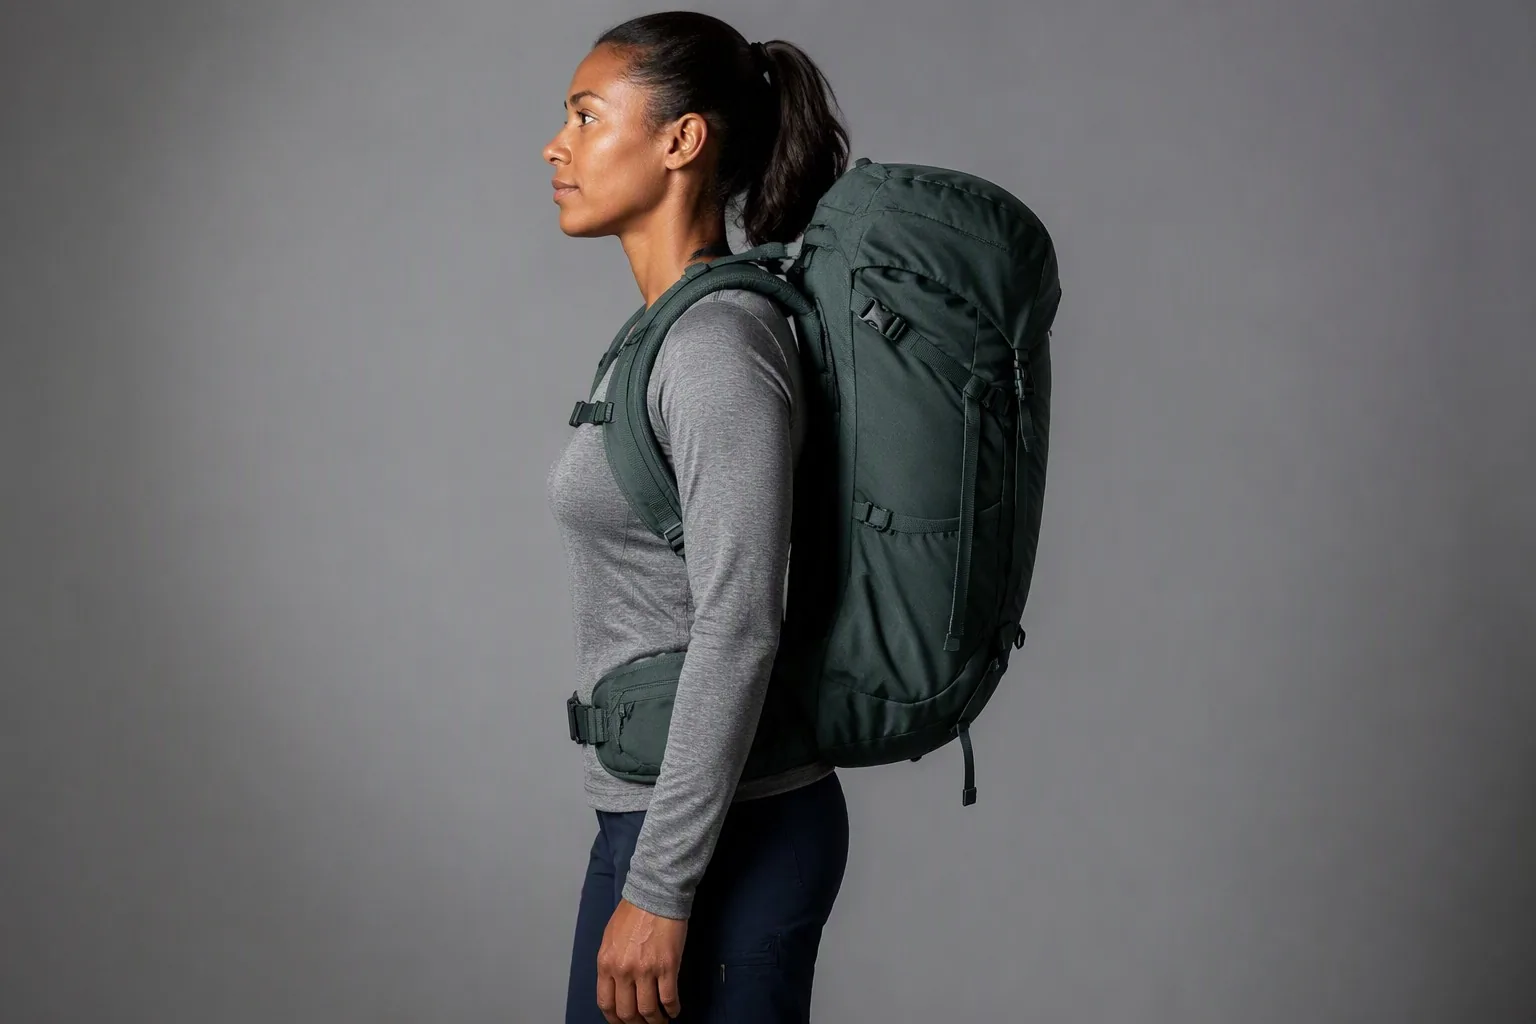
For any pack designed to carry more than ~7–10 kg, the hip belt is the most important ergonomic component. It transfers the majority of the load to the pelvis, where the body carries weight efficiently.
How the Hip Belt Works
- Position — the belt wraps the pelvis at the iliac crest (the top of the hip bones), where the load can be borne by the strongest structure in the body.
- Load transfer — the belt is connected to the pack frame; the frame transfers shoulder load down to the belt, and the belt transfers it to the pelvis.
- Padding — the belt padding distributes pressure over the hip area; too thin and it digs in, too soft and it collapses.
- Fit — the belt must be adjustable (typically 65–120 cm range) to fit different waist sizes.
The Padding Question
| Padding type | Character | Use |
|---|---|---|
| Dense EVA foam | Firm, holds shape, transfers load | Hiking/technical packs |
| Multi-density foam | Firmer core, softer contact layer | Premium packs, comfort focus |
| Memory foam | Soft, conforming | Fashion/commuter packs |
| Minimal padding | Thin foam or none | Light packs, urban use |
Manufacturer’s note: A common specification error is using the same foam for the hip belt and the back panel. The hip belt needs denser foam that holds its shape under load; the back panel needs foam with better airflow properties. They are different materials with different jobs — specify them separately.
The Hip Belt Manufacturing Challenge
The hip belt is a complex sub-assembly:
- Outer shell fabric
- Dense padding foam (contoured)
- Frame attachment (the belt connects to the frame system)
- Adjustment webbing and buckles
- Load-lifter strap anchors (for the shoulder straps)
- Stabilizer straps (pull the belt snug)
The critical manufacturing point is the frame connection: the belt must transfer load from the frame to the pelvis with zero play. A loose connection destroys the ergonomic function no matter how good the padding is.
The Sternum Strap: Small Part, Big Effect
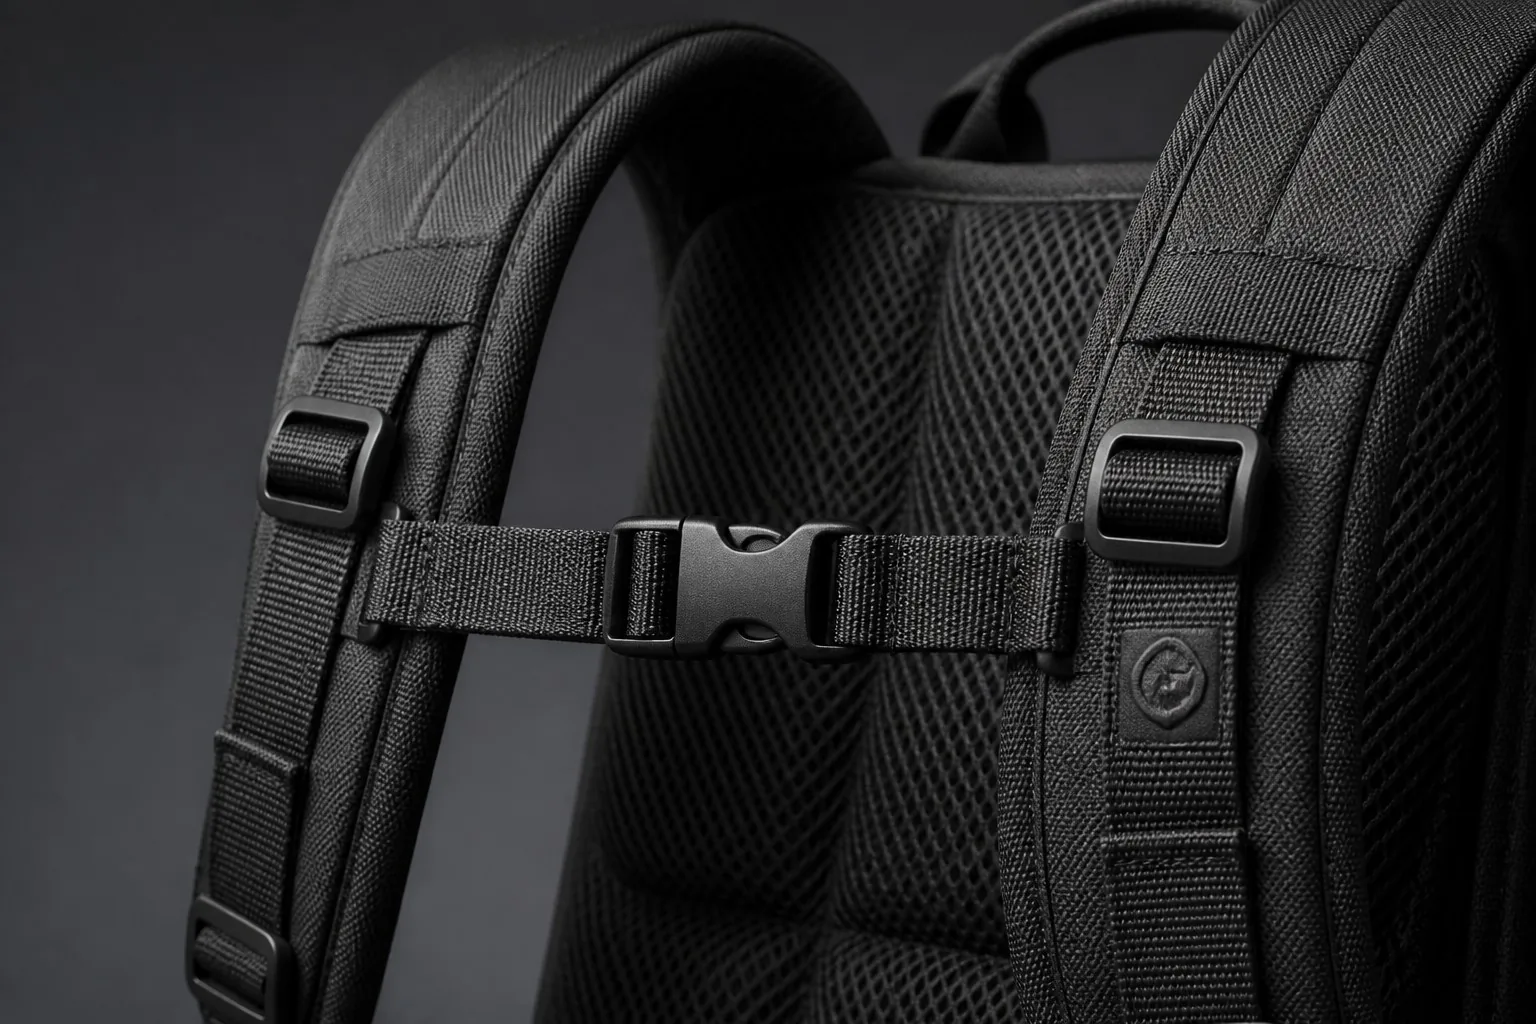
The sternum (chest) strap is a small component with a disproportionately large ergonomic effect. It connects the two shoulder straps across the chest.
What It Does
- Keeps straps in place — prevents the straps from sliding off the shoulders.
- Redistributes load — pulls the straps slightly toward the chest, reducing pressure on the shoulders.
- Stabilizes the pack — reduces side-to-side swing while walking or running.
Design Details
- Height adjustment — the strap should slide along the shoulder straps (on webbing rails) so the wearer can position it at the most comfortable height.
- Length adjustment — typically 200–400 mm of adjustment range.
- Buckle — a quality slide-release buckle (or magnetic closure on premium packs).
- Elastic segment — many designs include a small elastic section so the strap flexes with breathing.
The Manufacturing Detail
The sternum strap seems simple, but quality issues are common: the rail system must slide smoothly without catching, the buckle must click securely, and the attachment must hold under load without slipping. Test the sternum strap mechanism on samples — it is a frequent source of field complaints.
Load Management: Keeping the Load Close and Stable
Ergonomics is not only about the straps and panel — it is about how the pack behaves under load.
The Center of Gravity Principle
- A pack’s load should sit close to the wearer’s back, not hanging far behind it.
- The closer the load to the body, the less leverage it exerts on the shoulders and spine.
- Heavy items belong at the top of the pack, close to the back; light items at the bottom and away from the back.
Compression Straps
Compression straps pull the pack sides together, stabilizing the load:
- Side compression — reduces the pack’s volume and keeps items from shifting.
- Vertical compression — pulls the top of the pack down, keeping the load close to the body.
- Stabilizer straps — at the bottom, they pull the pack against the hips.
Stability in Motion
A pack that swings and shifts with each step forces the wearer to compensate constantly — a hidden ergonomic cost. Design features that improve stability:
- Frame stiffness (reduces pack deformation)
- Hip belt fit (anchors the pack to the body)
- Compression systems (keep the load compact)
- Balanced weight distribution (internal organization guides heavy items to the right position)
Fit and Adjustability: One Design, Many Bodies
No single pack shape fits everyone. The design must accommodate a range of body sizes through adjustability.
The Sizing Systems
| System | How it works | Used for |
|---|---|---|
| Fixed size | One pack size, one torso range | School packs, fashion packs |
| Adjustable torso | Sliding yoke or adjustable hip position | Commuter and hiking packs |
| Multiple sizes | S, M, L variants (different torso lengths) | Technical hiking packs |
The Adjustability Checklist
- Torso length adjustment range (typically 10–15 cm on adjustable systems)
- Shoulder strap length range (accommodate different chest sizes)
- Hip belt range (multiple sizes or wide adjustment range)
- Sternum strap height range
- Load-lifter adjustment range
Fit Verification in Production
A design that fits in theory must be verified on real bodies:
- Fit testing — try the pack on testers of different body sizes and collect feedback.
- Pressure mapping — measure pressure distribution at shoulders, back, and hips on a loaded pack.
- Motion testing — walk, run, and bend while wearing the loaded pack; check stability and comfort.
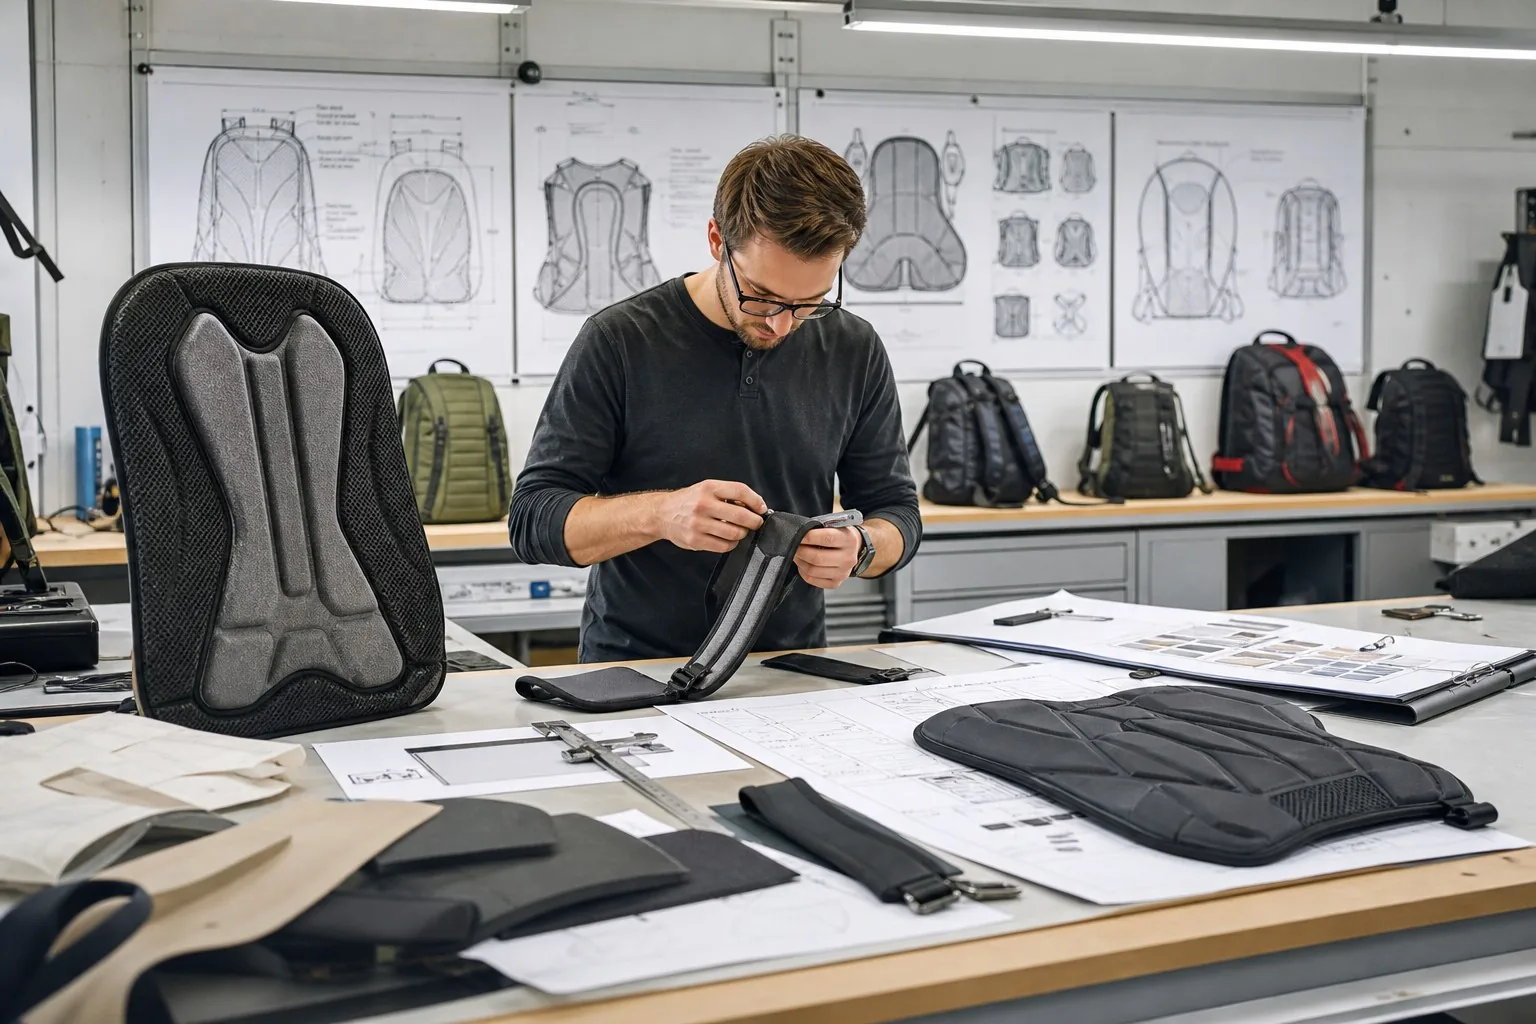
From Ergonomics to Manufacturing: The Production Perspective
Ergonomic designs are often complex to build, and the manufacturing details determine whether the ergonomics survive production.
The Manufacturing Challenges
| Ergonomic feature | Manufacturing challenge |
|---|---|
| Contoured back panel | Multi-layer assembly, precise foam placement |
| S-curved straps | Jig-dependent sewing, consistent curves |
| Hip belt frame connection | Zero-play attachment, precise alignment |
| Torso adjustment | Sliding mechanisms that work smoothly |
| Air-mesh ventilation | Tensioned mesh mounting |
| Multiple foam densities | Material management, correct foam per position |
How to Keep Ergonomics Alive on the Line
- Pattern engineering — ergonomic curves must be translated into patterns that sew correctly at production speed.
- Jigs and templates — strap curves, hip belt contours, and anchor placements need physical guides for consistency.
- First-piece inspection — every ergonomic sub-assembly checked against the spec before full production.
- Material control — foam densities and placements verified; wrong foam in the hip belt is an invisible defect that ruins comfort.
- Fit sampling — pull random units from production and fit-test them; the line drifts, and fit drifts with it.
Manufacturer’s note: The gap between an ergonomic prototype and a production pack is where most ergonomic quality is lost. The prototype is hand-built by skilled people with unlimited time. Production is operators sewing at speed. Bridging that gap requires jigs, first-piece checks, and fit sampling — the same discipline as any other quality system, applied to comfort.
The Cost of Ergonomic Features
| Feature | Approximate cost impact per pack |
|---|---|
| Contoured ventilated back panel | +$2–6 |
| S-curved multi-density straps | +$1–3 |
| Hip belt system (full) | +$3–8 |
| Torso adjustment system | +$2–5 |
| Compression and stabilizer straps | +$1–3 |
| Fit testing program | +$0.2–0.5 (amortized) |
The total for a fully ergonomic pack is roughly $8–25 over a basic pack — a cost that translates directly into comfort, and comfort translates into brand loyalty and fewer returns.
Ergonomics by Product Category: Different Jobs, Different Priorities
Ergonomics is not one-size-fits-all. Each product category has different ergonomic priorities:
| Category | Ergonomic priority | Key features |
|---|---|---|
| School packs | Light weight, simple comfort | Padded straps, basic back panel, correct sizing |
| Laptop/commuter | Urban walking comfort | Ventilated back, good strap padding, stability |
| Hiking packs | Load transfer over distance | Full hip belt, frame, torso adjustment |
| Tactical packs | Stability and modularity | Sturdy frame, load-bearing hip belt, MOLLE integration |
| Fashion packs | Aesthetics + basic comfort | Subtle ergonomics, adequate padding |
| Children’s packs | Correct sizing, light weight | Scaled proportions, minimal load, safety |
The Child-Specific Considerations
Children’s packs need special ergonomic attention:
- Proportions scaled to children’s bodies (not just smaller versions of adult packs)
- Lighter maximum loads (ergonomics prevent overload)
- Soft, wide straps (delicate shoulders)
- Safety features (no sharp hardware, breakaway sternum straps)
Specifying Ergonomics: The Buyer’s Checklist
When you write a specification for an ergonomic pack, cover these points:
The Ergonomics Specification Template
| Parameter | Example |
|---|---|
| Back panel | Ventilated air-mesh, contoured with spine channel, torso range 40–55 cm |
| Shoulder straps | S-curved, 80 mm wide at shoulder, 15 mm padding, load-lifter anchors |
| Hip belt | Full padded belt, range 70–120 cm, frame-connected, load-transfer spec |
| Sternum strap | Sliding, adjustable 200–400 mm, quality buckle |
| Frame | Aluminum stays or molded sheet, stiffness spec |
| Compression | Side + vertical compression straps |
| Fit testing | Fit on 5+ body sizes, pressure mapping report |
The Questions to Ask a Factory
- How do you build the ventilated back panel, and how is the mesh tensioned?
- What foam densities go in the hip belt and back panel — and how do you control them?
- How is the hip belt connected to the frame, and how do you verify zero-play?
- Do you use jigs for strap curves and anchor placement?
- Do you fit-test production units, and can I see the fit records?
Measuring Ergonomics: Pressure Mapping and Fit Testing
Ergonomics is a measurable science, and the tools for measuring it are more accessible than most buyers realize. If a factory cannot show you ergonomic measurement data, the ergonomics are unverified.
Pressure Mapping
Pressure mapping systems (sensor mats placed between the body and the pack) measure the pressure distribution at the shoulders, back, and hips while the pack is loaded. The output is a color map showing pressure hot spots.
| Measurement | What it reveals | Target |
|---|---|---|
| Shoulder pressure | Whether the straps concentrate pressure | Even distribution, no hot spots |
| Back pressure | Whether the panel presses on the spine | Relief along the spine channel |
| Hip pressure | Whether the hip belt is doing the work | High hip engagement, low shoulder load |
| Strap edge pressure | Whether strap edges dig in | No edge pressure lines |
The Fit Test Protocol
A professional fit test protocol:
- Tester selection — 5+ testers covering the target body-size range (different torso lengths, waist sizes, chest sizes).
- Loading — packs loaded to rated weight (e.g., 10–15 kg for a commuter pack).
- Static assessment — pressure mapping and visual fit check while standing.
- Dynamic assessment — walking, stair climbing, and bending while wearing the loaded pack.
- Feedback capture — structured comfort ratings per body zone and per activity.
- Iteration — the data drives design changes, and the test repeats.
Manufacturer’s note: Fit testing is not a one-time design event — it belongs in the production cycle. We fit-test every new style at the prototype stage, and we pull random production units for fit checks. The line drifts, foam changes, and jigs wear; fit testing is the check that catches ergonomic drift before customers do.
The Ergonomic Return on Investment
The business case for ergonomic investment is clear:
- Fewer returns — discomfort is a leading cause of backpack returns; fixing the load path reduces them.
- Higher price acceptance — buyers pay more for packs that carry well; comfort is a premium differentiator.
- Brand loyalty — a comfortable pack is recommended; an uncomfortable one generates complaints.
- Lower warranty costs — ergonomic failures (broken straps under load, seam failures at anchors) are often load-path failures, preventable by correct design.
Common Ergonomics Mistakes in Backpack Design
Learning from the mistakes of others is cheaper than making them. These are the ergonomic errors we see most often — and how to avoid them.
Mistake 1: Padding as a Substitute for Load Transfer
Adding foam to a pack that does not transfer load to the hips does not fix the problem — it just makes a heavy pack heavier. The load path must be designed first (frame, hip belt, strap geometry), and padding applied where the load path needs pressure relief.
Mistake 2: Designing the Straps, Then Attaching Them
Shoulder strap placement is often an afterthought — straps sewn onto the pack wherever convenient. The strap position relative to the pack’s center of gravity determines the whole feel of the carry. Strap geometry must be designed with the load distribution in mind, not as an attachment detail.
Mistake 3: One Size for Everyone
A single-size pack that fits a 160 cm person and a 190 cm person equally well is a design fantasy. Without adjustability or multiple sizes, most wearers get a poor fit. Define the target size range and provide adjustability or sizing to cover it.
Mistake 4: Ignoring Ventilation
A pack that feels fine in a 10-minute fitting becomes a sweat trap on a 40-minute commute. Ventilation is not a premium feature — it is a comfort requirement for any pack worn for more than a few minutes. Design the airflow in from the start.
Mistake 5: Skipping Fit Testing
The most confident claims of “ergonomic design” without fit-test data are just claims. Fit testing with pressure mapping and real testers is the only way to verify that the design actually works on bodies. Skip it, and you ship unverified comfort.
Mistake 6: Letting Ergonomics Drift in Production
Even a perfect ergonomic design degrades in production if materials are substituted and jigs are not used. The foam in the hip belt gets “upgraded” to a softer type, the strap curve flattens without the jig, the mesh is mounted loose. Verify with first-piece checks and fit sampling, or the ergonomics disappear.
FAQ
What is the most important ergonomic feature in a backpack?
For packs over ~7–10 kg, the hip belt with a frame system is the most important — it transfers load to the pelvis, where the body carries weight efficiently. For lighter packs, shoulder strap shape and back panel contour matter most. Match the feature to the load.
Why is my backpack uncomfortable even with thick padding?
Thick padding is not the same as good ergonomics. Discomfort usually comes from poor load distribution: load not transferred to the hips, straps positioned incorrectly, a flat panel pressing on the spine, or a pack that shifts while walking. Fix the load path, not just the padding.
What is the ideal shoulder-to-hip load split?
For a well-designed hiking pack, roughly 20–30% on the shoulders and 70–80% on the hips. For commuter packs without a full hip belt, the shoulders carry more (70–80%). The design goal is to move load to the hips as the weight increases.
Do I need a torso adjustment system?
If the pack serves a wide range of body sizes (commuter, hiking), adjustable torso length is valuable. If the pack is a single-size fashion or school product, a fixed size matched to the target demographic is acceptable. Adjustability adds cost and complexity.
How can I verify that ergonomics survive production?
Require fit testing on production samples, pressure mapping data on the prototype, and first-piece inspection of ergonomic sub-assemblies (back panel, straps, hip belt). The gap between prototype and production is where ergonomic quality is lost.
How much does a fully ergonomic design add to the cost?
Typically $8–25 per pack over a basic design (ventilated back panel, S-curved straps, hip belt, torso adjustment, compression system). The cost translates into comfort, fewer returns, and stronger brand loyalty.
The Future of Backpack Ergonomics
Ergonomics is not a static field — it evolves with materials, measurement tools, and user expectations.
The Trends to Watch
- Sensor-based fit — pressure-mapping and motion-capture tools are becoming affordable enough for mid-size manufacturers, bringing lab-grade ergonomic verification within reach.
- Sustainable materials — recycled and bio-based foams and fabrics must now meet ergonomic performance, not just environmental claims; the challenge is maintaining density and durability in eco-friendly formulations.
- Modular and adaptive systems — packs with interchangeable back panels, adjustable frames, and modular strap systems serve a wider range of bodies and uses from a single product platform.
- Health-aware design — growing awareness of postural health is pushing manufacturers to design for spine-friendly carrying at every price point, not just in premium hiking gear.
The Timeless Principle
Beneath the trends, the principle does not change: the pack must fit the human, not the other way around. The hips carry, the shoulders guide, the back breathes, and the load stays close and stable. Manufacturers who honor that principle — and verify it with data — will keep winning, whatever the next material or measurement tool brings.
Conclusion
Ergonomics is the core function of a backpack — the product exists to be carried, and how well it is carried determines its value. The human load-carrying system is well understood: the hips are the strongest carriers, the shoulders fatigue fast, and the spine dislikes compression. Great pack design works with that system, transferring load to the hips, contouring the back panel, shaping the straps, and keeping the load close and stable.
For manufacturers, the lesson is that ergonomics is a manufacturing discipline, not a sketch. The back panel, straps, and hip belt are precision sub-assemblies with material, placement, and alignment requirements. Jigs, first-piece inspection, material control, and fit sampling are what keep ergonomic quality alive from prototype to production.
For buyers, the practical path is to specify ergonomics explicitly — load distribution targets, back panel construction, strap dimensions, hip belt spec, and fit testing requirements — and to verify with samples and fit records. A pack that fits well and carries well is not just more comfortable; it is a product people keep, recommend, and return to.
If you are developing a backpack line, our team can walk you through our ergonomic design and manufacturing process, share our fit-testing program, and produce samples you can load up and wear before committing to production.