Fabric Cutting and Yield Optimization for Backpacks
Fabric Cutting and Yield Optimization for Backpacks
Fabric is the largest cost in most backpacks — typically half of the total production cost. Yet the cutting room, where that fabric turns into panels, is the least examined part of most factories.
The difference between a good cutting room and a poor one is measurable: a 5% yield difference on a 1,000-unit order of a standard commuter pack is worth hundreds of dollars in fabric alone. Across a season, it decides whether a style makes margin or loses it.
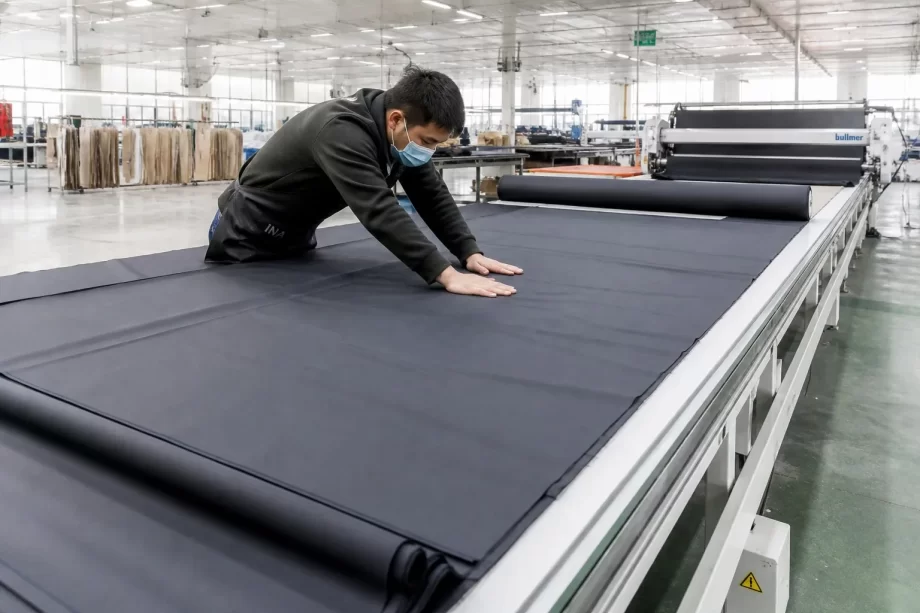
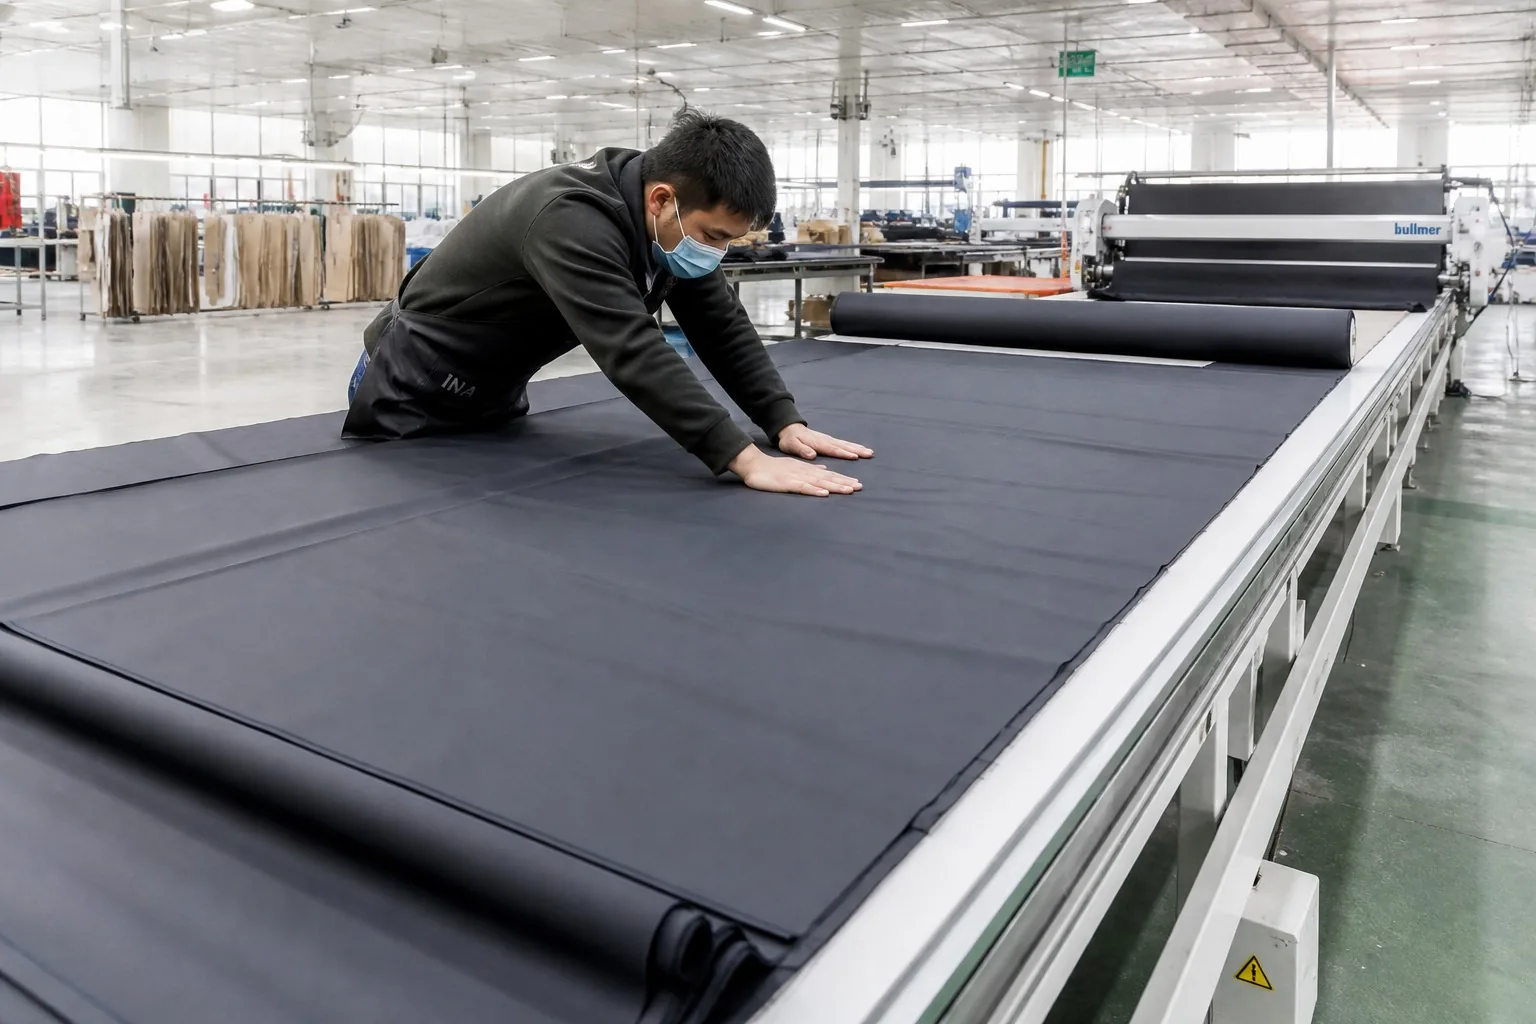
Spreading fabric layers on cutting table
This guide explains how professional cutting rooms work, what drives yield, and what buyers should check to make sure their fabric budget is not leaking away.
Cutting is the first manufacturing step and the largest cost driver. Errors here multiply through every later stage.
The Fabric Cost Share
Cost component
Share of pack cost
Fabric
45–60%
Hardware and trims
10–15%
Labor
15–25%
Overhead and margin
10–20%
The Yield Lever
Yield is the usable fabric percentage from every roll.
Yield level
Meaning
Below 70%
Poor nesting, heavy waste
75–82%
Typical for complex packs
82–88%
Good nesting, standard shapes
Above 88%
Excellent — simple geometry
Why Errors Multiply
A cutting error destroys every piece in that bundle.
Error
Consequence
Wrong size cut
Whole bundle unusable
Off-grain panel
Distorted assembly
Damaged layer
Multiple pieces lost
Mislabeled bundle
Rework downstream
The Cutting Process
A cutting room runs on a sequence. Each stage protects the next.
Stage 1: Spreading
Fabric layers are spread flat on the cutting table before cutting.
Spread type
Use
Single layer
Large or directional panels
Multi-layer
Small standard panels
Face-to-face
Matching pile fabrics
Face-to-back
Avoids shade difference
Stage 2: Nesting
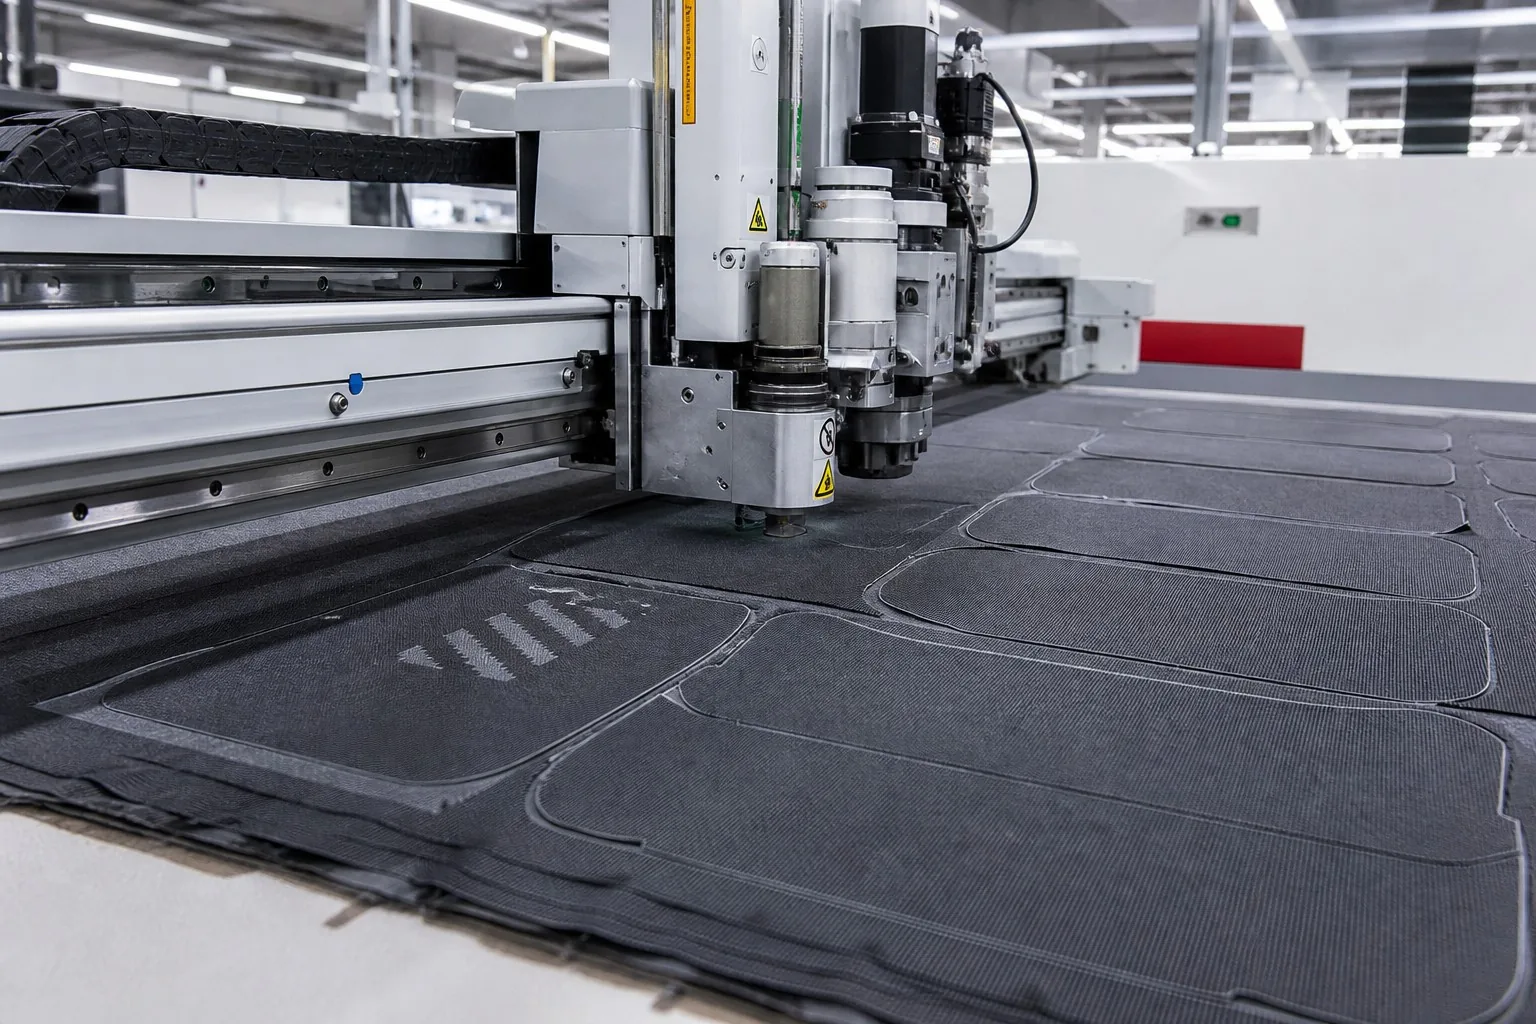
Pattern pieces are arranged to minimize wasted fabric between them.
Computerized cutting machine cutting panels
Nesting factor
Effect on yield
Piece interlock
Higher yield
Grain direction
Limits arrangement
Shade matching
Reduces options
Repeat pattern
Needs alignment
Stage 3: Cutting
The marker is cut through the spread layers.
Cut method
Precision
Speed
Hand scissors
Low
Slow
Straight knife
Medium
Fast
Round knife
Medium
Fast
Band knife
High
Medium
CNC cutter
Very high
Fast
Laser
Very high
Slow
Stage 4: Bundling
Cut pieces are counted, tied, and labeled for the sewing line.
Bundle element
Purpose
Bundle ticket
Style, size, piece list
Piece count
Line balancing
Color code
Shade grouping
Direction mark
Grain alignment
Nesting and Yield Math
Yield is not luck — it is engineered. The math is simple; the optimization is not.
The Yield Formula
Formula element
Meaning
Total fabric used
Roll meters consumed
Usable panels
Pieces that pass QC
Yield %
Usable area ÷ total area
The Yield Drivers
Driver
Impact
Piece shape
Complex curves waste more
Fabric width
Standard 150 cm optimizes
Repeat alignment
Costs 2–6%
Directional fabric
Napped or one-way prints
Bundle size
Larger spreads, better nesting
The Software Advantage
Nesting software arranges pieces automatically and finds better layouts than manual marking.
Capability
Manual
Software
Speed per marker
Hours
Minutes
Yield
Baseline
+3–8%
Multiple widths
Trial and error
Automatic
Revision handling
New marker
Instant
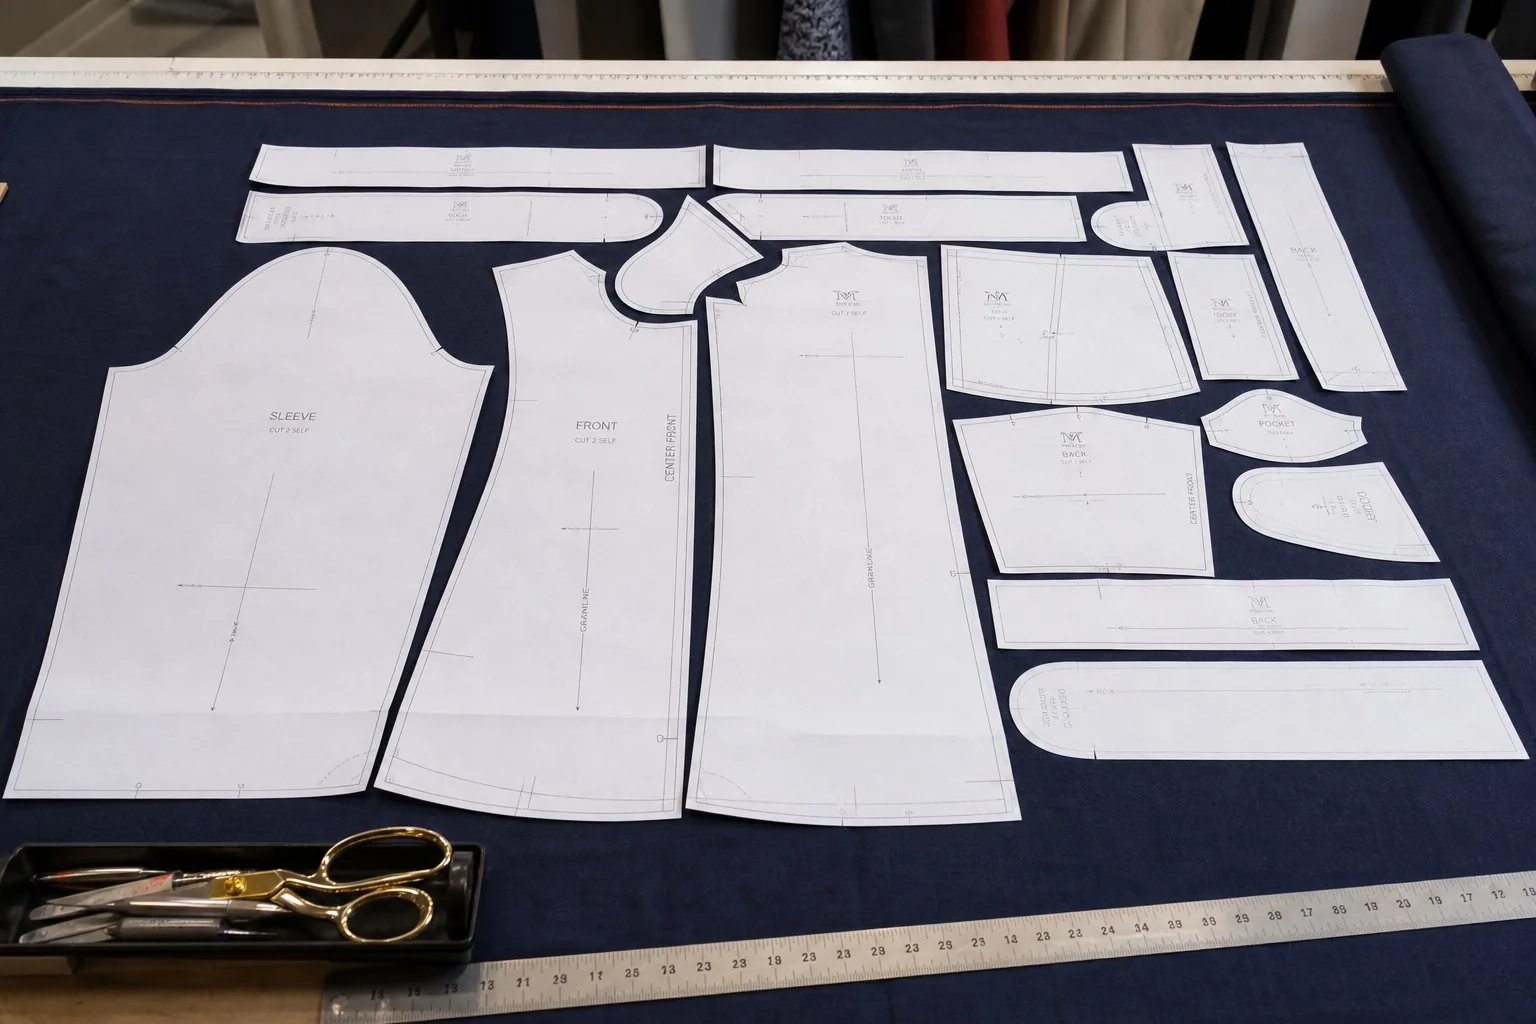
Pattern marker sheets laid over fabric
Pattern Engineering for Yield
Good yield starts in the pattern, before any fabric is spread.
Design for Nesting
Pattern choice
Yield effect
Straight seams
Higher yield
Interlocking panels
Higher yield
Mirrored pairs
Pair on fabric
Rounded details
Lower yield
Small separate parts
Nest in gaps
The Directional Problem
Fabric type
Directional constraint
Plain weave
None
One-way print
All pieces same direction
Napped fabric
All pieces one way
Stripe
Pattern alignment
Pile
Direction for shading
The Panel Consolidation Rule
Fewer, larger panels beat many small ones.
Panel count
Seam length
Fabric use
Few large
Shorter total
Higher yield
Many small
Longer total
Lower yield
Cutting Methods Compared
The method choice balances precision, speed, and cost.
The Method Table
Method
Setup cost
Precision
Layer height
Best for
Hand
None
Low
1
Sampling
Straight knife
Low
Medium
High
Bulk
Round knife
Low
Low
High
Straight lines
Band knife
Medium
High
Low-mid
Detailed parts
CNC
High
Very high
Medium
Complex markers
Laser
Medium
Very high
1
Coated, sealed edges
The Machine Decision
Factory size
Typical choice
Small (sampling)
Hand and straight knife
Medium
Straight knife + band knife
Large
CNC cutter
Specialized
Laser for technical fabrics
The Cutting Room Flags
Signals of a healthy cutting room:
Good signal
Poor signal
Clean table
Fabric scraps everywhere
Calibrated machines
Dull blades
Labeled bundles
Unmarked piles
Yield records
No measurements
Trained markers
Freehand cutting
Waste Management
Waste is inevitable — but controllable. Professional rooms track it and price it.
The Waste Categories
Waste type
Source
Recovery
End of roll
Short remnants
Small parts
Nesting waste
Between pieces
None — recycle
Edge trims
Selvedge removal
None
Defective panels
Fabric faults
Claim from mill
Spreading waste
Overlay errors
Minimize
The Remnant Strategy
Remnant size
Use
Over 1 m
Future small orders
0.5–1 m
Pockets and trims
Under 0.5 m
Scrap or recycling
Selvedge
Straps if wide enough
The Fault Handling
Fault type
Action
Mill defect
Claim credit from supplier
Cutting damage
Cut replacement panels
Spreading damage
Track and retrain
Quality in Cutting
Cutting quality sets the ceiling for assembly quality.
The Cutting Defects
Defect
Cause
Detection
Fused edges
Dull blade friction
Visual, touch
Frayed edges
Wrong blade
Visual
Off-grain parts
Poor spreading
Grain check
Notched pieces
Slipped marker
Measure
Shade bands
Mixed dye lots
Color check
Oversize/small
Marker error
First-piece
The First-Piece Check
Check
Standard
Dimensions
Pattern spec ±2 mm
Grain
Marked direction
Notch alignment
Matches pattern
Edge condition
Clean, no fusion
Color
Matches approved lot
The Bundle Inspection
Rule
Purpose
Count pieces
No short bundles
Match ticket
Right style and size
Group shades
No mixed lots
Direction mark
Sewing reference
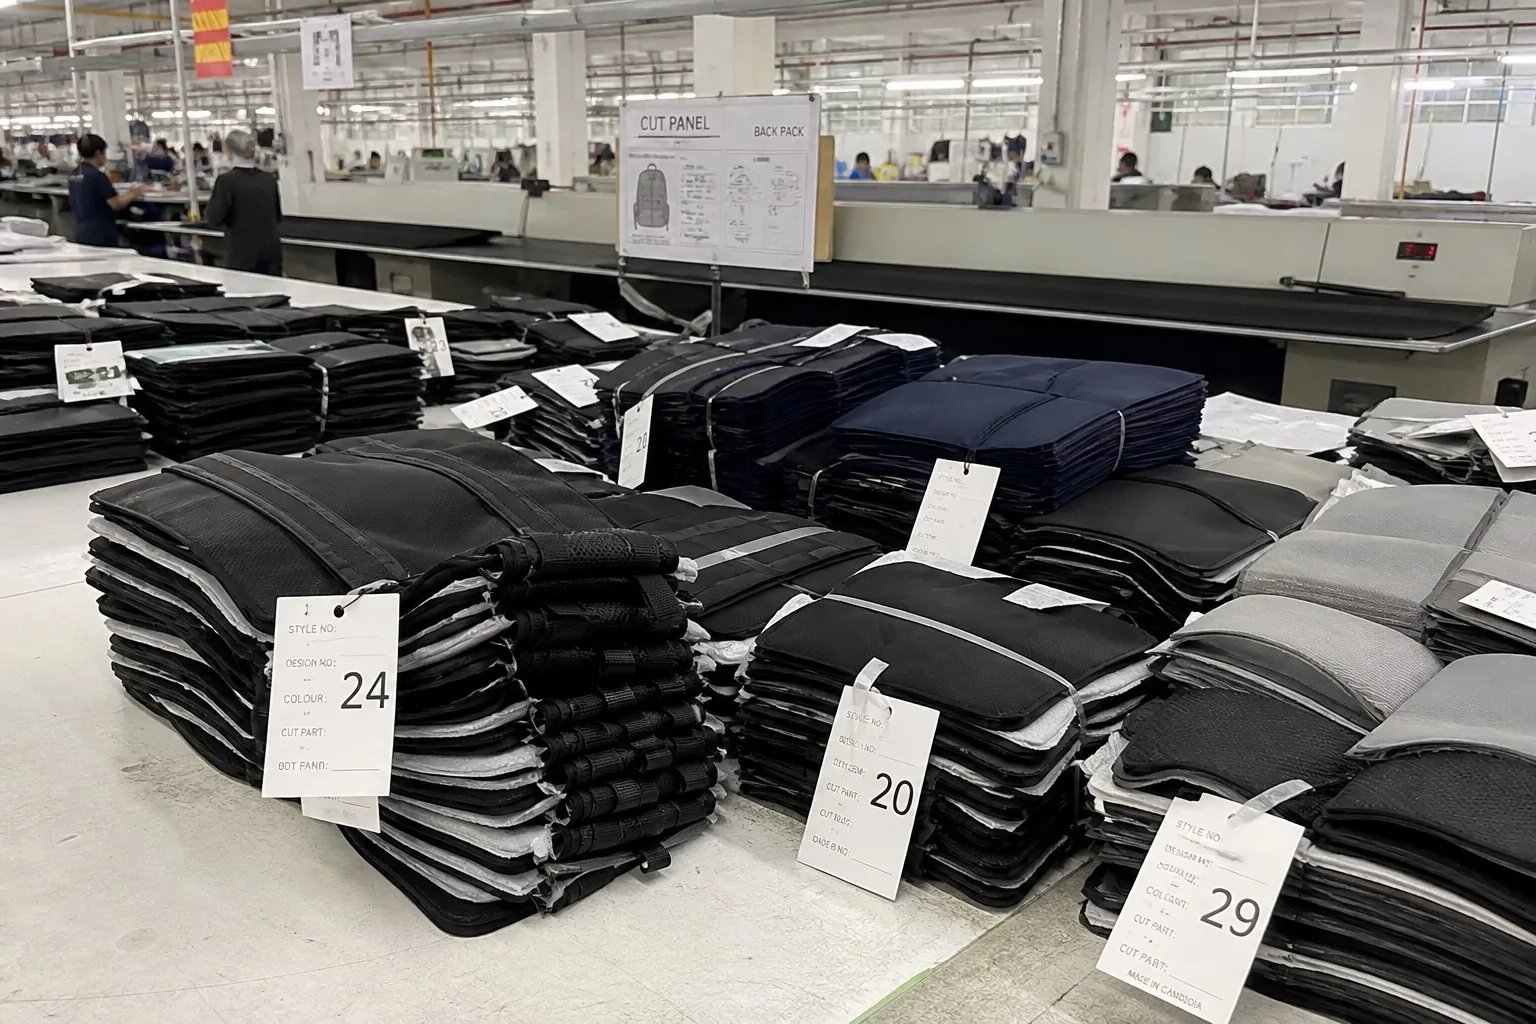
Cut panels bundled and labeled
Yield in the Quote
Buyers see yield through fabric consumption in the quote.
The Consumption Number
The quote states fabric per unit — usually meters per pack.
Consumption
Meaning
Theoretical
Pattern area only
Realistic
Pattern + 3–5% waste
Quoted
Realistic + buffer
Actual
Invoice from cutting
The Questions to Ask
Question
What it reveals
“What is your yield for this style?”
Efficiency honesty
“May we see the marker?”
Nesting quality
“What width did you quote?”
Fabric spec check
“How do you handle defects?”
Quality control
“Can you share cutting records?”
Data discipline
The Grade Rejection
Order fabric by grade. Mill-grade rolls arrive with accepted fault rates.
Grade
Fault allowance
Price
A
0–2%
Baseline
B
2–5%
Lower
C
Above 5%
Much lower
Cutting Room Management
The room runs on planning, records, and maintenance.
The Production Planning
Factor
Planning rule
Fabric arrival
Cut within 48 hours of inspection
Order grouping
Same fabric together
Spreading plan
Match layers to order size
Cutting sequence
Panel needs of first line
The Records to Keep
Record
Purpose
Yield per marker
Continuous improvement
Fabric receipt
Mill claim evidence
Bundle log
Traceability
Machine maintenance
Consistent quality
Operator output
Training needs
The Maintenance Schedule
Machine
Interval
Straight knife
Daily sharpening
Band knife
Weekly blade check
CNC
Monthly calibration
Laser
Weekly optics clean
Fabric Inspection Before Cutting
Fabric arrives with hidden faults. Inspection before cutting decides whether faults become claims or finished defects.
The 4-Point System
The textile industry grades fabric with a points-per-100-square-yards system.
Fault length
Points
Up to 3 inches
1
3–6 inches
2
6–9 inches
3
Over 9 inches
4
The Inspection Steps
Step
Check
1
Width measurement
2
Visual scan on light table
3
Fault marking and counting
4
Shade check across rolls
5
Grade decision
6
Claim or accept
The Grade Decision
Grade
Points per 100 sq yd
Action
A
0–15
Accept
B
16–40
Accept with claim
C
41+
Return or renegotiate
Manufacturer’s note: Cutting un-inspected fabric is gambling with the whole order. A fault in the middle of a spread ruins every layer above it. Inspect, grade, and claim before the knife moves.
Advanced Nesting Techniques
Standard nesting wastes fabric that advanced techniques recover.
Multi-Style Nesting
Different styles sharing fabric can nest together in one marker.
Style combination
Yield gain
Same fabric, different models
2–5%
Complementary sizes
2–4%
Filler parts in gaps
1–3%
The Pairing Rule
Mirrored panels nest together with less waste than identical panels.
Pair type
Nesting benefit
Mirror pairs
Interlock
Left-right parts
Shared cutting line
Same-size repeats
Clean rows
The Block Method
Block nesting groups common shapes — straps, bindings, small pockets — into one dense area.
Cutting for Special Materials
Each material family needs its own cutting approach.
The Material Rules
Material
Cutting rule
Coated nylon
Sharp blade, low heat
Ripstop
Follow grid alignment
Mesh
High layers, sharp knife
Canvas
Multi-layer OK
PU leather
Single layer, avoid marking
Waterproof film
Laser or cold knife
Reflective
Protect surface
The Leather Special Case
Real leather cannot nest like fabric — hides vary in shape and quality.
Leather factor
Cutting approach
Hide shape
Individual layout
Grain direction
Consistent within panels
Defect zones
Work around marks
Thickness variation
Sort by area
Sample Cutting vs Bulk Cutting
Sample rooms and bulk cutting rooms serve different masters.
The Sample Room
Sample cutting trait
Detail
Volume
1–5 units per style
Method
Hand or single layer
Speed
Fast turnaround
Precision
High care, low speed
The Bulk Room
Bulk cutting trait
Detail
Volume
Hundreds to thousands
Method
Multi-layer or CNC
Speed
High throughput
Precision
Consistent, machine-set
The Handoff Problem
A style cut well in sampling can fail in bulk if the marker changes.
Mismatch
Symptom
Different marker
Panel size drift
Different seam allowance
Assembly mismatch
Different fabric lot
Shade change
Approve the bulk marker separately — never assume the sample marker scales.
Yield Negotiation Between Buyer and Factory
Fabric consumption sits between buyer and factory like a price. Who owns the waste?
The Consumption Contract
Consumption model
How it works
Fixed quote
Factory prices waste into unit cost
Actual cost
Buyer pays consumed meters
Shared
Waste above target split
Target + claim
Buyer sets yield, factory claims faults
The Fair Target
Style complexity
Fair yield target
Simple tote
88%+
Standard backpack
82–86%
Complex multi-panel
78–82%
Directional fabric
72–78%
The Dispute Prevention
Practice
Effect
Agree yield upfront
No surprises
Inspect fabric together
Shared evidence
Track per order
Clear records
Review quarterly
Continuous trust
Cutting Room Layout and Workflow
The physical room shapes efficiency. A poor layout leaks time and fabric.
The Logical Flow
Zone
Function
Receiving
Fabric intake and inspection
Storage
Vertical roll racks
Spreading
Tables with measured ends
Cutting
Machines with rails
Bundling
Ticket station
Dispatch
To sewing lines
The Layout Principles
Principle
Benefit
Straight-line flow
No backtracking
Wide aisles
Roll transport
Clean storage
No fabric damage
Light tables
Fault visibility
Marked floors
Zone discipline
The Fabric Storage Rules
Rule
Why
Store rolls upright
Prevents creasing
Label rolls clearly
Lot traceability
Climate control
Avoid moisture damage
First-in-first-out
Consistent lots
Data and Continuous Improvement
Cutting rooms improve when they measure. The metrics are simple but revealing.
The Core Metrics
Metric
Formula
Yield %
Usable ÷ consumed
Waste %
100 − yield
Cut accuracy
Pieces within spec ÷ total
Claim rate
Fault meters ÷ received
Output per hour
Bundles per operator
The Improvement Loop
Step
Action
Measure
Record every order
Analyze
Find the waste source
Improve
Adjust marker or process
Standardize
Lock the best practice
Review
Monthly yield meeting
The Pareto Focus
Most waste comes from few causes.
Top cause share
Action
Nesting gaps
Better software or marker
Directional losses
Redesign or accept
Spread errors
Operator training
Fabric faults
Mill claims
Automation and Smart Cutting
The modern cutting room is increasingly digital.
The Connected Floor
Technology
Function
Digital markers
Software nesting
CNC cutters
Precise execution
Barcode bundles
Line tracking
Real-time yield
Live dashboards
ERP integration
Fabric orders matched
The Investment Case
Factor
Manual
Automated
Yield
78–84%
84–90%
Speed
Baseline
2–3×
Labor
High
Lower
Setup
Low
High
Data
None
Full
The Buyer Benefit
Digital cutting rooms give buyers evidence: marker files, yield reports, and consumption records.
Cutting Tools and Maintenance
Sharp tools are the first quality control in cutting. Dull blades fuse and fray fabric.
The Tool Set
Tool
Sharpening interval
Straight knife
Every shift
Round knife
Daily
Band knife
Twice daily
CNC blade
Per programmed cycle
Scissors
Weekly
The Dull Blade Symptoms
Symptom
Fabric effect
Fused edges
Heat melts nylon
Ragged cuts
Frayed seam edges
Slower feed
More pressure needed
Burning smell
Immediate stop needed
The Blade Care Rules
Rule
Why
Log sharpening
Consistent quality
Replace at wear limit
Prevent damage
Lubricate rails
Smooth operation
Store blades safely
Safety and edge life
Quality Systems in Cutting
Cutting quality is protected by systems, not luck.
The Checkpoint Chain
Checkpoint
Frequency
Gate
Fabric inspection
Each delivery
Grade decision
Marker approval
Each new style
Yield sign-off
Spreading check
Each spread
Alignment and tension
First-piece cut
Each marker run
Dimensions
Bundle audit
Daily
Counts and tickets
Yield review
Per order
Waste report
The Defect Escalation
Finding
Action
Single panel error
Replace panel
Repeating error
Stop and fix marker
Machine fault
Stop and maintain
Fabric fault
Claim from mill
The Golden Rules
Rule
Meaning
Measure, do not guess
Every bundle verified
Record everything
Evidence for claims
Fix the root cause
Stop repeat defects
Audit the marker
Prevent systematic error
The Cutting Room Team
The team makes the system work. Skills and training decide the outcome.
The Roles
Role
Responsibility
Marker maker
Nesting layout
Spreader
Layer alignment
Cutter
Knife operation
Inspector
Panel checks
Bundler
Tickets and counts
Supervisor
Output and quality
The Skill Development
Skill
Training method
Marker reading
Classroom + practice
Knife handling
Supervised production
Yield awareness
Show cost impact
Fault recognition
Sample library
Machine care
Maintenance routine
The Motivation Question
Operators who see fabric cost waste less fabric.
Practice
Effect
Show fabric prices
Cost awareness
Share yield targets
Team ownership
Reward good yield
Positive incentive
Feedback loops
Quick correction
Marker Making in Detail
The marker is the blueprint of fabric use. Its quality decides yield before cutting starts.
The Marker Process
Step
Action
1
Collect pattern pieces
2
Check grain directions
3
Choose fabric width
4
Arrange pieces digitally
5
Minimize gaps
6
Add cutting allowances
7
Print and verify
Manual vs Software Markers
Factor
Manual
Software
Yield
Baseline
+3–8%
Time
Hours
Minutes
Revisions
Slow
Instant
Repeat styles
Reuse skill
Stored files
The Marker Quality Checks
Check
Standard
Grain lines
All marked correctly
Notches
Match pattern
Piece count
Complete set
Edge clearance
Safe cutting margin
Fabric direction
Consistent
Fabric Width and Its Impact
Width is a hidden lever in yield. Small width changes shift the whole economics.
The Width Options
Width
Typical use
150 cm
Standard packs
160 cm
Wide panels, fewer seams
140 cm
Niche widths
Custom
Special requirements
The Width-Yield Relationship
Wider fabric does not always mean better yield — the marker must fit the width.
Situation
Effect
Marker wider than fabric
Major waste
Marker narrower
Empty side strip
Matched width
Optimal yield
The Width Decision
Factor
Choose
Large single panels
Wider fabric
Small pieces
Standard width
Same roll for multiple styles
Common width
Price difference
Compare per usable meter
The Cutting Audit
A structured audit evaluates any cutting room in half a day.
The Audit Checklist
Area
Check
Storage
Rolls labeled, clean
Inspection
4-point system in use
Markers
Software or disciplined manual
Machines
Sharp, maintained
Bundles
Counted, ticketed
Records
Yield tracked per order
Waste
Sorted and measured
Team
Trained and stable
The Red Flags
Flag
Meaning
No inspection records
Faults unclaimed
No yield numbers
Waste invisible
Dull blades
Fused edges
Mixed lots on table
Shade bands
No bundle tickets
Traceability missing
The Audit Output
Output
Value
Yield assessment
Current level
Waste estimate
Cost of leakage
Improvement list
Priority fixes
Baseline for future
Track progress
Sustainability in the Cutting Room
Cutting waste is a sustainability story — and a cost story. Both improve together.
The Waste Pyramid
Level
Practice
Reduce
Better nesting
Reuse
Remnants for small parts
Recycle
Clean scrap to mills
Recover
Energy from mixed waste
The Circular Options
Option
Requirement
Mono-material design
Easier recycling
Recycled-content fabric
Market demand
Scrap take-back
Mill partnership
Digital markers
Less sampling waste
The Reporting
Sustainability claims need numbers.
Metric
Report
Waste per unit
kg or meters
Recycling rate
% of scrap
Recycled content
% of fabric
Yield trend
Quarter over quarter
The Waste Reduction Playbook
Practical moves that reduce cutting waste without big investment.
The Quick Wins
Move
Waste saved
Software nesting
3–8%
Multi-style markers
2–5%
Remnant program
1–3%
Spread planning
1–2%
Fabric fault claims
Recovers cost
The System Moves
Move
Effort
Yield tracking
Low
Marker library
Medium
CNC investment
High
Fabric width review
Low
Team training
Medium
The Ten Percent Challenge
Most factories can recover 10% of fabric waste with the practices in this guide.
Practice
Share of gain
Nesting software
40%
Multi-style markers
20%
Remnant reuse
15%
Spread discipline
10%
Fault claims
15%
Cutting Room Safety
Cutting tools are the most dangerous equipment in a bag factory. Safety systems protect people and productivity.
The Hazards
Hazard
Risk
Knife blades
Cuts to hands and legs
CNC cutters
Moving blades
Fabric rolls
Falling from racks
Dust and fibers
Respiratory irritation
Repetitive motion
Strain injuries
The Safety System
Element
Practice
Guards
On all cutting machines
Blade locks
Engaged when idle
Training
Before machine access
PPE
Cut-resistant gloves and aprons
Housekeeping
Clean floors, clear aisles
Emergency stops
Tested monthly
The Safe Culture
Signal
Meaning
Safety briefings
Management priority
Incident records
Learning system
Near-miss reports
Prevention focus
Machine permits
Only trained operators
In-House Cutting vs Outsourcing
Some factories cut internally; others send fabric to cutting subcontractors. Each model has trade-offs.
The Comparison
Factor
In-house
Outsourced
Control
Full
Shared
Yield visibility
Direct
Reported
Lead time
Flexible
Fixed slots
Investment
Machines
None
Quality
Direct oversight
Audit needed
Cost at scale
Lower
Higher
The Hybrid Model
Many factories keep panel cutting in-house and outsource accessories — webbing cutting, foam, or leather parts.
In-house
Outsourced
Main fabric panels
Webbing lengths
Linings
Foam profiles
Critical parts
Small accessories
The Buyer Question
Ask whether the factory cuts in-house. The answer changes what you audit.
If in-house
If outsourced
Audit the cutting room
Audit the cutting partner
Check yield records
Request the same records
Marker approval direct
Verify marker ownership
The Cutting Glossary
Shared terms prevent costly misunderstandings between buyer and factory.
The Essential Terms
Term
Meaning
Marker
Nesting layout on fabric
Nesting
Arranging pieces for yield
Spreading
Laying fabric layers
Yield
Usable fabric percentage
Grain
Fabric thread direction
Selvedge
Woven edge of fabric
Bias
45-degree diagonal
Bundle
Group of cut pieces
Ply
One fabric layer
Spread length
Meters per lay
The Ordering Terms
Term
Meaning
Ply height
Layers per cut
Cut number
Bundle identifier
Lay plan
Spread specifications
Marker efficiency
Yield percentage
Fabric consumption
Meters per unit
The Question of Responsibility
Scenario
Who owns it
Marker too loose
Factory marker room
Fabric defects
Mill (via factory claim)
Off-grain spreading
Cutting operator
Size variation
Pattern or marker
Wrong consumption quote
Quoting error
The Cutting Room Visit Guide
A factory visit should always include the cutting room. Here is how to read it in twenty minutes.
The Walkthrough Order
Stop
Look for
Fabric store
Labels, cleanliness, stock rotation
Inspection table
Light table, grading records
Marker office
Software, marker files
Spread table
Tension control, layer counts
Cutting area
Blade sharpness, guard use
Bundle station
Tickets, counts, shade groups
The Conversation Starters
Question
What answers reveal
“What was yesterday’s yield?”
Daily measurement
“Show us a marker file”
Digital or manual
“How do you claim mill faults?”
Cost discipline
“Who maintains the knives?”
Quality ownership
“May we see bundle tickets?”
Traceability
The Takeaway Signs
A cutting room either protects fabric value or leaks it. The signs are visible in minutes: labeled rolls versus bare piles, sharp blades versus fused edges, counted bundles versus unmarked stacks, and open records versus vague answers. Buyers who look once — and return each season — build relationships with factories that treat fabric like money. Because that is exactly what it is.
FAQ
What is a good fabric yield for backpack cutting?
For typical backpack shapes, 75–85% is normal; well-optimized markers reach 85–90%. Complex directional fabrics or heavy patterning may run lower. Below 70% signals poor nesting or excessive waste — ask for the marker before accepting the number.
How does cutting method affect fabric yield?
The method affects precision and edge quality more than nesting yield. CNC and laser cut precisely along the marker, saving small margins around each piece. Manual cutting strays more, wasting fabric at edges. Precision gains are typically 1–3% of fabric.
Why does my factory’s fabric consumption exceed the quote?
Common causes: low-yield nesting, fabric width changes, pattern repeat losses, spreading waste, or defect replacements. Compare the actual cutting records with the quoted consumption. A transparent factory shares both and explains the difference.
What is a marker and why should I see it?
A marker is the nesting plan — the layout of pattern pieces on the fabric width. Seeing it shows nesting density, grain direction, and waste. A tight, well-organized marker signals a professional cutting room. Ask for it before approving fabric quantities.
Can I improve yield by changing the design?
Yes. Designers can reduce fabric use with strategic choices: fewer panels, straighter seams, mirrored pieces, and avoiding directional fabrics. Small changes in panel shape can shift yield by several percent. Involve the pattern engineer early in design.
How do I check cutting quality on arrival?
Measure key panels against the spec, check grain direction, verify bundle counts, and inspect edges for fusion or fraying. Compare bundle tickets to the packing list. Consistent dimensions across bundles indicate a controlled cutting room.
What happens to cutting waste in a good factory?
Good factories sort waste: remnants reused for small parts, trims recycled, and scrap measured. Some mills take back clean fabric waste for recycling. Ask about the waste policy — it affects both cost and the sustainability story of your product.
The Cutting Room Scorecard
Score any cutting room in ten minutes with this card:
Score item
Points (1–5)
Fabric stored clean and labeled
☐
Inspection records available
☐
Markers digital or disciplined
☐
Blades sharp and logged
☐
Bundles counted and ticketed
☐
Yield tracked per order
☐
Waste sorted
☐
Safety guards in place
☐
Team trained
☐
Data shared openly
☐
A score below 30 means fabric is leaking. Above 40 means the room runs a real system.
The Buyer’s Cutting Questions
Question
Purpose
“What yield do you expect for this style?”
Baseline honesty
“May we review the marker?”
Nesting quality
“What fabric width are you quoting?”
Spec accuracy
“How are defects claimed?”
Cost recovery
“Can we see last month’s yield?”
Data discipline
“Who cuts — you or a partner?”
Audit scope
The Yield Culture
The best cutting rooms share one trait: they measure and talk about yield daily.
Culture signal
Effect
Yield on the wall
Daily awareness
Waste named in cost
Real accountability
Markers reviewed
Continuous gains
Team rewarded
Ownership
The Seasonal Cycle
Cutting rooms work in seasons, and each season should teach something new.
Season phase
Cutting focus
Pre-season
Markers prepared, fabric inspected
Peak
Throughput with quality
Post-season
Returned-goods analysis
Between seasons
Marker library update
The returned packs tell the truth about cutting. Frayed panels, mismatched shades, and size drift all trace back to the cutting room. Reviewing returns with the cutting team closes the loop that no audit can replace.
Conclusion
Cutting is where fabric becomes product — and where cost is won or lost. Yield, precision, and waste control in the cutting room determine how much of every fabric roll becomes a sellable pack.
Buyers who understand cutting ask better questions: what yield, what marker, what width, what records. Factories that answer with data run controlled cutting rooms. Factories that answer vaguely are losing fabric somewhere — and that loss lands in the price.
Specify the fabric, approve the marker, check the first bundle, and track consumption against the quote. The cutting room rewards attention with margin.