Export Packaging and Container Loading for Backpacks
Export Packaging and Container Loading for Backpacks
A backpack that leaves the factory in perfect condition can arrive crushed, scuffed, or wet — and the cause is almost never the bag. It is the packaging and the loading.
For a manufacturer, export packaging is the last controllable stage of quality. Once the container door closes, the product is at the mercy of stacking pressure, humidity, handling, and transit vibration. The decisions made in the packing area and the loading bay determine whether the customer opens a clean carton or files a claim.
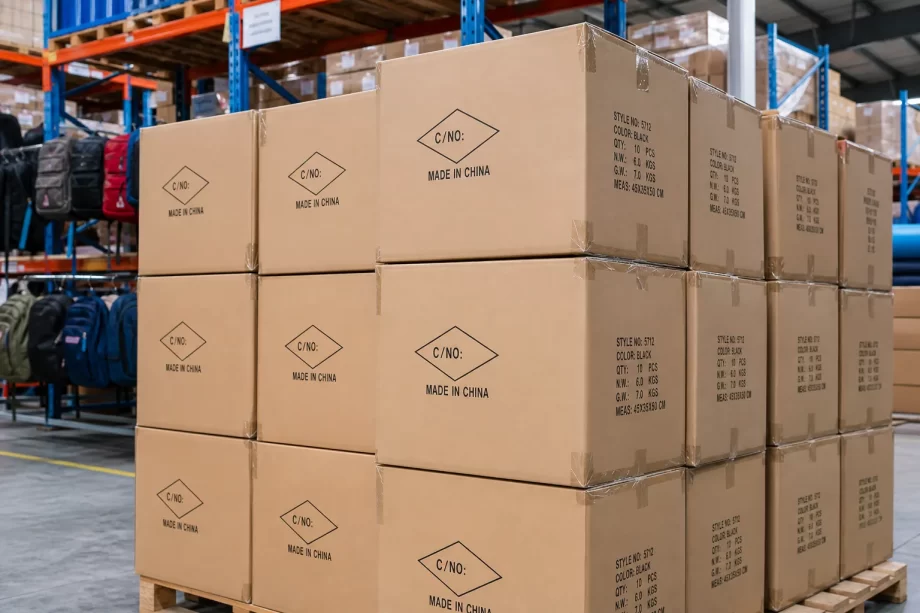
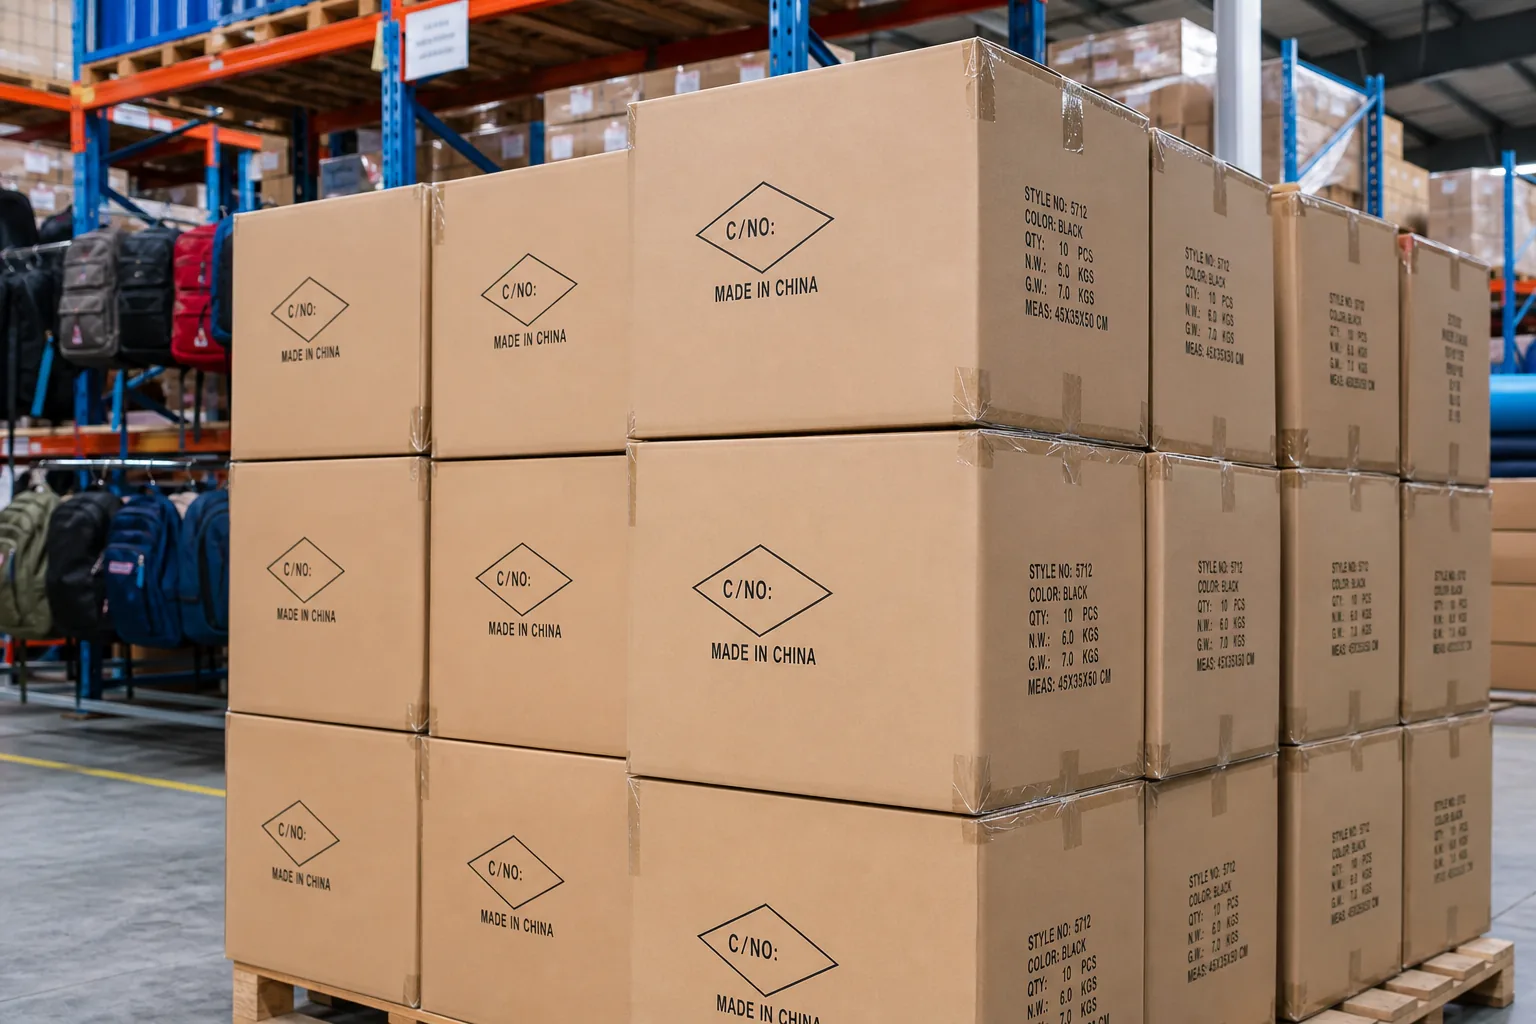
Stacked export cartons of backpacks in a factory warehouse
This guide covers export packaging for backpacks end to end: carton specification and testing, packing methods and quantities, marking requirements, container loading calculations and plans, securing methods, and the documentation that supports a claim when something goes wrong.
Packaging is a cost line that prevents much larger costs. Understanding the failure modes makes the specification concrete.
The Transit Risks
Risk
Cause
Compression damage
Stacking height and load
Impact damage
Handling and drops
Vibration damage
Road and rail transit
Humidity damage
Container condensation
Contamination
Dust, oil, water
Theft
Unmarked or weak packaging
Punctures
Poor internal protection
Rubbing damage
Loose contents
The Cost of Failure Table
Outcome
Cost impact
Retail rejection
Full shipment
Markdown
Margin loss
Return freight
High
Replacement shipment
Full production cost
Claim handling
Administrative
Relationship damage
Future orders
The Packaging Cost Structure
Element
Share of packaging cost
Carton
40–55%
Inner bags
10–20%
Inserts and dividers
10–20%
Tape and strapping
5–10%
Labels and marks
5–10%
Labour
10–15%
The Packaging Objectives
Objective
Requirement
Protect the product
Withstand the transit chain
Meet the customer specification
Match the approved packing method
Optimise freight
Maximise units per container
Enable handling
Clear marks and stable units
Support claims
Documented packing records
The Specification Sources
Source
Governs
Brand packing instructions
Carton, marking, quantity
Retailer routing guide
Labels, pallet, timing
Destination regulation
Wood, recycling, labeling
Freight forwarder
Container and securing
Insurer
Evidence requirements
The Alignment Table
Specification
Must agree with
Carton size
Product dimensions and container plan
Units per carton
Freight cost and handling limits
Carton strength
Stacking height
Marking
Customer routing guide
Pallet type
Destination rules and container
Factory note: Two documents control export packaging: the brand’s packing instruction and the retailer’s routing guide. When they conflict, the routing guide usually wins, because non-compliant cartons and labels are rejected at the distribution centre before the product is even opened.
Packaging Materials and Structure
Carton performance comes from board grade, construction, and internal protection working together.
The Carton Board Grades
Grade
Typical use
Single wall
Light items, short transit
Double wall
Standard export packing
Triple wall
Heavy or high stacking
Five-ply
Heavy duty, long transit
The Board Specification Table
Parameter
Typical export value
Flute type
B or BC
Board grade
Double wall, K=K
Bursting strength
1,200 kPa or higher
Edge crush test
7 kN per metre or higher
Grammage
320–400 g per square metre
Moisture content
8–12%
The Carton Construction
Feature
Purpose
Full overlap base
Stronger bottom
Interlocking flaps
Stability when stacked
Reinforced corners
Compression resistance
Correct internal dimensions
Prevent movement
Adequate headroom
Avoid product pressure
The Inner Packaging
Component
Function
Polybag
Dust and moisture barrier
Tissue or foam wrap
Surface protection
Divider or insert
Separation and shape
Hardware bag
Prevent scratching
Desiccant
Humidity control
Void fill
Prevent movement
The Polybag Specification
Parameter
Typical value
Material
LDPE or recycled LDPE
Thickness
0.03–0.05 mm
Closure
Tape or self-seal
Print
Warning text per market
Perforation
Optional, per regulation
Recycled content
Per brand requirement
The Protection Hierarchy
Level
Protection provided
Level 1
Polybag only
Level 2
Polybag plus wrap
Level 3
Wrap plus insert
Level 4
Insert plus dividers
Level 5
Full interior structure
The Protection by Product Table
Product
Recommended level
Casual fabric backpack
Level 1–2
Technical backpack
Level 2–3
Leather backpack
Level 4–5
Structured business bag
Level 4
Wheeled bag
Level 5
Hardshell or frame pack
Level 4–5
The Material Selection Table
Consideration
Choice
Moisture protection
Polybag plus desiccant
Surface protection
Foam or tissue wrap
Shape retention
Cardboard insert
Impact protection
Corner reinforcement
Recyclability
Mono-material packaging
Cost control
Simplify the level
The Sustainability Considerations
Practice
Effect
Recycled board
Lower material impact
Reduced plastic
Less waste
Mono-material design
Easier recycling
Right-sized cartons
Less void fill
Reusable pallets
Reduced waste
Paper tape
Recyclable with the carton
The Packaging Drawings
Document
Content
Carton drawing
Dimensions, board grade, flute
Packing method sheet
Sequence and components
Marking layout
Print positions and content
Label specification
Size, content, barcode
Protection list
All inner components
Factory note: Most carton failures trace to one specification error: the internal dimensions were sized to the product rather than to the product plus its protection. When the bag fits exactly with no allowance, the carton bulges, corners fail under stacking, and compression damage follows within days.
Carton Testing and Quality Control
Carton performance can be tested before the shipment, which converts an assumption into a specification.
The Standard Tests
Test
What it measures
Compression test
Stacking strength
Drop test
Impact resistance
Vibration test
Transit durability
Inclined impact
Handling shock
Humidity conditioning
Performance when damp
Bursting strength
Board quality
Edge crush test
Vertical strength
The Test Protocol Table
Test
Typical condition
Compression
Static load, 24 hours
Drop
Corners, edges, faces
Vibration
Fixed displacement, defined duration
Conditioning
Defined humidity and temperature
Sample size
Three to five cartons
The Acceptance Criteria
Criterion
Requirement
No product damage
After all tests
Carton deformation
Within tolerance
No bursting
Structure intact
Marks readable
After testing
Product function
Unaffected
The Stacking Calculation
Input
Method
Carton weight
Weighed
Stacking height
Warehouse and container
Safety factor
Applied for humidity
Required compression
Calculated load
Specified strength
Must exceed requirement
The Humidity Factor
Storage condition
Effect
Dry warehouse
Full board strength
Standard ambient
Slight loss
High humidity
Notable loss
Container transit
Significant loss
Long sea voyage
Highest risk
The Incoming Carton Check
Check
Method
Dimensions
Measure against drawing
Board grade
Confirm and test
Print accuracy
Compare with master
Marking position
Verify layout
Barcode scan
Test readability
Strength
Sample compression test
The Common Carton Defects
Defect
Cause
Weak corners
Poor board or construction
Dimension drift
Supplier variation
Print misalignment
Setup error
Barcode unreadable
Print quality
Delamination
Glue or moisture
Wrong grade supplied
Substitution
The Approval Process
Step
Action
1
Approve the drawing
2
Receive sample cartons
3
Test compression and drop
4
Pack a trial carton
5
Approve a physical master
6
Inspect each production lot
The Retention Requirements
Item
Retained
Approved carton master
Until style ends
Test reports
Per shipment
Packing method sheet
Current version
Marking artwork
Current version
Lot inspection records
Per shipment
Factory note: Compression strength is measured on dry board, but a container crossing the equator spends weeks in high humidity. Applying a humidity safety factor — commonly 30 to 50 percent — to the calculated stacking load is the difference between a specification that works in the lab and one that works on arrival.
Packing Methods and Carton Quantities
How the product is placed inside the carton determines both protection and freight efficiency.
Worker packing a backpack into a polybag and carton at a packing station
The Packing Methods
Method
Description
Flat pack
Bag laid flat, layered
Folded pack
Folded into a compact block
Hanging pack
On a hanger, for retail display
Stuffed pack
Filled to hold shape
Individual carton
One bag per carton
Bulk carton
Multiple bags per carton
The Method Comparison
Method
Protection
Freight efficiency
Labour
Flat pack
Moderate
Good
Low
Folded pack
Moderate
Best
Low
Hanging pack
Good
Poor
High
Stuffed pack
Best
Poor
High
Individual carton
Best
Poor
High
Bulk carton
Good
Best
Lowest
The Quantity Per Carton Table
Product type
Typical units per carton
Small daypack
20–30
Standard backpack
10–20
Large travel pack
6–10
Leather backpack
4–8
Wheeled bag
2–4
Gift or retail packed
1–4
The Carton Size Selection
Consideration
Effect
Product dimensions
Base footprint
Units per carton
Volume and weight
Container plan
Pallet or floor loaded
Handling limit
Weight per carton
Retail requirement
Presentation and count
Freight cost
Volume versus weight
The Weight Limits Table
Constraint
Typical limit
Manual handling
15–23 kg
Warehouse equipment
25 kg or more
Container floor loading
Per plan
Pallet load
Per pallet type
Air freight
Lower limits
The Packing Sequence
Step
Action
1
Inspect the bag before packing
2
Remove loose threads and dust
3
Apply the polybag
4
Add the accessory bag
5
Fold or stuff per method
6
Place in the carton
7
Add void fill or insert
8
Close and tape the carton
9
Apply marks and labels
10
Weigh and record
The Accessory Packing Table
Accessory
Packing
Rain cover
Inside the main bag or a pouch
Tags
Hung or placed on top
Manuals
Inside the accessory bag
Spare parts
Sealed bag, marked
Keys or locks
Separate bag, marked
The Packing Quality Checks
Check
Requirement
Bag cleanliness
No dust, threads, marks
Correct polybag
Size and material
Fold uniformity
Matches the master
Accessory presence
Per packing list
Carton count
Verified
Tape closure
Full and clean
Marks readable
Position and clarity
The Packing Records
Record
Purpose
Packing list
Quantity and contents
Carton count sheet
Verification
Photography
Evidence of packing condition
Weight record
Freight and claims
Inspector signature
Accountability
Marking, Labelling and Identification
Marks are how the shipment is identified at every handover. Errors cause delays that cost more than the carton.
The Marking Elements
Element
Purpose
Shipping mark
Identifies the buyer
Order or PO number
Ties to the order
Style or item code
Identifies the product
Quantity
Contents count
Carton number
Sequence within the order
Gross and net weight
Handling and freight
Dimensions
Volume calculation
Country of origin
Regulatory requirement
Handling symbols
Care in transit
The Marking Placement Table
Mark
Position
Shipping mark
Side panel, two faces
PO number
Beside the shipping mark
Style code
Side panel
Carton number
Side panel, top
Weight
Side panel
Barcode
Defined position per routing guide
Origin
Side panel
Symbols
Top or side
The Barcode Requirements
Item
Requirement
Symbology
Per customer guide
Size
Minimum size specified
Quiet zone
Clear of print
Contrast
Dark on light
Position
Defined and consistent
Verification
Scan test per lot
The Compliance Marking Table
Market
Requirement
EU
Origin, importer details
US
Origin marking
Retailer
Routing guide labels
Wood packaging
ISPM 15 marking
Recycling
Packaging material symbols
The Marking Errors Table
Error
Consequence
Missing carton number
Stock count failure
Wrong PO number
Misallocated shipment
Illegible print
Manual handling delay
Wrong quantity
Discrepancy claim
Missing origin
Customs delay
Unverified barcode
DC rejection
The Label Quality Standards
Standard
Requirement
Print method
Per specification
Adhesion
No lifting in transit
Smudge resistance
Marking stays legible
Position tolerance
Within a defined margin
Consistency
Uniform across the lot
The Verification Before Loading
Check
Method
Marking vs packing list
Sample inspection
Barcode scan
Test each position
Carton count
Physical count
Weight
Spot weighing
Label adhesion
Peel test
Pallets and Load Units
Palletised shipments trade some container volume for handling speed and stability.
The Pallet Types
Pallet
Character
Standard wood
Common, requires treatment
Heat treated wood
ISPM 15 compliant
Plastic
Clean, reusable
Pressed wood
Light, export-friendly
Half pallet
Retail distribution
The Pallet Specification Table
Parameter
Typical value
Size
1200 x 1000 mm
Height
150 mm
Static load
2,500 kg or more
Dynamic load
1,000 kg or more
Treatment
ISPM 15 for wood
The Pallet Loading Rules
Rule
Reason
Overhang prohibited
Damage in handling
Underhang minimised
Stability
Column stacking
Compression strength
Strapping per layer
Unit integrity
Corner protectors
Edge protection
Top cap where required
Load distribution
The Pallet Pattern Table
Pattern
Character
Column stack
Strongest
Interlocked
More stable
Pinwheel
Fits odd cartons
Split row
Mixed sizes
The Pallet Height Table
Constraint
Limit
Container internal height
About 2,390 mm
Pallet plus load
Typically 1,800–2,200 mm
Retail requirement
Per routing guide
Forklift stability
Per equipment
The Pallet Documentation
Document
Purpose
Pallet list
Contents per pallet
Treatment certificate
ISPM 15 compliance
Weight record
Freight calculation
Photograph
Loading evidence
Factory note: Most pallet claims trace to overhang, not to carton strength. A carton that projects beyond the pallet edge takes the impact in every handling operation, and the damage appears on arrival as though the board failed. Keep the stack inside the pallet footprint and the same cartons perform well.
Container Loading Fundamentals
Loading is a calculation, not an improvisation. Two numbers govern every container: volume and payload.
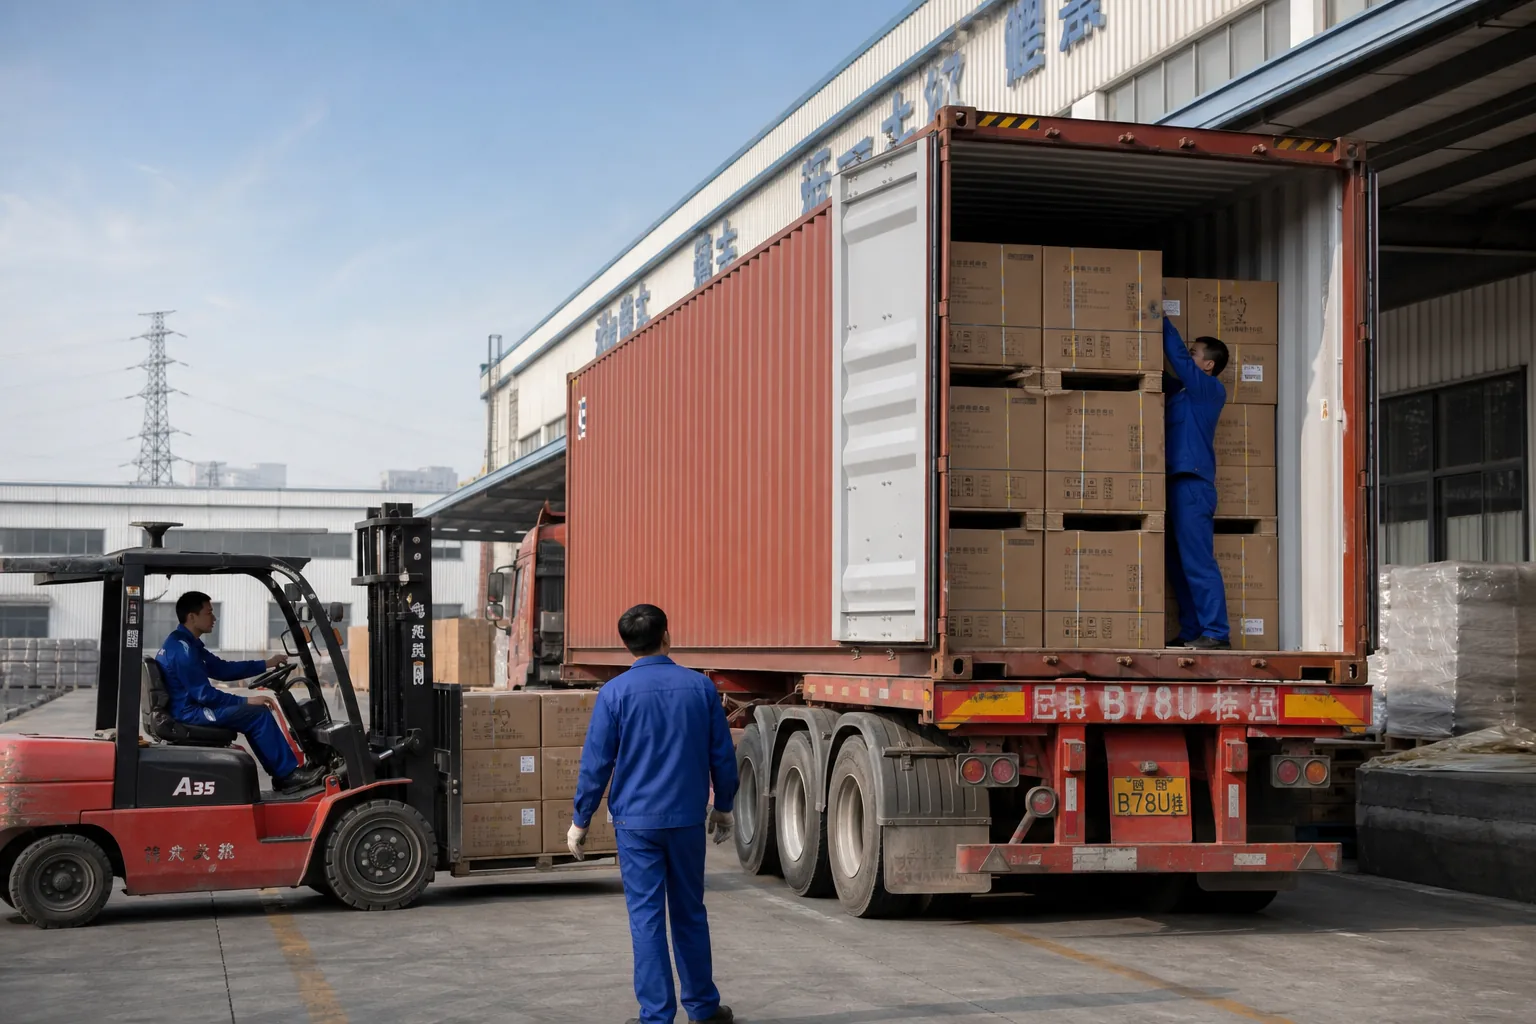
Workers loading cartons into a shipping container at a loading dock
The Container Types
Type
Internal length
Capacity
20 foot standard
About 5.9 m
About 33 cubic metres
40 foot standard
About 12.0 m
About 67 cubic metres
40 foot high cube
About 12.0 m
About 76 cubic metres
45 foot high cube
About 13.5 m
About 86 cubic metres
The Container Specification Table
Parameter
20 ft
40 ft
40 ft HC
Internal width
2,352 mm
2,352 mm
2,352 mm
Internal height
2,393 mm
2,393 mm
2,698 mm
Door height
2,280 mm
2,280 mm
2,585 mm
Door width
2,340 mm
2,340 mm
2,340 mm
Payload
About 28,200 kg
About 26,700 kg
About 26,400 kg
The Loading Calculation Steps
Step
Calculation
1
Measure the carton
2
Calculate carton volume
3
Calculate cartons per container floor plan
4
Check total against container volume
5
Calculate total weight
6
Compare with payload limit
7
Apply the limiting factor
8
Produce the loading plan
The Volume Calculation Example
Input
Value
Carton size
600 x 400 x 500 mm
Carton volume
0.12 cubic metres
Container volume
67 cubic metres
Theoretical capacity
558 cartons
Practical capacity
500–530 cartons
Efficiency loss
5–10%
The Efficiency Factors
Factor
Effect
Carton dimensions vs container
Fit efficiency
Pallet use
Volume loss
Loading pattern
Space utilisation
Door height limit
Stacking height
Payload limit
Weight restriction
Dunnage and securing
Lost volume
The Floor Loading vs Pallet Table
Approach
Volume use
Handling
Cost
Floor loaded
Highest
Labour intensive
Lowest freight
Palletised
Lower
Fast
Higher freight
The Container Selection Table
Shipment
Recommended
Small order, dense
20 foot
Large order, light
40 foot high cube
Palletised cargo
40 foot, pallet count driven
Mixed styles
40 foot with a plan
Priority shipments
LCL or air
The Weight Versus Volume Check
Scenario
Limiting factor
Bulky light cargo
Volume
Dense heavy cargo
Payload
Balanced cargo
Neither, plan for both
Leather goods
Usually volume
Hardware-heavy bags
Possibly weight
Loading Plans
A loading plan is drawn before the container arrives. Improvised loading wastes space and risks damage.
The Plan Elements
Element
Content
Carton list
Dimensions, weight, quantity
Pattern
How cartons interlock
Sequence
Loading order
Layer count
Stacking per area
Securing method
Strapping and dunnage
Weight distribution
Balance front to back
Access plan
What is needed first
The Loading Patterns
Pattern
Character
Block stacking
Simple, stable
Brick stacking
Interlocked, strong
Pinwheel
Fills mixed sizes
Split load
Two destinations
Pallet loading
Unit loads
The Sequence Rules
Rule
Reason
Heavy to the floor
Stability
Fill front to back
Avoid gaps
Keep weight balanced
Axle limits
No gaps at the door
Prevents shifting
Secure the last stack
Door-end protection
The Weight Distribution Table
Zone
Guidance
Front third
Heavy cartons
Middle third
Even
Rear third
Lighter cartons
Door end
Secured and blocked
Height
Even throughout
The Utilisation Targets
Loading type
Target utilisation
Floor loaded, uniform cartons
90–95%
Floor loaded, mixed cartons
85–92%
Palletised
75–85%
Mixed pallet and floor
80–88%
The Plan Review Checks
Check
Purpose
Carton count matches the order
Prevents shortfall
Weight within payload
Legal and safe
Stacking within limits
Prevents compression
Door closes with no obstruction
Practical
Plan matches the packing list
Consistency
The Common Planning Errors
Error
Consequence
Volume-only calculation
Overweight container
Ignoring door height
Loading stops mid-way
Mixed carton sizes unplanned
Wasted space
No securing allowance
Damage at door end
Pallet assumed without checking
Replanning at the dock
Loading Execution and Securing
The plan is only as good as its execution. Loading is where documentation and observation matter most.
The Loading Preparation
Step
Action
1
Inspect the container
2
Check for holes, rust, and odour
3
Verify the container is dry
4
Confirm the number against the plan
5
Position carts and equipment
6
Brief the loading team
The Container Inspection Table
Check
Standard
Floor condition
Dry, clean, intact
Walls and roof
No holes, no rust flakes
Door seals
Functional
Odour
No chemical or mould smell
Cleanliness
No residue from prior cargo
Lighting
Adequate for inspection
The Securing Methods
Method
Use
Strapping
Vertical and horizontal restraint
Dunnage bags
Fill gaps between stacks
Wooden bracing
Blocking at the door end
Airbags
Prevent shifting
Banding
Unit stability
The Securing Table
Condition
Method
Full load, uniform cartons
Load locks or bracing
Partial load
Dunnage plus bracing
Palletised
Strapping to the pallet
Mixed sizes
Dunnage in gaps
Fragile cartons
Front position, secured
The Moisture Control Measures
Measure
Effect
Container desiccant
Absorbs internal moisture
Liner bags
Barrier for sensitive cargo
Dry container verification
Prevents wet damage
Ventilation
Where appropriate
Product-level desiccant
Local protection
The Loading Records
Record
Content
Photographs
Empty container, mid-load, closed door
Carton count
Verified total
Container number
Recorded
Seal number
Recorded
Loader signature
Accountability
Time records
Loading duration
The Photographic Evidence Table
Photograph
Purpose
Empty container
Proves condition at loading
Mid-load
Shows the loading method
Door-end securing
Shows restraint
Closed doors with seal
Confirms sealing
Carton marks
Ties to the shipment
The Seal and Handover
Step
Action
Seal applied
After loading complete
Seal number recorded
On the documents
Handover to forwarder
Signed receipt
Documents released
Per payment terms
The Damage Prevention Summary
Risk
Prevention
Compression
Stacking within limits
Shift in transit
Securing and dunnage
Humidity
Desiccants and dry container
Handling damage
Stable loads
Water ingress
Container inspection
Pilferage
Seals and documentation
Factory note: The five photographs that resolve most claims are the empty container, the loading in progress, the door-end securing, the closed doors with the seal, and the carton marks. They cost two minutes at loading and they are the difference between a paid claim and a disputed one.
Export Documentation
Documents travel with the cargo and decide who pays when something goes wrong.
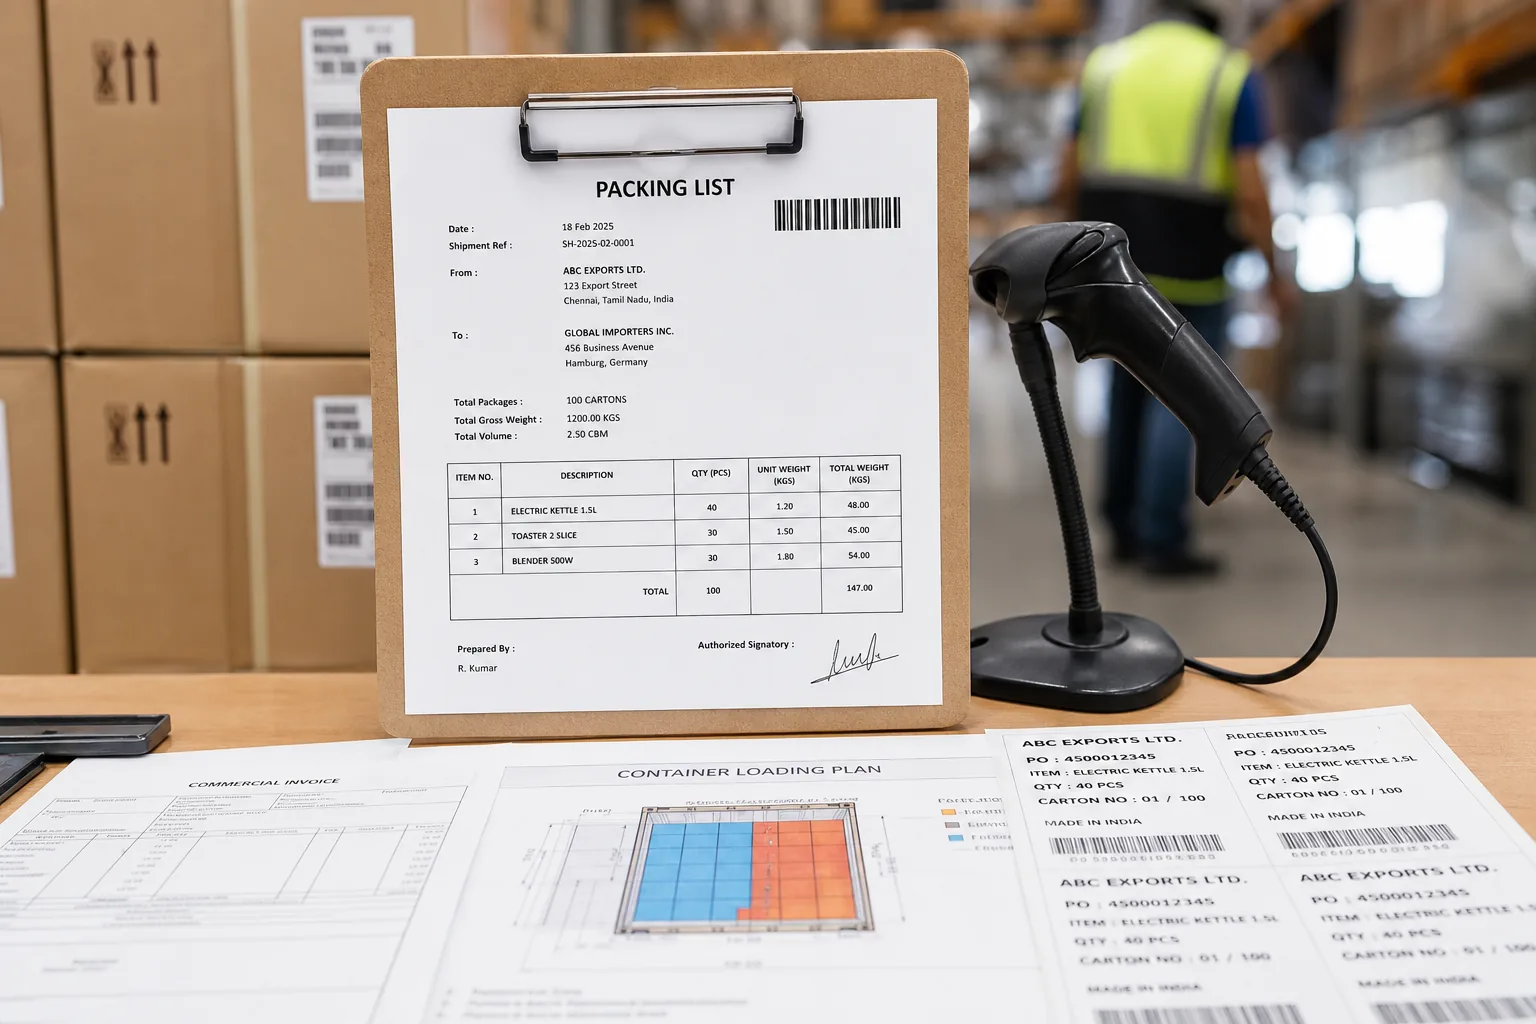
Export shipping documents and packing list at a warehouse desk
The Core Documents
Document
Purpose
Commercial invoice
Value and parties
Packing list
Contents by carton
Bill of lading
Contract of carriage
Certificate of origin
Tariff and compliance
Inspection certificate
Quality evidence
Fumigation or treatment certificate
Wood packaging
Insurance certificate
Risk cover
The Packing List Contents
Field
Detail
Carton number
Sequence
Style
Product code
Quantity
Units per carton
Net weight
Product only
Gross weight
With packaging
Dimensions
Per carton
Total cartons
Summary
Total quantity
Summary
The Documentation Accuracy Table
Document
Common error
Invoice
Value or description mismatch
Packing list
Quantity does not match cartons
Bill of lading
Consignee details wrong
Origin certificate
Criteria not met
Inspection certificate
Issued after loading
The Incoterms Question
Term
Responsibility
EXW
Buyer arranges everything
FOB
Seller loads to the vessel
CIF
Seller arranges freight and insurance
DAP
Seller delivers to a named place
DDP
Seller clears import duties
The Liability Boundary
Stage
Typically seller
Packing
Yes
Inland transport to port
Per terms
Loading into container
Yes at origin
Ocean transit
Insurer or buyer
Destination handling
Per terms
The Claim Evidence Pack
Evidence
Purpose
Loading photographs
Condition at origin
Packing list
Contents delivered
Container seal record
Integrity
Inspection report
Quality at loading
Arrival survey
Damage documentation
Carton and product samples
Physical evidence
The Claim Timing
Deadline
Action
On arrival
Note visible damage
Within days
Survey and photograph
Per contract
Formal notice
Per policy
Insurance claim
Cost Optimisation in Packaging and Loading
Freight is charged on volume or weight. Packaging decisions move both.
The Cost Drivers
Driver
Effect
Carton size
Volume utilisation
Units per carton
Handling and volume
Carton strength
Board cost
Pallet use
Volume and cost
Protection level
Material cost
Loading labour
Time at the dock
The Optimisation Levers
Lever
Typical saving
Right-sized cartons
5–12% volume
Optimised units per carton
3–8% freight
Column stacking
Better compression use
Floor loading where suitable
8–15% volume
Correct board grade, not heavier
Board cost
Reduced void fill
Material cost
The Trade-off Table
Decision
Benefit
Cost
More units per carton
Lower freight per unit
Higher handling weight
Thinner board
Lower material cost
Higher damage risk
Floor loading
Higher utilisation
Warehouse labour
Palletised
Faster handling
Volume loss
Higher protection
Lower claims
Material cost
The Landed Cost View
Element
Often omitted
Carton cost
Visible
Inner packaging
Visible
Packing labour
Frequently omitted
Loading labour
Sometimes omitted
Freight
Visible
Claims
Estimated rarely
Return processing
Rarely estimated
The Savings Estimate Table
Action
Effort
Return
Carton size review
Low
Moderate
Units per carton study
Low
Moderate
Loading pattern optimisation
Low
Moderate
Board grade right-sizing
Moderate
Moderate
Packaging standardisation
Moderate
High
Supplier packaging audit
Moderate
High
Common Packaging and Loading Problems
Most problems recur across factories and each has a known cause.
The Problem Table
Problem
Likely cause
Crushed cartons
Insufficient compression strength
Damaged corners
No corner protection
Wet cartons
Container condensation
Scuffed products
Inadequate wrapping
Missing accessories
Packing sequence error
Wrong quantity claimed
Carton count not verified
Barcode rejection
Print quality or position
Load shift damage
Insufficient securing
Door-end damage
No bracing
Space shortfall
Plan not followed
The Root Cause Table
Root cause
Prevention
Specification error
Test before bulk
Supplier variation
Lot inspection
Time pressure at loading
Pre-load planning
Unclear packing sheet
Approved instruction
No verification step
Count and scan checks
No photographic record
Standard loading photos
The Escalation Triggers
Trigger
Action
Container found wet
Reject and request a replacement
Carton count mismatch
Stop loading, recount
Marking errors found
Repack before loading
Carton strength failure
Hold and test the lot
Damage during loading
Document and report
The Export Packing Checklist
A working checklist organised by stage, from specification to shipment handover.
Specification Stage
Item
Done
Carton drawing approved
☐
Board grade specified
☐
Compression test completed
☐
Packing method sheet approved
☐
Marking layout approved
☐
Barcode position verified
☐
Protection level agreed
☐
Production Stage
Item
Done
Carton lots inspected
☐
Bag cleanliness verified
☐
Polybag and accessories checked
☐
Packing method followed
☐
Fold uniformity inspected
☐
Count verified per carton
☐
Marks applied correctly
☐
Loading Stage
Item
Done
Container inspected and dry
☐
Loading plan followed
☐
Weight within payload
☐
Securing applied
☐
Desiccant placed
☐
Photographs taken
☐
Seal applied and recorded
☐
Documentation Stage
Item
Done
Packing list complete
☐
Invoice consistent
☐
Container and seal numbers recorded
☐
Inspection certificate issued
☐
Treatment certificate where required
☐
Evidence pack filed
☐
The Eight Packing Rules
Rule
Reason
Size the carton to product plus protection
Prevents bulging
Test compression before bulk
Converts assumption to spec
Apply a humidity factor
Container conditions are harsh
Verify the count physically
Claims depend on it
Photograph every loading
Resolves disputes
Keep the stack inside the pallet
Prevents handling damage
Secure the door end
Where shifting starts
Use the customer’s routing guide
Compliance at the DC
FAQ
What carton board grade should be used for exporting backpacks?
Double wall board with a B or BC flute is the normal export standard for backpacks, with a bursting strength around 1,200 kPa or higher and an edge crush test value of about 7 kN per metre or more. The correct grade depends on stacking height, carton weight, and transit duration, so the specification should be confirmed by a compression test rather than assumed.
How many backpacks fit in a 40 foot container?
It depends on carton dimensions and packing method. A standard backpack carton holding 10 to 20 units typically yields roughly 500 to 530 cartons in a 40 foot high cube, giving around 5,000 to 10,000 bags. Calculate from the actual carton dimensions and check both volume and payload before confirming, because volume-optimised loads can still exceed the weight limit.
Should backpacks be floor loaded or palletised for export?
Floor loading uses roughly 90 to 95 percent of the container volume and is cheaper on freight, but it requires more labour at both ends. Palletising uses about 75 to 85 percent and costs more in freight, but it speeds up handling and reduces damage from manual stacking. Many retail distribution centres require pallets, so check the routing guide before choosing.
How do I prevent moisture damage in containers?
Verify the container is dry and free from holes before loading, use a container desiccant appropriate to the cargo volume and voyage length, keep the polybag seal intact, and consider a container liner for moisture-sensitive products. Photograph the dry container before loading, because moisture claims are otherwise difficult to resolve.
What markings are required on export cartons?
At minimum: the shipping mark identifying the buyer, the purchase order number, the style or item code, the quantity, carton number, gross and net weight, dimensions, country of origin, and handling symbols. Many retailers add specific label and barcode requirements in their routing guide, and those take priority because non-compliant cartons are rejected at the distribution centre.
How should cartons be secured inside a container?
Use wooden bracing or load locks at the door end, dunnage bags or airbags to fill gaps between stacks, strapping for unit stability, and keep the weight distribution balanced front to back with heavy cartons placed first. The door end is where shifting begins, so it receives the strongest restraint.
What documents should accompany an export backpack shipment?
A commercial invoice, a detailed packing list showing carton numbers and quantities, the bill of lading, a certificate of origin where applicable, an inspection certificate, a treatment certificate for wood packaging, and an insurance certificate. Keep the documentation consistent — invoice, packing list, and bill of lading must agree on quantities and descriptions.
How do I handle a damage claim after arrival?
Preserve the loading photographs, the packing list, the seal record, and the inspection report from origin, then document the damage with a destination survey including photographs of cartons and product. Compare the origin evidence with the arrival condition to identify whether the cause was packaging, loading, or transit handling — that determination decides which party or policy covers the loss.
Conclusion
Export packaging and loading are the final quality control step in backpack production. Everything before them protects the product at the factory; these two stages protect it until the customer opens the carton.
The principles are straightforward. Size the carton to the product plus its protection, not to the product alone. Specify board grade by compression requirement and verify it with a test, applying a humidity factor for sea transit.
Verify quantities physically and print marks exactly as the routing guide requires. Plan the container load as a calculation covering both volume and payload, keep the stack inside the pallet footprint, secure the door end, and photograph every loading.
For factories, these practices are competitive as well as protective. A plant that ships documented, well-loaded containers and can produce an evidence pack on request wins retail programs that reject claims without proof.
For buyers, the same discipline lowers landed cost: right-sized cartons and planned loading reduce freight per unit, while tested packaging reduces the cost that never appears in a quotation — the claim, the markdown, and the replacement shipment.
The container is closed once. Every decision that protects the cargo has to be made before the seal goes on.