The outside of a backpack sells the first unit. The inside sells the second. A buyer who opens a pack and finds a considered interior — where the laptop sits, where the keys live, where the charger does not tangle — becomes a repeat customer, and repeat customers are what turn a style into a program.
For a manufacturer, interior organization is the most cost-efficient differentiation available. Exterior design changes require new moulds, new tooling, and new fabric development. Interior organization is largely a matter of pattern engineering: panels, pockets, zippers, and elastic arranged inside a space that already exists.
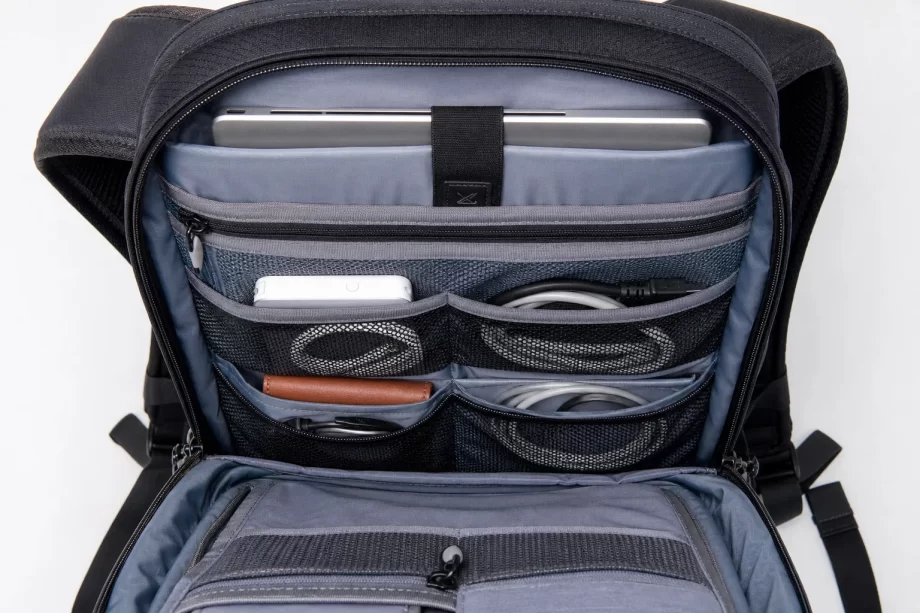
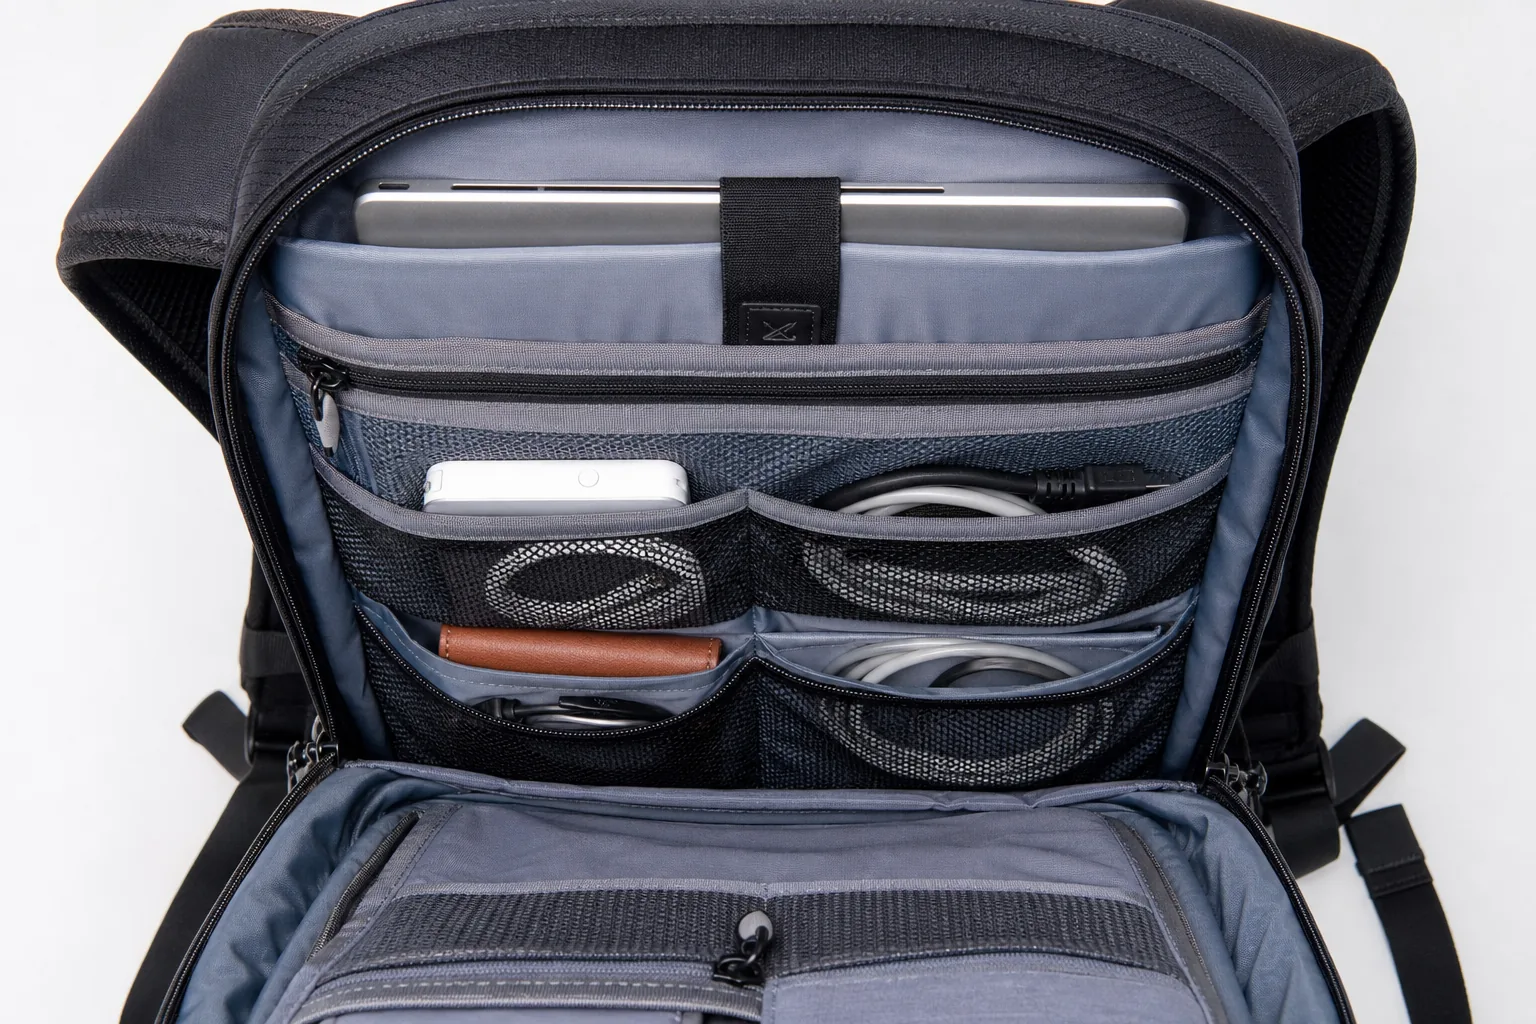
Open backpack interior showing organised pockets and dividers
This guide covers interior organization design from a factory perspective: the organization architecture, pocket types and construction methods, laptop and electronics protection, segment-specific layouts, materials and manufacturing considerations, weight and cost trade-offs, and the testing that verifies an interior actually works.
Organization is a functional feature that customers notice every day of use. That daily contact makes it a strong driver of satisfaction.
The Value Drivers
Driver
Effect
Daily usability
Constant positive contact
Protection
Prevents device damage
Speed of access
Reduces frustration
Product narrative
Explains the design
Differentiation
Hard for competitors to copy quickly
Review sentiment
Frequently mentioned
The Cost Versus Value Table
Investment
Relative cost
Perceived value
Additional pocket panel
Low
High
Laptop compartment padding
Low to moderate
High
Key clip
Very low
High
Elastic loops
Very low
Moderate
Zippered inner pocket
Low
Moderate
Mesh divider
Low
Moderate
Document sleeve
Low
High for commuters
The Buyer Segments
Segment
Interior priority
Commuter
Laptop, documents, charger
Student
Laptop, books, bottle
Traveller
Packing cubes, access, security
Photographer
Padding, dividers, customisable
Tradesperson
Tool loops, durability
Parent
Wipes, bottles, quick access
The Organization Outcomes
Outcome
Design implication
Everything has a place
Defined pocket for each item
Nothing damages the device
Padded separation
Fast access to the essentials
Priority positioning
Load stays stable
Compartments prevent movement
Interior stays clean
Wipeable materials
The Competitive Gap
Factor
Easy to copy
Hard to copy
Exterior colour
Yes
No
Logo placement
Yes
No
Hardware style
Yes
No
Pocket architecture
Moderate
No
Padded protection system
Moderate
No
Fit-to-device specification
No
Yes
Factory note: Interior organization is usually the cheapest way to differentiate a bag. A commuter style with a properly specified laptop sleeve, a key clip, and a defined charger pocket can be positioned above a competitor using the same shell fabric and hardware — because the difference is pattern engineering, not materials cost.
The Organization Architecture
Good interiors follow a hierarchy. Items are grouped by frequency of use and by protection requirement, not by available space.
The Hierarchy Levels
Level
Content
Primary
Laptop, documents
Secondary
Charger, cable, bottle, notebook
Tertiary
Keys, wallet, phone, glasses
Occasional
Umbrella, jacket, camera
The Zone Map
Zone
Position
Content
Back panel
Against the wearer
Laptop, documents
Main body
Centre
Bulk items
Front inner
Away from body
Accessories
Base
Bottom
Heavy, low-use
Lid or front pocket
Outermost
Quick access
The Access Frequency Table
Item class
Access per day
Placement
Phone
Very frequent
Exterior quick pocket
Keys
Frequent
Clip or exterior pocket
Transit card
Frequent
Small exterior slot
Laptop
Twice
Padded rear sleeve
Charger
Once or twice
Dedicated interior pocket
Bottle
Frequent
Side pocket
Document folder
Once
Rear sleeve with laptop
The Protection Requirement Table
Item
Protection need
Laptop
Impact and pressure
Tablet
Impact and scratch
Camera
Impact and moisture
Glasses
Crush and scratch
Bottle
Leak containment
Documents
Moisture and creasing
The Architecture Principles
Principle
Reason
Padded items against the back
Best shock position
Heavy items low and close
Stability and comfort
Frequent items accessible without opening the main
Speed
Wet items separated
Prevents damage
Flat items uncreased
Document sleeve
Everything has one defined home
Usability
The Volume Allocation Table
Zone
Share of interior volume
Main compartment
55–70%
Laptop and document sleeve
10–20%
Organizer panel
8–15%
Side pockets
5–10%
Lid or top pocket
5–10%
The Organization Density Guide
Bag type
Organizer pockets typical
Minimalist
2–4
Everyday commuter
5–8
Technical or EDC
8–12
Travel
4–7 plus packing features
The Layout Decision Table
Decision
Options
Organizer location
Front interior, front panel, or both
Laptop position
Rear sleeve or suspended sleeve
Sleeve access
Top load or side access
Bottle pocket
Side, exterior mesh
Admin panel
Removable or fixed
The Opening Design
Opening
Character
Top load
Simple, weather resistant
Clamshell
Full access, packing
Front panel
Quick access to organizer
Side access
Laptop without opening the bag
Roll top
Protection, limited access
The Access Trade-off Table
Design
Access
Protection
Top load
Moderate
Best
Clamshell
Best
Moderate
Front panel
Good
Moderate
Side access
Good for the laptop
Reduced
Roll top
Poor
Best
The Usability Rules
Rule
Benefit
Openings sized to the hand
Comfortable use
Zipper pulls visible
Fast access
Pockets deep enough to hold contents
Items do not fall out
Contrasting lining
Contents visible
No pocket behind a closed compartment
Avoids confusion
Factory note: The most common interior design error is a pocket dimensioned to the item at rest rather than in use. A charger pocket sized to the plug alone will not hold the cable, and a sleeve sized to a bare laptop will not hold it in a case. Always add working clearance to the specified item.
Pocket Types and Construction
Each pocket type has a defined manufacturing method, cost, and best use. Selecting the right type is a pattern-engineering decision.
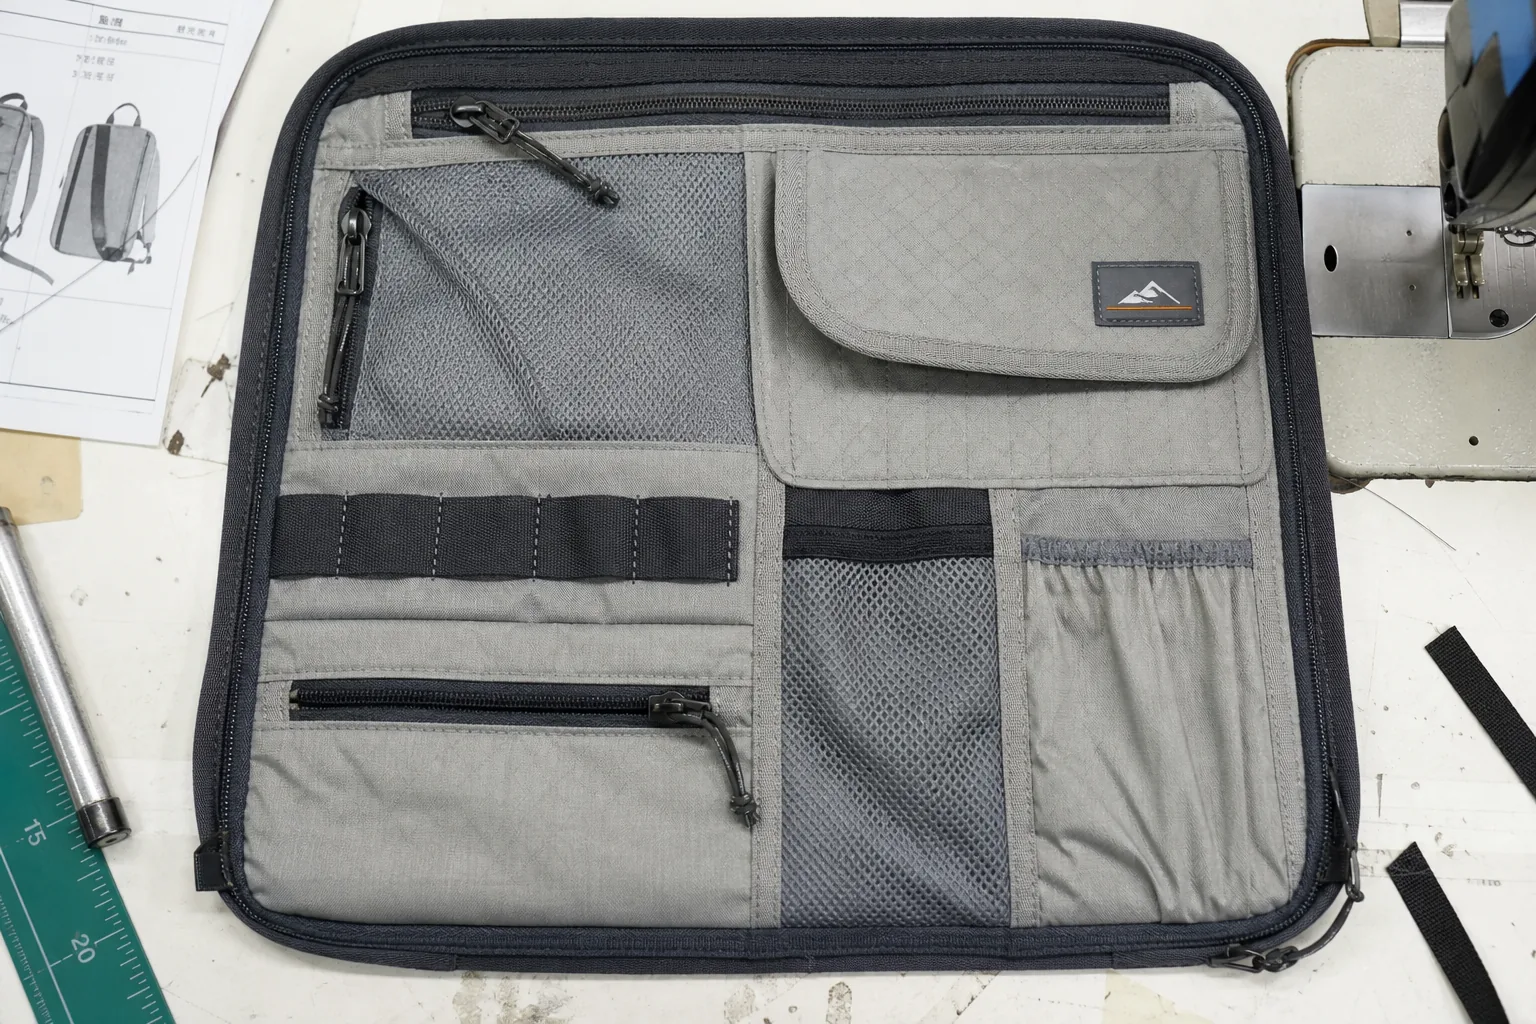
Backpack front organizer panel showing multiple pocket constructions
The Pocket Types
Type
Construction
Flat patch pocket
Single panel stitched on
Gusseted pocket
Adds depth with side panels
Zippered pocket
Enclosed with a zipper
Slip pocket
Open top, no closure
Elastic pocket
Elasticated opening
Mesh pocket
Visible, ventilated
Suspended sleeve
Hangs off the base
Modular panel
Removable insert
The Pocket Comparison Table
Type
Cost
Capacity
Protection
Flat patch
Lowest
Low
Low
Slip pocket
Low
Low
Low
Gusseted
Moderate
High
Moderate
Zippered
Moderate
Moderate
Moderate
Elastic
Low
Moderate
Low
Mesh
Low
Moderate
Low
Suspended sleeve
High
Moderate
High
Modular panel
Highest
Custom
High
The Construction Methods
Method
Application
Single needle topstitch
Pocket edges
Double needle
Stress edges
Binding
Raw edge finish
Elastic casing
Bottle and tool pockets
Zipper insertion
Enclosed pockets
Bar tack
Strap and clip points
Box-X
Reinforced anchorage
The Dimension Rules Table
Pocket
Working clearance
Laptop sleeve
10–20 mm each side
Tablet sleeve
8–15 mm
Document pocket
15–20 mm
Phone pocket
8–12 mm
Charger pocket
20–30 mm
Bottle pocket
10–15 mm diameter allowance
The Zipper Selection Table
Location
Zipper type
Laptop sleeve
5 or 8 gauge coil
Organizer pocket
3 or 5 gauge coil
Security pocket
5 gauge coil
Exterior access
8 or 10 gauge
The Elastic Specification
Parameter
Typical value
Width
20–40 mm
Stretch ratio
1.5 to 2 times relaxed
Attachment
Casing or zigzag
Recovery
Must return to shape
Test
Cycle extension
The Attachment Points
Point
Reinforcement
Key clip
Bar tack plus webbing
Strap loops
Box-X
Divider anchors
Bar tack
Elastic ends
Multiple passes
Modular panel
Reinforced edge
The Lining Material Table
Material
Character
210D polyester
Light, economical
300D polyester
Durable, common
Ripstop nylon
Light, tear resistant
Brushed tricot
Soft, protects screens
PU-coated lining
Wipeable
Recycled lining
Growing requirement
The Lining Colour Guide
Color
Effect
Light grey
Contents visible
Orange or yellow
High contrast
Black
Hides wear, reduces visibility
Brand colour
Identity, lower visibility
The Stitching Standard Table
Location
Requirement
Pocket edge
Even spacing
Zipper seam
Consistent distance
Anchor points
Reinforced
Divider seam
Straight and secure
Laptop and Device Protection
The laptop sleeve is the most specified interior feature in modern backpacks and the one most often executed poorly.
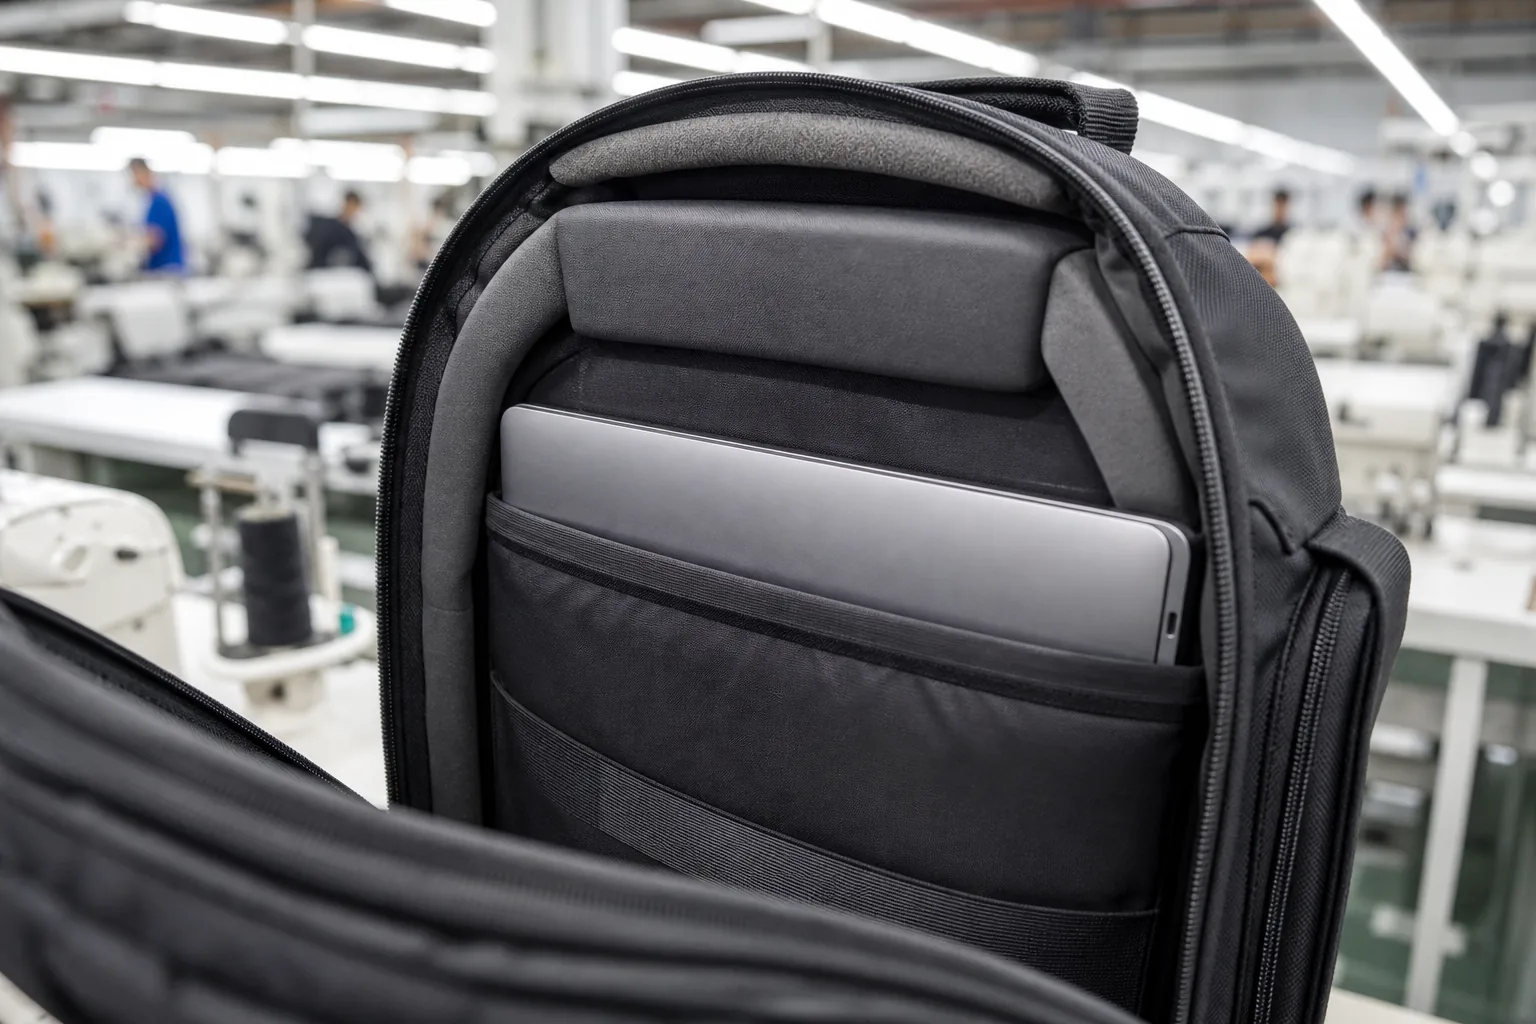
Padded laptop compartment showing foam padding construction
The Sleeve Designs
Design
Construction
Flat sleeve
Padding stitched to the back panel
Suspended sleeve
Sleeve hangs above the base
Hanging sleeve
Sleeve attached at the top only
Side-access sleeve
Diagonal opening
Suspended plus frame
Add a stiffener sheet
Removable sleeve
Separate padded case
The Protection Comparison
Design
Drop protection
Complexity
Cost
Flat sleeve
Moderate
Low
Low
Suspended sleeve
Good
Moderate
Moderate
Hanging sleeve
Good
Moderate
Moderate
Side access
Moderate
High
Moderate
Suspended plus frame
Best
High
High
Removable
Varies
Moderate
Moderate
The Sizing Standards
Laptop size
Sleeve internal dimensions
13 inch
330 x 240 mm
14 inch
355 x 250 mm
15 inch
380 x 270 mm
16 inch
400 x 285 mm
Universal
Adjust with elastic or a strap
The Sizing Rule
Rule
Reason
Measure the device, not the marketing size
Sizes vary by model
Add working clearance
Devices are used in cases
Add thickness allowance
Charger cables add bulk
Specify the maximum device
Prevents returns
State the fit in the tech pack
Removes ambiguity
The Padding Specification
Parameter
Typical value
Foam type
PE or EVA
Thickness
8–15 mm
Density
25–35 kg per cubic metre
Coverage
Both faces plus base
Base protection
Essential
Edge protection
Recommended
The Padding Configuration Table
Configuration
Protection level
One face, 5 mm
Minimal
Two faces, 5 mm
Basic
Two faces, 10 mm
Good
Two faces plus base, 10 mm
Very good
Two faces plus base plus frame, 15 mm
Excellent
The Base Gap Rule
Gap below the sleeve
Effect
None
Impact transfers directly
20–40 mm
Meaningful drop protection
Over 60 mm
Space lost, little gain
The Access Design Table
Access
Position
Top load
Sleeve opening at the top
Side access
Diagonal zip on the side
Front access
Sleeve behind the organizer
The Device Organization Table
Item
Storage
Laptop
Padded sleeve
Tablet
Separate padded pocket
Phone
Soft-lined pocket
Charger
Dedicated pocket with cable loop
Cable
Elastic loop or mesh pocket
Power bank
Dedicated pocket
Headphones
Soft pocket or hard case
The Cable Management Designs
Design
Benefit
Elastic loops
Keeps cables tidy
Mesh zip pocket
Contains small items
Pass-through port
Charging while closed
Cable channel
Route to the exterior
Dedicated charger pocket
Prevents scratch damage
The Scratch Protection Table
Contact risk
Mitigation
Zipper against screen
Zipper garage
Hardware against device
Soft lining
Keys against phone
Separate pocket
Charger prongs against device
Dedicated pocket
The Protection Tests
Test
Method
Drop test
Loaded bag, defined height
Compression
Load applied to the sleeve
Vibration
Transit simulation
Surface abrasion
Rub test against lining
The Test Acceptance Table
Test
Criterion
Drop
No device damage
Compression
Sleeve returns to shape
Vibration
No seam failure
Abrasion
Lining intact
Factory note: A flat sleeve stitched directly to the back panel passes visual inspection and fails a drop test. The base gap and the padding on both faces are what absorb energy. Buyers who specify a drop-test criterion rather than a foam thickness get a genuinely protective sleeve.
Layouts by User Segment
The same interior architecture produces different layouts depending on who uses the bag.
The Segment Layout Table
Segment
Primary zone
Secondary zone
Distinct feature
Commuter
Laptop
Document sleeve
Charger pocket
Student
Laptop plus books
Bottle
Large main volume
Traveller
Packing access
Security pocket
Clamshell opening
Photographer
Padded dividers
Card and battery
Customisable layout
Tradesperson
Tool loops
Document sleeve
Heavy duty lining
Parent
Bottle and wipes
Change items
Quick exterior access
The Commuter Specification
Feature
Specification
Laptop sleeve
15 inch suspended
Document sleeve
A4 flat, separate
Charger pocket
Zippered, with loop
Key clip
Interior, near the top
Bottle pocket
Exterior mesh
Quick pocket
Exterior, phone sized
The Travel Specification
Feature
Specification
Opening
Clamshell or wide U-zip
Packing
Compression straps inside
Security
Hidden rear pocket
Wet separation
Waterproof pouch
Access
Front panel to organizer
The Photography Specification
Feature
Specification
Padding
Full body, thick
Dividers
Removable, hook-and-loop
Configuration
Adjustable interior
Access
Front or side
Base
Reinforced, water resistant
The Customisation Table
Method
Benefit
Hook-and-loop dividers
User-defined layout
Removable panel
Converts the bag
Modular inserts
Different use cases
Adjustable elastic
Holds varied sizes
The Segment Priority Table
Priority
Commuter
Traveller
Laptop protection
Highest
Moderate
Volume
Moderate
Highest
Access speed
Highest
Moderate
Security
Moderate
High
Weight
High
Moderate
Factory note: Segment layouts fail when a bag tries to serve two segments at once. A travel bag with a commuter organizer wastes volume; a commuter bag with a clamshell opening loses structure. Choose the primary segment, specify for it, and accept what the design gives up.
Materials and Manufacturing Considerations
Interior components are produced and assembled in specific sequences. Design decisions made without the line in mind create cost and quality problems.
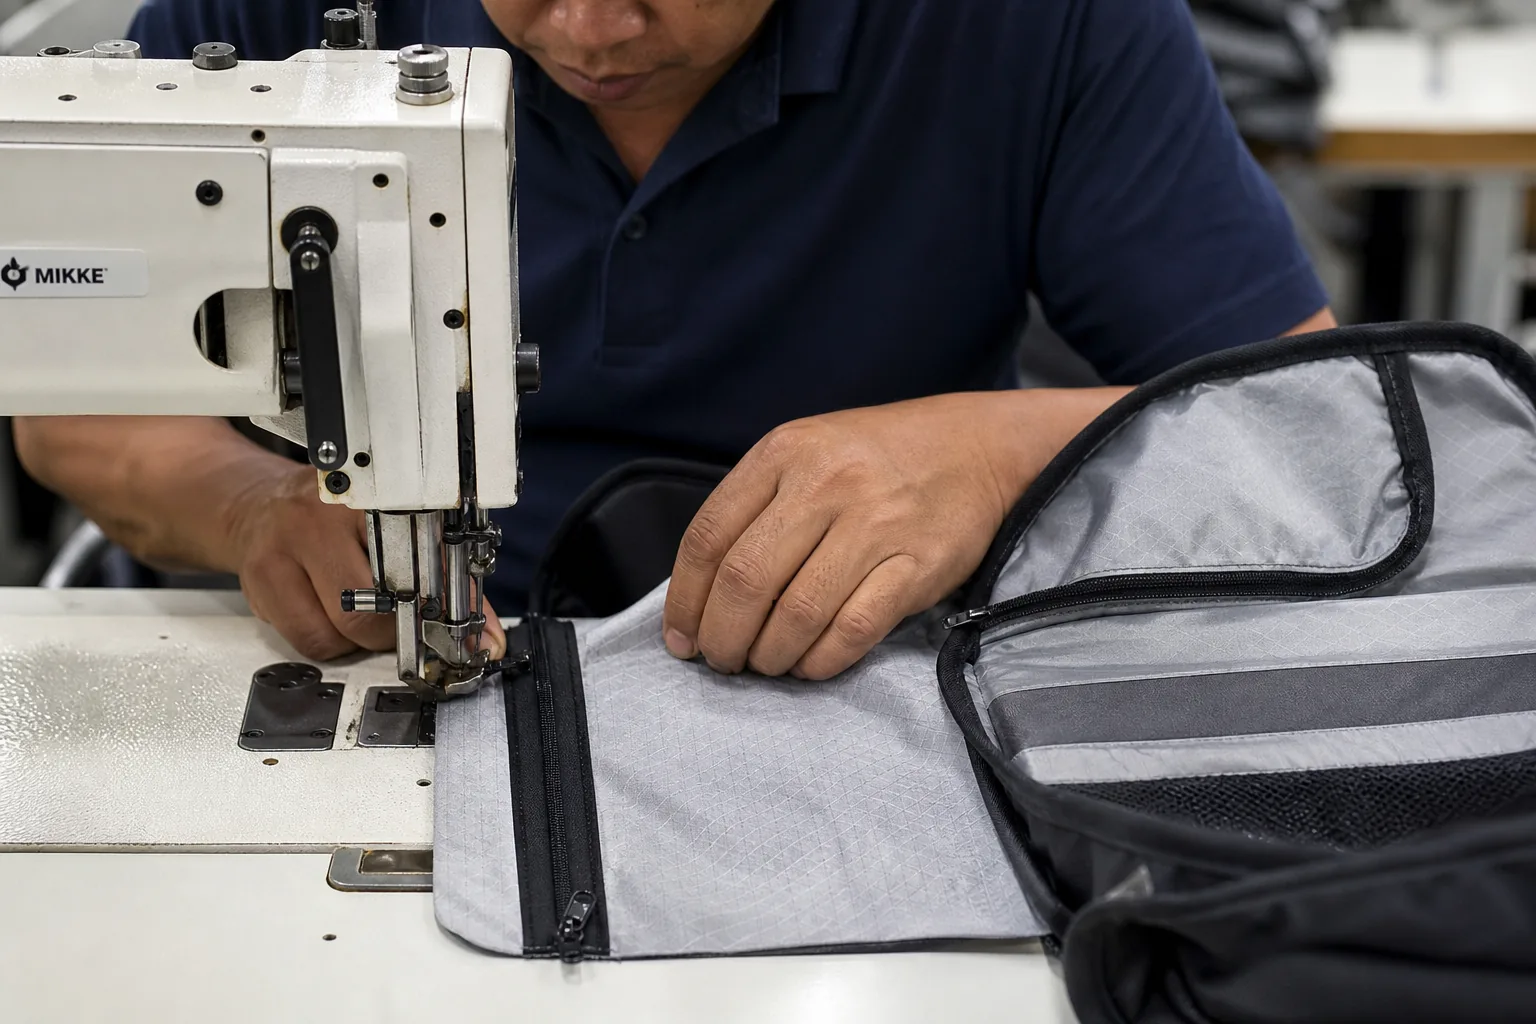
Worker sewing interior lining and pocket panels
The Manufacturing Sequence
Step
Operation
1
Cut lining and pocket panels
2
Cut and apply interfacing
3
Prepare zippers and binding
4
Assemble individual pockets
5
Attach pockets to the panel
6
Join the panel to the lining
7
Assemble the main body
8
Insert the sleeve and padding
9
Final inspection of the interior
The Lining Interface Table
Interface
Requirement
Seam allowance
Agreed standard
Edge finish
Bound or overlocked
Pocket placement
Marked accurately
Zipper length
Cut to size
Panel shape
Matches the exterior
The Interfacing Guide
Use
Interfacing
Pocket structure
Light woven
Sleeve stiffness
Medium foam or board
Panel body
Light fusible
Edge stability
Tape
The Material Availability Table
Component
Common options
Lining
210D, 300D, ripstop
Pocket fabric
Lining material
Mesh
Power mesh
Elastic
Woven elastic
Zipper
Coil, various gauges
Webbing
Polyester or nylon
Padding
PE or EVA foam
The Cost Drivers Table
Driver
Cost impact
Number of pockets
Labour
Zipper count
Material and labour
Foam thickness
Material
Dividers
Material and labour
Modular system
Material and labour
Lining upgrade
Material
Reinforcement points
Labour
The Cost Estimate Structure
Element
Relative share of interior cost
Lining fabric
25–35%
Zippers
15–25%
Foam and padding
10–20%
Elastic and webbing
5–10%
Labour
25–35%
Hardware
5–10%
The Simplification Options
Option
Saving
Standardise pocket sizes
Pattern efficiency
Reduce zipper count
Material and labour
Combine pockets
Labour
Use elastic instead of a zipper
Material
Keep one lining material
Inventory
The Quality Control Points
Point
Check
Panel cutting
Dimension accuracy
Pocket placement
Position against the drawing
Zipper operation
Smooth full travel
Stitching
Even and secure
Padding
Correct thickness and placement
Lining seam
No raw edges visible
Interior cleanliness
No threads or marks
The Defect Table
Defect
Cause
Pocket misplaced
Marking error
Zipper puckering
Tension or feed
Padding shifted
Assembly sequence
Raw edge exposed
Finish step missed
Lining too tight
Dimension error
Elastic sagging
Poor quality elastic
The Tolerance Table
Feature
Tolerance
Pocket position
Within 5 mm
Sleeve dimensions
Within 5 mm
Zipper length
Within 5 mm
Panel match
Within 3 mm
Stitch spacing
Per specification
Weight, Complexity and Volume Trade-offs
Every interior feature consumes material, labour, and volume. Designers who track all three make better decisions than those who track appearance alone.
The Weight Impact Table
Feature
Added weight
Additional lining panel
15–30 g
Laptop padding set
40–90 g
Zipper plus pull
15–30 g
Elastic loops
5–15 g
Mesh pocket
10–25 g
Divider panel
20–45 g
Stiffener sheet
30–80 g
The Volume Impact Table
Feature
Volume consumed
Laptop sleeve, padded
5–12%
Organizer panel
5–10%
Dividers
3–8%
Foam back panel
3–6%
Bottle pockets
Exterior, no loss
The Complexity Cost Table
Complexity level
Pockets
Relative labour
Minimal
2–3
Reference
Standard
5–8
1.2 to 1.4 times
Advanced
9–12
1.5 to 1.8 times
Complex modular
12 plus
2 to 2.5 times
The Trade-off Decisions
Decision
Gains
Loses
More pockets
Organization
Volume, weight, cost
Thicker padding
Protection
Volume, weight
Modular system
Flexibility
Cost, weight
More zippers
Security
Weight, cost, failure points
Large sleeve
Device range
Main volume
The Failure Point Table
Component
Failure risk
Zipper
Highest
Elastic
High
Key clip anchorage
Moderate
Pocket seam
Moderate
Divider attachment
Moderate
Lining seam
Low
The Optimisation Rules
Rule
Effect
Specify per segment
Removes unused features
Standardise pocket sizes
Pattern efficiency
Use elastic where a zipper is not needed
Lower cost and weight
Keep the sleeve dimensions tight
Protects volume
Limit zipper count
Fewer failure points
Avoid double lining
Saves weight
The Value Engineering Table
Feature
Keep when
Laptop sleeve
Always
Key clip
Always
Charger pocket
Mostly
Bottle pockets
Mostly
Document sleeve
Commuter and travel
Modular panels
Photography and specialist
Multiple small pockets
Only when each has a purpose
The Principle Table
Principle
Application
Every pocket has a stated purpose
Design discipline
Every zipper justifies its weight
Weight control
Every feature is tested
Quality
Every dimension has a tolerance
Manufacturing
Testing Interior Organization
An interior should be verified with use, not with opinion. Physical testing catches the errors that drawings hide.
The Test Types
Test
Method
Fit test
Load the specified items
Drop test
Loaded bag from a defined height
Load test
Fill to rated capacity
Cycle test
Open and close zippers repeatedly
Elastic recovery
Extend and release cycles
Abrasion test
Rub against contents
Water test
Leak containment
The Fit Test Protocol
Item
Load
Laptop
Maximum specified size
Tablet
Maximum size
Charger
With cable
Documents
Full A4 sleeve
Bottle
Widest specified diameter
Phone
Largest common size
The Acceptance Criteria Table
Test
Criterion
Fit
Items insert without forcing
Removal
Items come out without resistance
Drop
No device damage
Load
Seams intact
Zipper cycle
Smooth after cycles
Elastic
Returns to shape
Abrasion
No lining damage
The Cycle Testing Table
Component
Cycles
Main zipper
5,000 or more
Pocket zipper
3,000 or more
Elastic loops
500 or more
Key clip
Pull test
The Load Testing Table
Bag size
Test load
Small daypack
5 kg
Standard commuter
10 kg
Large travel
15 kg or more
Technical
Per rated capacity
The Usability Assessment
Assessment
Method
Access time
Time to retrieve the phone
One-handed use
Retrieve without removing the bag
Visibility
Locate items in dim light
Structure
Bag stands when loaded
Comfort
Load does not press through
The Usability Scoring Table
Criterion
Score
Laptop accessible in under 10 seconds
☐
Phone accessible without opening the main
☐
Charger retrievable without unloading
☐
Contents visible in low light
☐
Bag stands upright when loaded
☐
No item falls out when opened
☐
The Failure Log Table
Finding
Action
Laptop moves in the sleeve
Reduce clearance
Charger pocket too small
Resize
Zipper catches the lining
Add a guard
Keys poke the device
Reposition
Bottle falls out
Adjust the elastic
Document creased
Enlarge the sleeve
Factory note: The cheapest interior test is to pack the bag with the exact items the target user carries and use it for a week. Almost every pocket dimension error appears in that week, and correcting it in sampling costs a pattern revision rather than a production rework.
Common Interior Design Problems
Interior problems follow patterns. Each has a cause and a correction that can be specified.
The Problem Table
Problem
Likely cause
Laptop does not fit
Sleeve dimensioned too tightly
Laptop damaged in transit
No base gap or padding
Charger tangles
No cable management
Keys scratch the device
No separation or clip
Bottle falls out
Elastic too loose
Zipper catches lining
No garage or guard
Contents invisible
Dark lining
Pocket useless
Wrong dimension
Bag collapses when open
Insufficient structure
Interior wears early
Thin lining
The Correction Table
Problem
Correction
Tight sleeve
Add clearance
Impact damage
Add base gap and padding
Tangled cables
Add loops or a zip pocket
Device scratches
Add soft lining and separation
Loose bottle
Tighten elastic or add a lip
Zipper catching
Add zipper garage
Poor visibility
Change lining colour
Useless pocket
Redesign to a real item
Collapse
Add a stiffener
Early wear
Upgrade lining denier
The Design Review Questions
Question
Purpose
What items must fit?
Defines dimensions
Where does each item live?
Defines pockets
What is accessed most?
Defines placement
What must not touch?
Defines separation
What if the bag is dropped?
Defines padding
What happens when wet?
Defines materials
The Specification Checklist
Item
Done
Item list defined
☐
Dimensions specified with clearance
☐
Pocket positions drawn
☐
Zipper types specified
☐
Padding thickness defined
☐
Lining material and colour set
☐
Reinforcement points marked
☐
Tolerances stated
☐
The Risk Table
Risk
Mitigation
Device fit complaints
Specify maximum device
Damage claims
Test with drop criteria
Low usability scores
Physical use test
High cost
Value engineering
Excess weight
Weight budget
Specifying the Interior in the Tech Pack
The interior specification converts design intent into manufacturing instructions. Precision here removes most sampling iterations.
The Required Fields
Field
Example
Laptop sleeve internal size
380 x 270 x 30 mm
Sleeve construction
Suspended, 40 mm base gap
Padding
EVA 10 mm both faces
Padding coverage
Two faces plus base
Pocket count and positions
Per drawing
Pocket dimensions
Per drawing with clearance
Zipper specification
5 gauge coil, reverse
Lining material
300D recycled polyester
Lining colour
Light grey
Reinforcement points
Key clip, divider anchors
Tolerances
Within 5 mm
Test requirements
Drop 800 mm loaded
The Drawing Requirements
Drawing
Content
Interior layout
All pockets with dimensions
Section view
Padding layers
Detail view
Stitch construction
Materials list
Every component
Position drawing
Pocket placement on the panel
The Specification Table Format
Component
Specification
Tolerance
Lining
300D PU coated
Grade per approved sample
Sleeve padding
EVA 10 mm
Plus or minus 1 mm
Main zipper
8 gauge coil
Per approved sample
Pocket zipper
5 gauge coil
Per standard
Elastic
25 mm woven
Stretch ratio 1.8
Webbing
20 mm polyester
Colour fastness grade 4
The Change Control Table
Change
Re-approval needed
Pocket dimension
Yes, sample
Lining material
Yes, full sample
Padding thickness
Yes, drop test
Zipper brand
Yes, function test
Colour
Yes, swatch approval
The Approval Sequence
Step
Output
1
Interior drawing approved
2
Materials approved
3
Sample produced
4
Fit test with real devices
5
Drop test completed
6
Sample approved and signed
7
Production specification frozen
Factory note: The single most valuable line in an interior specification is the maximum device size with clearance stated in millimetres. It removes the interpretation that produces most fit complaints, and it gives the factory a dimension to inspect against.
The Buyer’s Interior Checklist
A working checklist for evaluating an interior design before and during sampling.
Before Sampling
Item
Done
Target segment defined
☐
Item list defined
☐
Maximum device sizes stated
☐
Access priorities defined
☐
Protection level agreed
☐
Weight budget set
☐
Cost target stated
☐
At Sample Review
Item
Done
Devices fit without forcing
☐
Devices remove easily
☐
Charger and cable stored
☐
Keys separated from devices
☐
Bottle secure
☐
Zippers operate smoothly
☐
Contents visible
☐
Bag stands when loaded
☐
No item falls out when opened
☐
At Testing
Item
Done
Drop test performed with a device
☐
Load test at rated capacity
☐
Zipper cycle test
☐
Elastic recovery test
☐
Usability timing test
☐
Results documented
☐
The Eight Rules
Rule
Reason
Specify maximum device sizes
Removes fit disputes
Add working clearance
Items are used in cases
Protect the base of the sleeve
Drops land on the base
Give every pocket a stated purpose
Prevents useless features
Separate hard items from screens
Prevents scratch claims
Use light lining colours
Contents must be visible
Test with real devices
Drawings hide errors
Track weight and cost per feature
Keeps decisions honest
FAQ
What size laptop sleeve should a backpack have?
Specify the maximum device dimensions plus working clearance, not the marketing laptop size. A 15 inch laptop typically needs roughly 380 x 270 mm internally with 10 to 20 mm clearance on each side and enough thickness allowance for a protective case. State the maximum device size in millimetres in the tech pack so the factory has a dimension to inspect against.
How thick should laptop padding be?
Around 10 mm of EVA or PE foam on both faces is a practical standard for a commuter backpack, with extra padding at the base. Thinner padding of 5 mm provides basic protection only. The dimension that matters most for drop performance is the gap between the bottom of the sleeve and the base of the bag, typically 20 to 40 mm.
What is a suspended laptop sleeve?
A suspended sleeve is attached to the back panel or the bag structure so that its base sits above the bottom of the backpack, leaving an air gap. When the bag is dropped onto its base, the gap absorbs the impact instead of transferring it directly to the device. It is one of the most effective and inexpensive protection features available.
How many pockets should a backpack interior have?
It depends on the segment. A minimalist commuter bag usually works with two to four purposeful pockets; an everyday commuter bag commonly uses five to eight; a technical or EDC bag may use eight to twelve. Every pocket should have a stated purpose, because unused pockets consume volume, add weight, and increase labour cost without adding value.
Should the backpack lining be light or dark?
A light or contrasting lining makes contents visible, which measurably improves usability, particularly in low light. Dark linings hide wear and dirt but also hide contents, which is why many bags damaged by forgotten items use dark interiors. Light grey and orange are the most practical choices.
How do you test a backpack interior?
Load it with the exact items the target user carries, including the maximum specified laptop in its case, then run three tests: a fit test for insertion and removal, a drop test from around 800 mm with the device installed, and a cycle test on the zippers. Finish with a usability assessment, timing how long it takes to retrieve a phone and a charger without removing the bag.
Does interior organization add much cost?
The materials are a small part of it; labour dominates. Interior cost is roughly a quarter to a third lining fabric, a quarter to a third labour, and the remainder split between zippers, foam, and hardware. Sharp increases come from pocket count and zipper count, which is why standardising pocket sizes and limiting unnecessary zippers are the most effective cost controls.
How do you prevent a charger from scratching a laptop?
Give the charger its own zippered pocket, separate from the laptop sleeve, with an elastic loop to hold the cable. Keep hard items such as keys and charger prongs away from screens and device surfaces, and use a soft brushed lining in the pockets that come closest to the device.
Conclusion
Interior organization is where a backpack becomes useful rather than merely attractive. It is also the most cost-efficient differentiation a manufacturer can offer, because the difference is pattern engineering inside space that already exists rather than new tooling, moulds, or fabric development.
The design principles are consistent. Build a hierarchy based on access frequency and protection need. Put padded items against the back, heavy items low, and frequent items where they can be reached without opening the main compartment. Give every pocket a stated purpose and a dimension based on the item in use rather than at rest. Protect the base of the laptop sleeve with a real gap, because that is where drops land.
The manufacturing discipline matters equally. Specify pocket positions and dimensions with tolerances, choose linings that make contents visible, reinforce every anchorage point, and test with the actual devices the target user carries. A drop test with a laptop installed is worth more than any amount of discussion about foam thickness.
For factories, an interior competence is a competitive asset: brands return to plants that get pocket architecture right the first time and that can iterate on it without new tooling. For buyers, an interior checklist is the cheapest quality tool available — one week of carrying a loaded sample reveals almost every dimension error before production starts, and correcting a pattern costs far less than reworking a shipment.