
From Fabric Roll to Finished Pack: The Backpack Manufacturing Process
Every backpack you have ever carried — the school pack on a teenager’s back, the commuter bag in a busy subway car, the hiking pack heading up a mountain trail — began as a roll of fabric in a factory. Between that roll and the finished product stand dozens of precise, interdependent steps that most buyers never see and few articles explain.
This guide walks through the complete backpack manufacturing process from the perspective of the people who run the factory floor. Whether you are a brand owner planning your first production run, an importer evaluating a factory, or a sourcing manager trying to understand why a quote costs what it does, knowing what actually happens inside the workshop will make you a dramatically better negotiator and partner.
We cover the process in the order it happens on the floor: material inspection and preparation, cutting, sewing and pre-assembly, heat pressing and bonding, final assembly and hardware fitting, and quality inspection before packing and shipping. Along the way we highlight the quality checkpoints, common failure points, and the decisions that separate a factory that delivers consistent quality from one that produces problems.
- An Overview of the Production Flow
- Stage 1: Material Receiving and Inspection
- Stage 2: Cutting
- Stage 3: Pre-Sewing and Sub-Assembly
- Stage 4: Main Sewing
- Stage 5: Heat Pressing and Bonding
- Stage 6: Final Assembly and Hardware Fitting
- Stage 7: Quality Inspection
- Stage 8: Packing and Shipping
- Cost Structure: Where the Money Goes
- FAQ
- Choosing the Right Factory Partner
- Conclusion
An Overview of the Production Flow
A typical backpack factory runs a production flow that looks like this:
| Stage | What happens | Typical duration* | Key output |
|---|---|---|---|
| 1. Material receiving & inspection | Fabric, zippers, webbing, hardware checked against spec | 1–2 days | Approved materials |
| 2. Cutting | Fabric laid, patterned, and cut into panels | 2–4 days | Cut panels, labeled kits |
| 3. Pre-sewing & sub-assembly | Pockets, straps, and small parts sewn first | 2–5 days | Sub-assemblies |
| 4. Main sewing | Panels joined into the pack body | 3–7 days | Sewn shell |
| 5. Heat pressing & bonding | Stiffeners, logos, and reinforcements bonded | 1–2 days | Structured shell |
| 6. Final assembly & hardware | Zippers, buckles, webbing, and labels fitted | 2–4 days | Completed pack |
| 7. Quality inspection | Full AQL inspection, function and load tests | 1–2 days | Passed units |
| 8. Packing & shipping | Folding, polybagging, carton packing | 1–2 days | Shipped goods |
*For a standard production run of 1,000–5,000 units, assuming materials are already in stock. Total production typically spans 15–30 days from cutting start to shipment.
Manufacturer’s note: Lead time is not one number. Ask a factory to break the schedule into these stages — then you will see where the real bottlenecks are. A factory that quotes “20 days” without a stage breakdown is usually quoting from a calendar, not from a plan.
Each stage has its own quality gates. Skipping or rushing any of them is how a factory ships packs that look fine in photos but fail in the field — seams that pop, zippers that jam, straps that pull out.
Stage 1: Material Receiving and Inspection
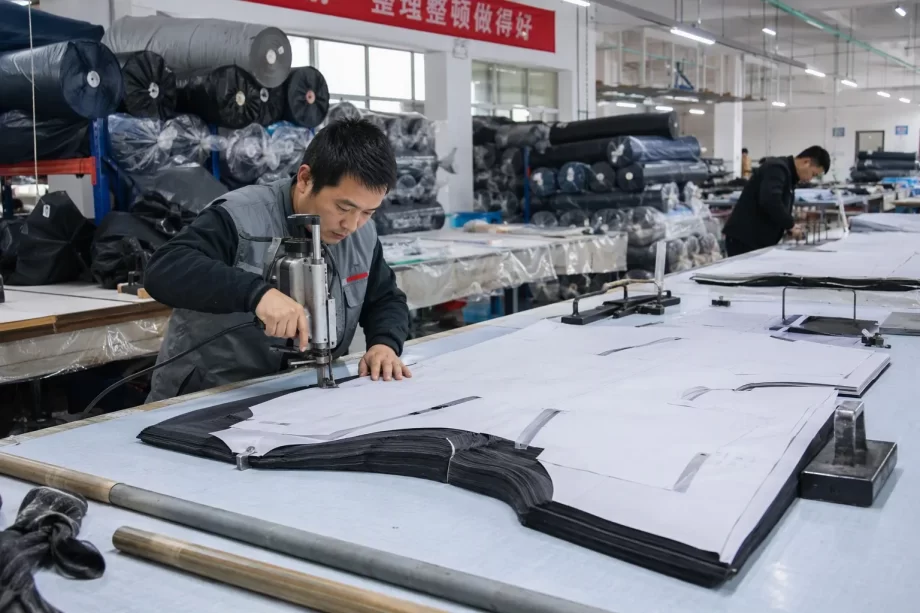
Production does not start on the cutting table. It starts in the warehouse, where every incoming material is checked against the approved specification. This is the cheapest place in the entire process to catch a problem — catching a bad fabric here costs nothing compared to discovering it after 2,000 packs are sewn.
What Gets Inspected
- Fabric — verify style, denier, GSM (grams per square meter), color against the approved master swatch, and coating integrity. Check for shading within the roll and across rolls.
- Zippers — confirm size, type (coil, molded, metal), slider brand, and function. Test a sample of each batch for smooth opening and closing.
- Webbing and straps — check width, breaking strength, and edge finish. Webbing is the component most often substituted with cheaper, weaker material.
- Hardware — buckles, cord locks, D-rings, hooks, and magnets are tested for function, plating quality, and strength.
- Foam and padding — density, thickness, and compression recovery are verified against spec.
| Material | Common substitution risk | Why it matters |
|---|---|---|
| Fabric | Lower denier than spec | Packs wear through faster |
| Webbing | Narrower or weaker strap | Straps snap under load |
| Zipper slider | Non-branded lower-grade slider | Jams, pulls apart |
| Buckles | Thin-walled plastic | Breaks in cold weather |
| Foam | Lower density | Padding flattens quickly |
The Color and Shade Check
Color is the single most common cause of material rejection. Fabric dye lots vary, and the same color code can look different under daylight, store lighting, and camera flash. Every serious factory maintains a master swatch library and checks incoming rolls against it under standardized lighting (typically D65 daylight).
Manufacturer’s note: If your brand has strict color requirements, ask the factory for a shade band — a physical range of acceptable color variation. Agreeing on acceptable tolerance (for example ΔE ≤ 1.5) before production prevents the most common dispute in the entire industry: “the color is wrong.”
Stage 2: Cutting
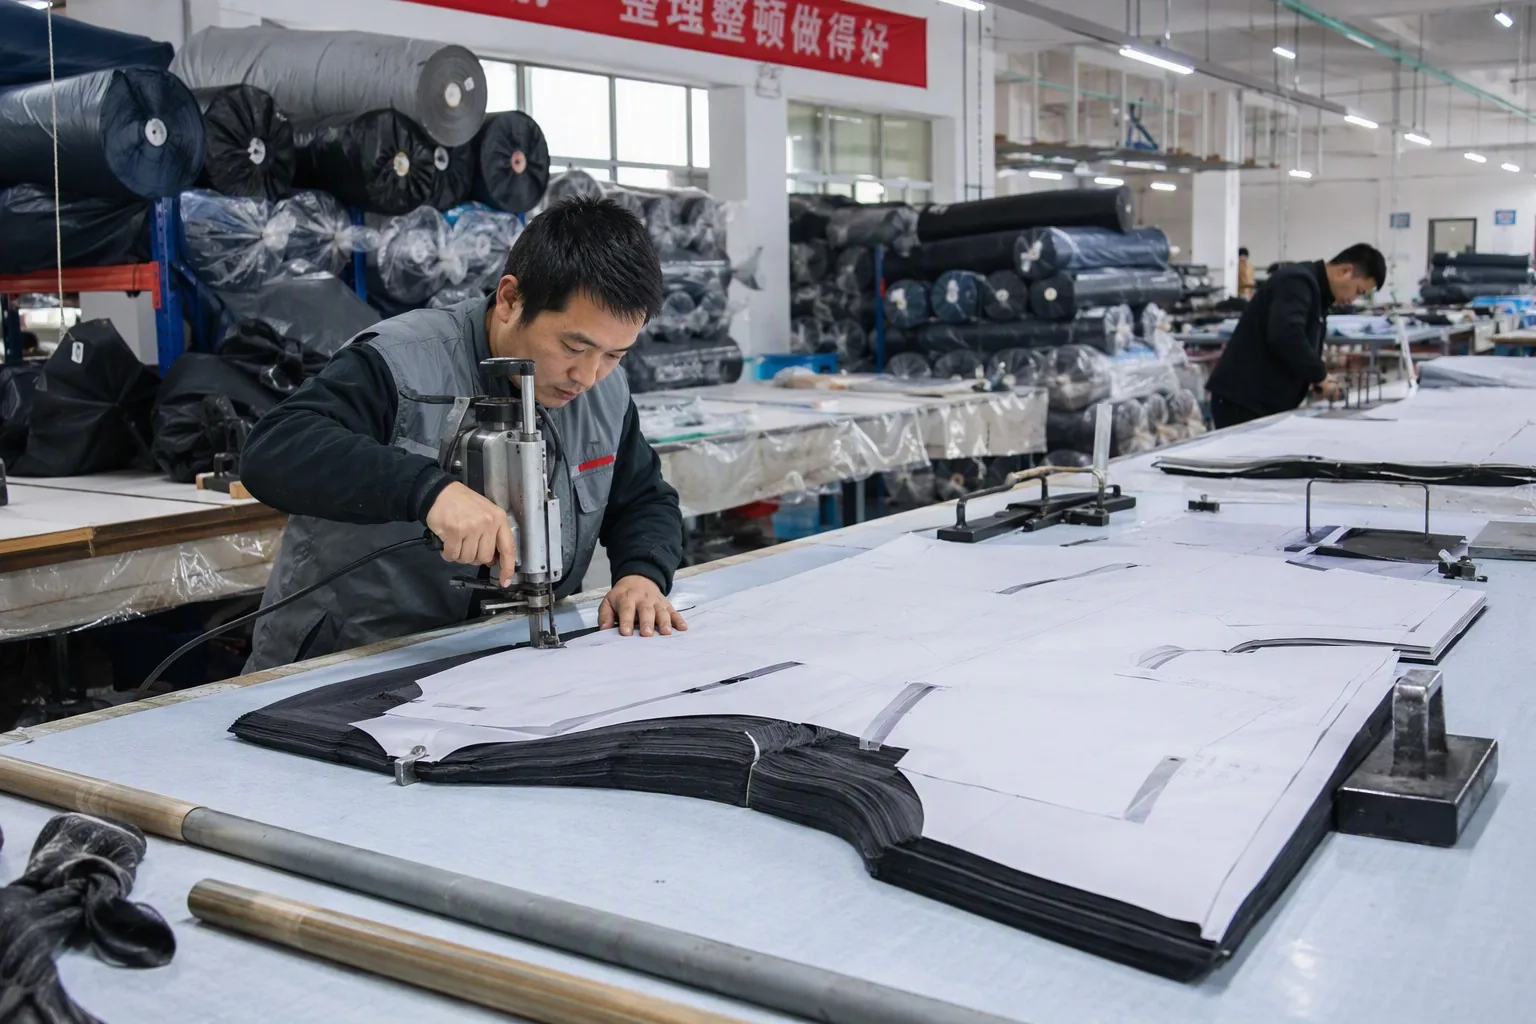
Cutting converts fabric rolls into the individual panels that will become the pack. It is a high-precision, high-waste stage, and the efficiency of the cutting process directly affects material cost — typically 5–10% of fabric is lost to waste, and good cutting can reduce that to 3–5%.
How Cutting Works
- Spreading — layers of fabric are spread on a long cutting table. The number of layers is limited by fabric thickness and the cutting method; thicker fabric means fewer layers per spread.
- Pattern laying (marker making) — the cutting patterns for each panel size are nested as tightly as possible on the fabric width to minimize waste. This is done digitally with marker-making software.
- Cutting — panels are cut with straight knives, band knives, or increasingly common CNC/automated cutting machines. Small curved parts (strap ends, pocket corners) may be cut with manual shears or clicker dies.
- Kitting (bundling) — cut panels are sorted into kits, each containing everything needed for one backpack (or one bundle of 10–20 packs). Each kit is labeled with a lot number so problems can be traced back to a specific fabric roll and cutting shift.
Key Quality Points in Cutting
- Grain direction — most fabrics have a direction (warp/weft) and some have a nap or directionality (like Cordura-style textures). Panels must be cut consistently to avoid visible shade differences on the finished pack.
- Edge condition — clean cuts without fraying or crushed edges. Poor cutting produces ragged seams later.
- Yield control — the factory tracks actual fabric consumption against theoretical consumption. Big unexplained differences signal pattern problems or theft.
Cutting Technology
| Method | Typical use | Advantages | Limitations |
|---|---|---|---|
| Straight knife | Standard fabric cutting | Fast, flexible, low cost | Manual skill required |
| Band knife | Curved and small parts | Clean edges on curves | Slower |
| Clicker (die) press | Repeated identical small parts | Consistent, fast for small parts | Die cost per design |
| CNC/automated cutter | High-volume, complex nesting | Maximum yield, precise, data traceable | High capital cost |
Stage 3: Pre-Sewing and Sub-Assembly
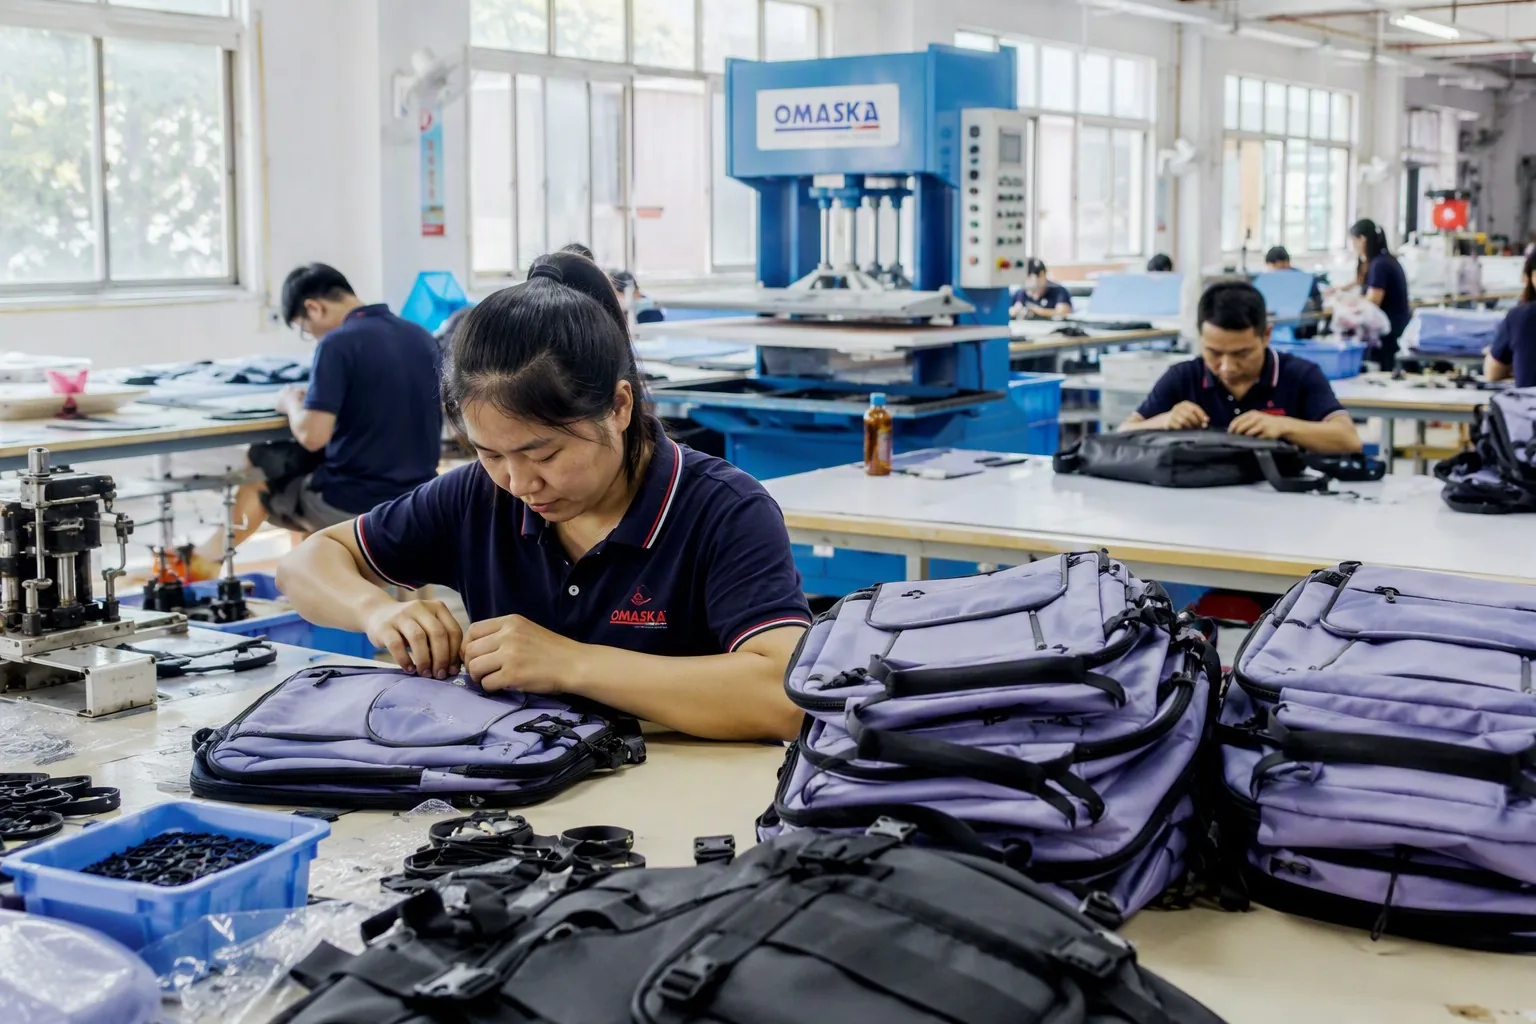
A backpack is not sewn as one piece. It is assembled from dozens of smaller sub-assemblies that are sewn first, then joined. Working this way lets different operators specialize in different parts and dramatically improves quality and speed.
Common Sub-Assemblies
- Front pockets — sewn with zipper attachment, pleats, and logo placement.
- Straps — shoulder straps are layered constructions: outer fabric, padding foam, lining fabric, and webbing, sewn together and edge-stitched. Strap construction is a major durability factor.
- Top handles — reinforced with webbing cores and bar-tacked at attachment points.
- Internal dividers — laptop sleeves, organizer panels, and mesh pockets are sewn flat before being installed into the main body.
- Back panels — padding panels with foam and breathable mesh are assembled as a unit.
Why Sub-Assembly Matters
Sub-assemblies are where most of the sewing quality is determined. A pocket that is sewn straight onto the main body would be hard to access; sewn flat as a sub-assembly, it is easy to position precisely. This modular approach also means a defect in one component can be reworked without tearing apart the whole pack.
Stage 4: Main Sewing
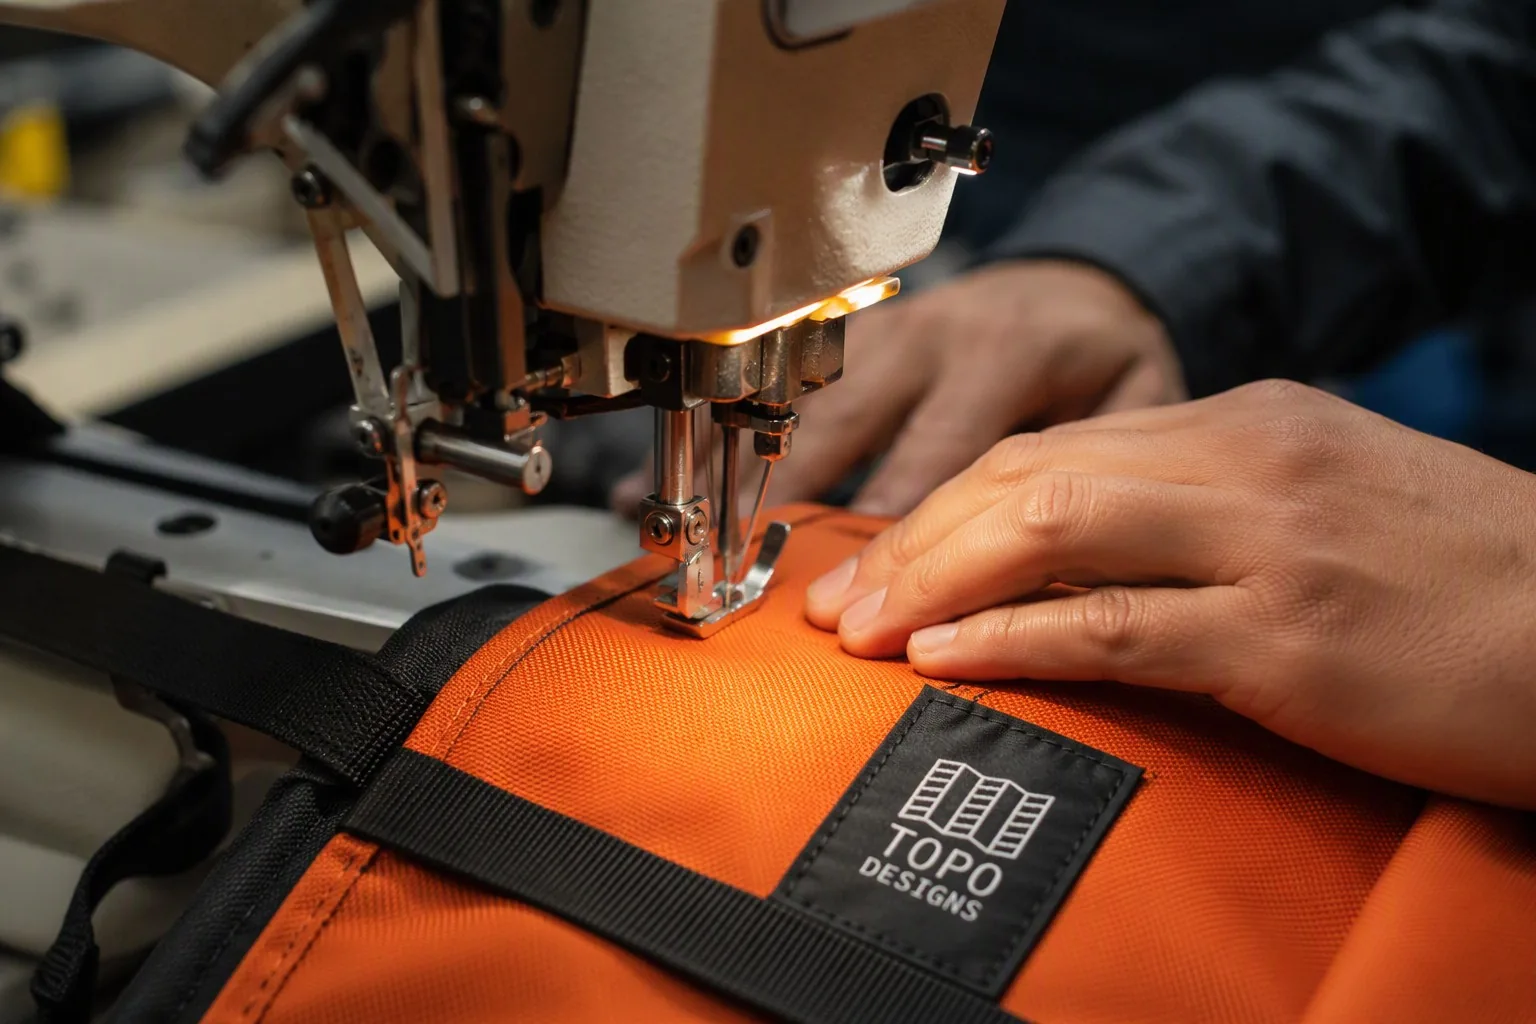
Main sewing joins the sub-assemblies into the pack body. This is the heart of the factory — typically 40–60% of the labor cost of a backpack is sewing labor, and the sewing line is where capacity, quality, and schedule are won or lost.
The Sewing Line
A backpack factory organizes sewing into a production line, often with these stations:
| Station | Operation |
|---|---|
| Body assembly | Joining front, back, and gusset panels |
| Zipper installation | Attaching main opening zippers with proper tape alignment |
| Lining insertion | Installing the inner lining bag into the shell |
| Straps and handles | Attaching shoulder straps, handles, and webbing |
| Binding and edging | Covering raw edges with binding tape |
| Bar-tacking | Reinforcing stress points with dense zigzag stitches |
| Final close | Closing the pack and installing remaining hardware |
Stitch Quality Standards
Sewing quality is governed by stitch density and tension, not just appearance:
- Stitches per inch (SPI) — typical backpack spec is 4–6 SPI for main seams, more for reinforcement. Count them on a sample; it is the fastest way to judge a factory’s discipline.
- Thread tension — balanced tension produces flat, even stitches. Loose tension causes loops and seam failure; tight tension puckers the fabric.
- Seam allowance — consistent seam allowance (typically 8–12 mm) ensures seams line up and hold.
- Bar-tacks — stress points (strap ends, webbing loops, zipper stops) must have bar-tacks: dense reinforcement stitches that prevent tears.
Manufacturer’s note: The single most reliable indicator of factory quality is bar-tacking discipline. Check the strap attachment points on a sample pack — are they bar-tacked on both sides of the webbing? Many low-cost factories skip this because it takes extra time. Within a year, those packs come back with straps torn out.
Common Sewing Defects
- Skipped stitches (needle or tension problems)
- Puckered seams (tension imbalance or fabric/thread mismatch)
- Open seams (missed sections, poor operator training)
- Crooked zipper installation (tape tension incorrect)
- Uneven strap lengths (poor jig use)
Stage 5: Heat Pressing and Bonding
Not every pack needs heat pressing, but it is a defining step for structured packs — the kind that stand up on their own, hold their shape, and look premium on a shelf.
What Heat Pressing Does
- Fusing stiffeners — heat-activated adhesive films (fusible interlinings) bond stiffener materials to fabric panels, giving the pack structure.
- Bonding layers — heat and pressure fuse laminated materials (like TPU-coated fabrics) to create sealed, waterproof seams.
- Logo application — heat transfer logos and patches are applied with heat presses.
- Foam shaping — molded foam panels for back systems are shaped and bonded.
The Process
Panels are placed in a heat press with the adhesive layer, then pressed at a controlled temperature, pressure, and dwell time. The settings are material-specific — too hot melts the fabric, too cool produces weak bonds that delaminate later.
| Parameter | Typical range | Effect of error |
|---|---|---|
| Temperature | 120–180°C depending on material | Too hot: melting, scorching |
| Pressure | 2–5 kg/cm² | Too low: weak bond, delamination |
| Dwell time | 8–20 seconds | Too short: adhesive fails to activate |
Why It Matters
Structured packs (commuter packs, laptop bags, premium school packs) rely on bonded stiffeners for their shape. A pack that “looks great in the photo” but goes soft and saggy after a month of use usually has poor heat pressing or wrong stiffener material.
Stage 6: Final Assembly and Hardware Fitting
With the shell sewn and structured, the pack moves to final assembly: fitting hardware, installing the remaining components, and finishing.
Final Assembly Operations
- Zipper sliders and pulls — fitting sliders, adding pull tabs, and checking function.
- Buckles and adjusters — installing side-release buckles, cord locks, and strap adjusters, and setting strap lengths.
- Compression straps — attaching compression straps and webbing loops.
- Internal accessories — key clips, hanging loops, and accessory attachments.
- Labels — sewing in brand labels, size labels, care labels, and any required compliance labels (fiber content, country of origin).
- Trim and detail — piping, edging, decorative stitching, and final logo placement.
Hardware Selection Matters
Hardware is the highest-failure component of a backpack after the fabric. A factory should verify:
- Buckle material — nylon buckles are tougher than most plastic buckles; acetal is common in outdoor gear.
- Plating quality — metal hardware should be salt-spray tested to avoid corrosion.
- Slider quality — branded sliders (YKK, etc.) have tighter quality control; generic sliders are the most common downgrade in cheap production.
Stage 7: Quality Inspection
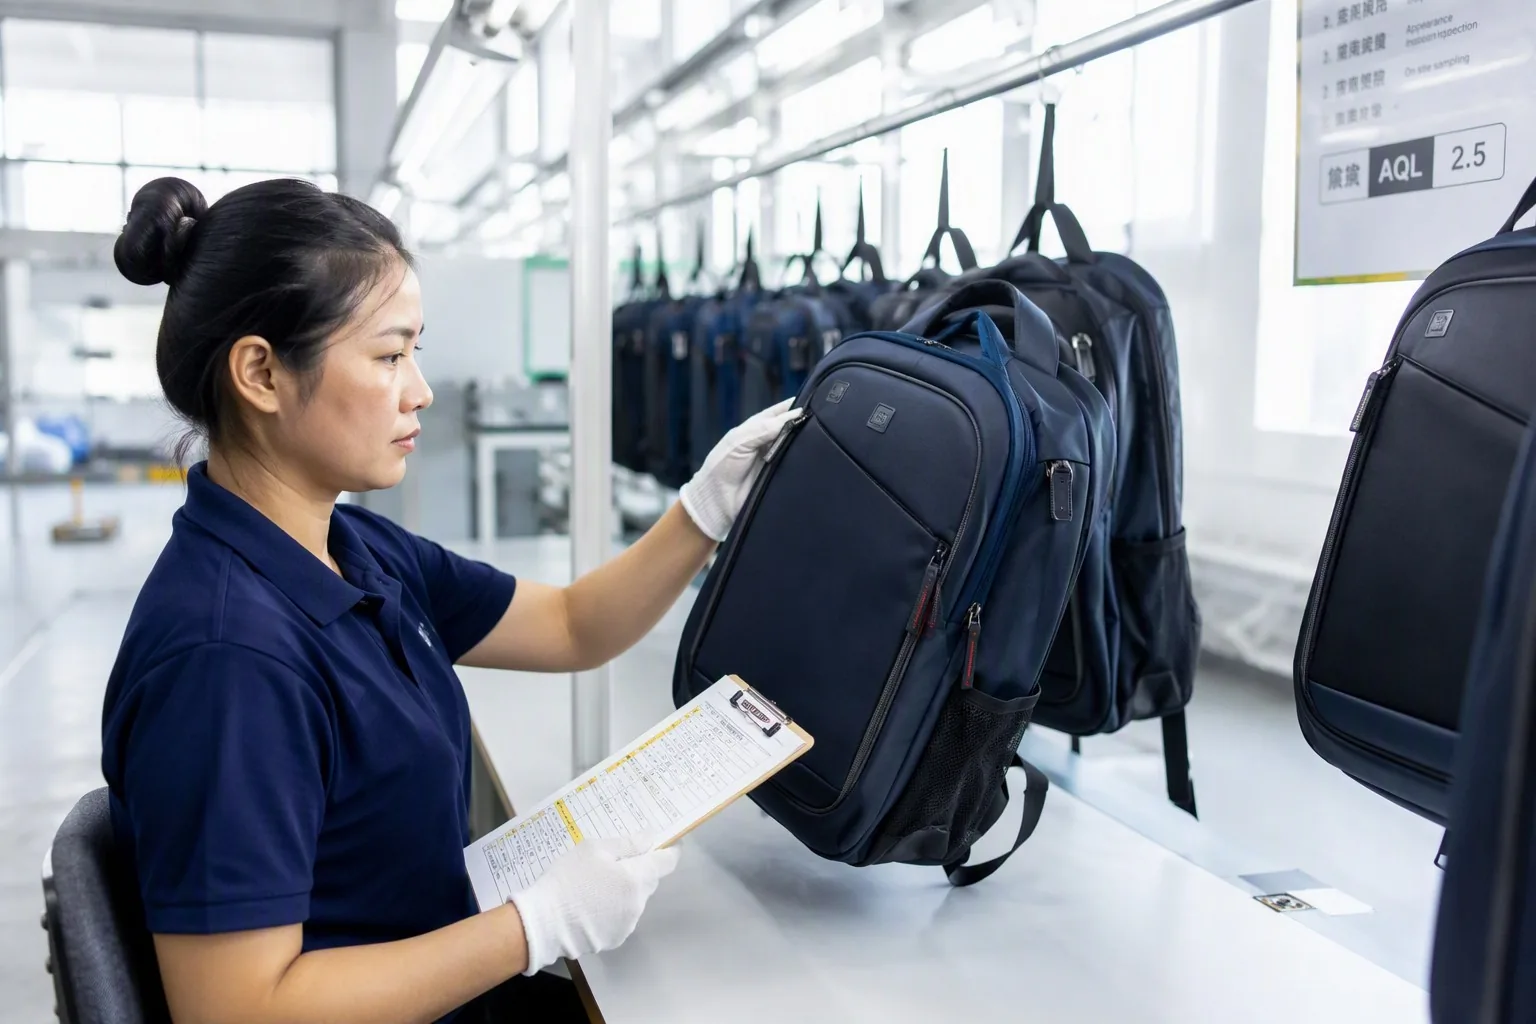
Inspection is not a single final check — it runs throughout production. But the final inspection is the gate before packing, and it follows established protocols.
In-Line vs Final Inspection
- In-line inspection — roving QC staff check sub-assemblies and sewing stations during production, catching defects while rework is cheap.
- Final inspection (AQL) — finished packs are sampled and inspected per the Acceptable Quality Limit (AQL) standard, typically AQL 2.5 for major defects and 4.0 for minor defects for most backpack programs.
What the Final Inspection Covers
| Check | Method | Typical acceptance |
|---|---|---|
| Appearance | Visual check under standard light | No stains, shading, or defects |
| Stitching | Count SPI, check seams and bar-tacks | 4–6 SPI, no skipped stitches |
| Zipper function | Open/close cycle test | Smooth, no jamming |
| Hardware function | Buckle/strap function test | Secure, no breakage |
| Load test | Fill with weight (e.g., 20 kg) and lift | No seam or strap failure |
| Dimension check | Measure against spec | Within tolerance |
| Label check | Verify all labels present and correct | Compliance labels included |
The Load Test
A simple but revealing test: fill the pack with the specified test weight (for school packs, commonly 10–20 kg), lift by the handle, carry by the straps, and check for seam separation or hardware failure. This test alone catches most structural defects.
Manufacturer’s note: Ask your factory for the AQL levels and test protocol in writing before production, and consider a third-party inspection (SGS, Bureau Veritas, Intertek, or a local inspection company) on the first shipment. The cost of one inspection is a fraction of the cost of receiving a bad container.
Stage 8: Packing and Shipping
The final stage is often where corners get cut — and where products get damaged before they even reach the customer.
Packing Process
- Folding — packs are folded consistently (some brands require specific fold patterns to reduce creasing).
- Polybagging — each pack goes into a polybag, usually with a desiccant pack for long transit.
- Carton packing — packs are packed into export cartons, typically 5–20 packs per carton depending on size. Carton dimensions and inner packing should be tested to prevent crushing.
- Carton marking — shipping marks, carton numbers, and handling marks are printed.
- Pre-shipment inspection — if contracted, a final container-loading inspection verifies quantity, packing, and condition.
Packing Considerations
- Creasing — structured packs can be crushed or creased by tight packing; use appropriate carton size and void fill.
- Moisture — long sea transit (30–40 days) can cause mildew in humid climates; desiccants and moisture-resistant packing matter.
- Weight limits — carton gross weight should stay within freight limits and handling guidelines (commonly under 20–25 kg for easy handling).
Cost Structure: Where the Money Goes
Understanding the process also means understanding the cost. A typical backpack’s factory price breaks down roughly as:
| Cost component | Typical share of factory price |
|---|---|
| Materials (fabric, hardware, zippers, webbing) | 45–60% |
| Labor (cutting, sewing, assembly) | 20–30% |
| Factory overhead and utilities | 8–12% |
| Quality control and packing | 5–8% |
| Profit margin | 5–10% |
Manufacturer’s note: When a quote seems too low, ask which stage is being cut. The honest answer is almost always inspection, hardware quality, or stitch density — the three things you cannot see in a product photo but will feel within months of use.
FAQ
How long does it take to manufacture a backpack?
A typical production run of 1,000–5,000 units takes 15–30 days from cutting start to shipment, plus 2–4 weeks for material procurement and 1–3 weeks for sampling. Total lead time from confirmed order is usually 6–10 weeks.
What is the minimum order quantity (MOQ) for custom backpacks?
MOQs typically range from 300–1,000 units for standard styles, and 1,000–3,000 units for fully custom designs with new patterns and custom hardware. Lower MOQs are possible but increase per-unit cost.
Can a factory make one sample before I commit to bulk?
Yes — sampling is standard. Expect a development sample (to approve design and materials) in 7–15 days, then a pre-production sample (from the actual production setup) before bulk manufacturing begins.
How do I verify a factory’s sewing quality before ordering?
Request production samples, inspect bar-tacking at stress points, count stitches per inch (4–6 SPI is typical), and ask for reference clients. A third-party factory audit (quality, social compliance) is the strongest verification.
What are the most common quality problems in backpack manufacturing?
The most common are: poor bar-tacking (straps pull out), zipper jamming or slider failure, seam popping under load, color shading between batches, and hardware breakage in cold weather. All are preventable with proper specs, inspection, and testing.
Should I use a third-party inspection company?
For first shipments or large orders, yes. A pre-shipment inspection (AQL-based) costs a small fraction of the order value and verifies quantity, quality, and packing before your money and the container leave the factory.
Choosing the Right Factory Partner
The manufacturing process only delivers quality when it is run by people who care about every stage. When you evaluate a factory, look beyond the showroom and the sample they hand you — the sample is made by the best operators under special attention. What matters is how the factory runs its standard production.
Questions That Reveal the Real Factory
- Ask for production line photos and videos, not just product samples. A live production line shows whether the workstations are organized, whether QC stations exist on the line, and whether the floor matches the claims.
- Ask how many operators each production line has and what the daily output is. A vague answer (“we produce a lot”) versus a specific one (“this style runs at 120 units per day with 18 operators on the line”) tells you whether they actually track their process.
- Ask where the QC station sits. The best factories place QC checkpoints on the line, not only at the end. In-line QC catches defects while they are cheap to fix.
- Ask about rework rates and the most common defect. A factory that can name its top three defects and what it does about them understands its own process. One that cannot has not measured anything.
- Ask for the mill certificates for their standard fabrics. A factory with real material traceability can show you fabric test reports on request. This is also the first sign of compliance capability for markets like the EU or the US.
Manufacturer’s note: Do not evaluate a factory on the day of your visit alone. Ask for photos of the same line from a month ago, or check a reference client who has been ordering for more than a year. Consistency over time — not a single good day — is the real signal of process quality.
The Role of Communication in Quality
A significant share of quality problems in backpack manufacturing are not sewing defects — they are specification defects. The buyer and the factory meant different things by “water resistant,” “heavy duty,” or “premium finish.” The best safeguard is written, itemized specifications:
- Fabric: exact style, denier, GSM, coating, and color code
- Hardware: exact type, size, brand, and finish
- Stitch density and seam construction
- Test requirements (load test weight, zipper cycle count, water column rating)
- Label and compliance requirements
- Packing and carton specifications
Every one of these items should be written into the purchase order or a product specification sheet. If a factory pushes back on writing specs down, treat it as a warning sign — specifications protect both sides, and a factory that refuses to commit to them in writing is a factory that does not want to be held accountable.
Conclusion
A backpack is the product of eight disciplined stages — from material inspection through cutting, sub-assembly, main sewing, heat pressing, final assembly, inspection, and packing. Each stage carries its own quality gates, and each gate exists because skipping it has a measurable cost in returns, warranty claims, and brand damage.
For buyers, the practical takeaway is simple: you do not need to become a factory expert, but you should know enough to ask the right questions. Ask for the stage breakdown of the lead time. Ask for the AQL levels and test protocol in writing. Ask to see the bar-tacking on a sample. Ask how color tolerance is defined. The factories that answer these questions with specifics are the ones that will deliver packs that last.
At our facility, every pack on the line passes through all eight stages, with inspection points at each one. If you are planning a new backpack line — or re-evaluating your current supplier — we would be glad to walk you through our process, share our quality protocol, and quote your next run.