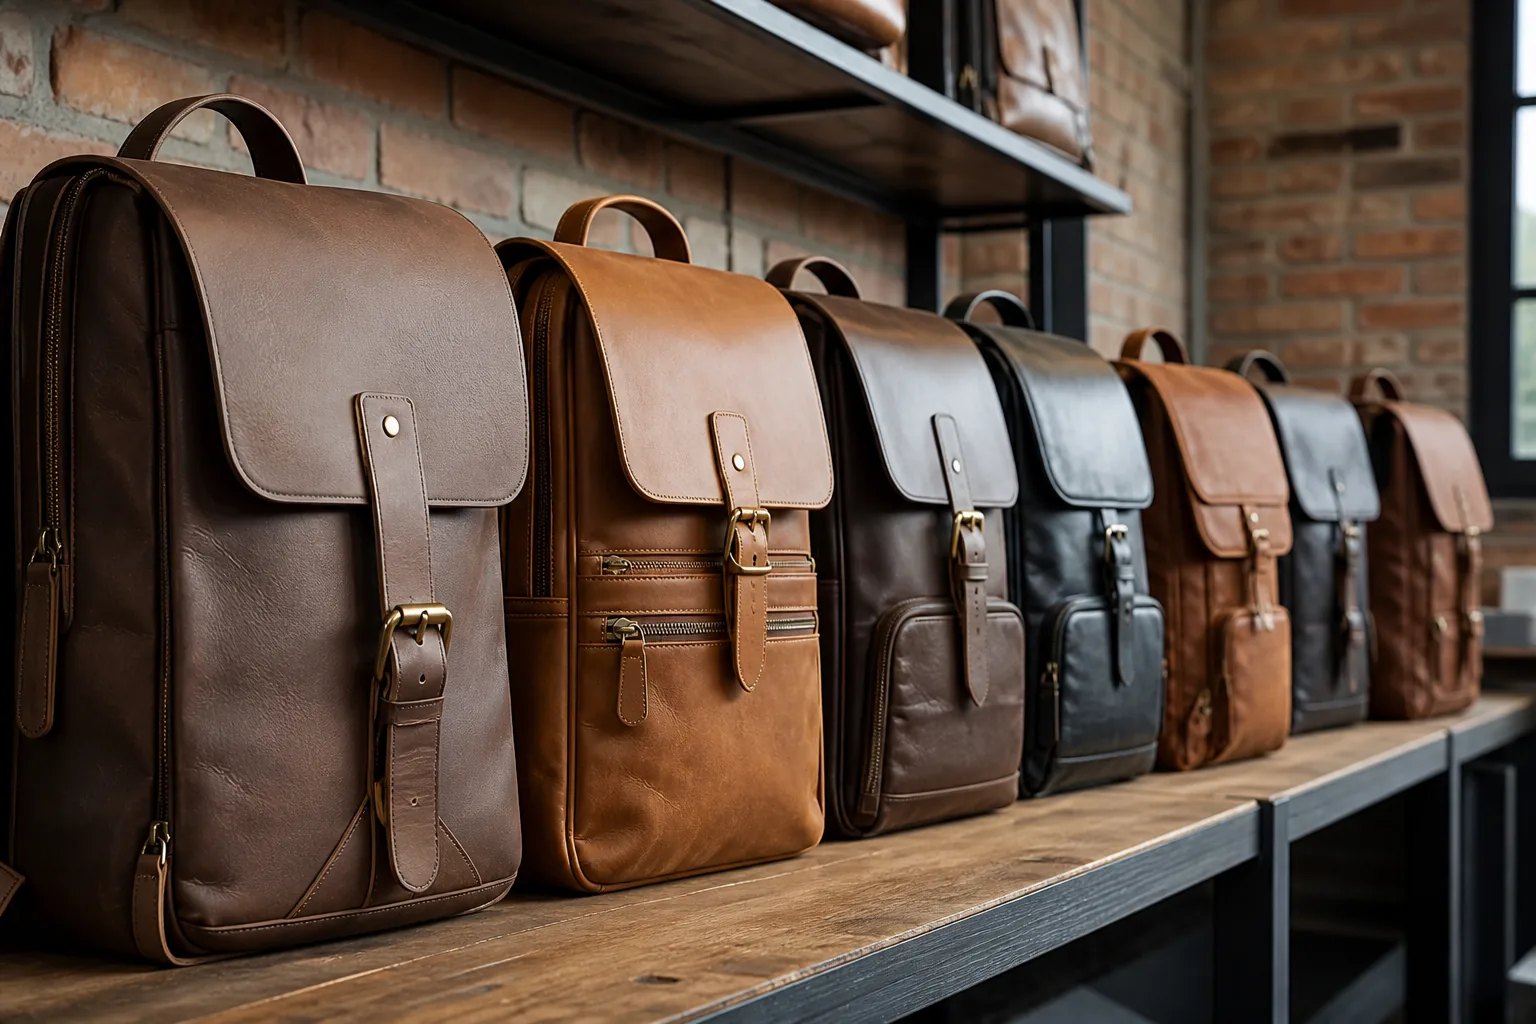
Leather Backpack Design: Structure and Style Balance
Leather Backpack Design: Structure and Style Balance
Every leather backpack is a negotiation. Structure wants thickness, reinforcement, and rigidity. Style wants clean lines, soft drape, and an unbroken surface. The designer’s job is to resolve that tension in a way the factory can build and the customer will carry.
For a manufacturer, this is not an aesthetic question. Design decisions set the material list, the machine routing, the labor time, the weight the customer feels on their shoulders, and the price the brand can defend.
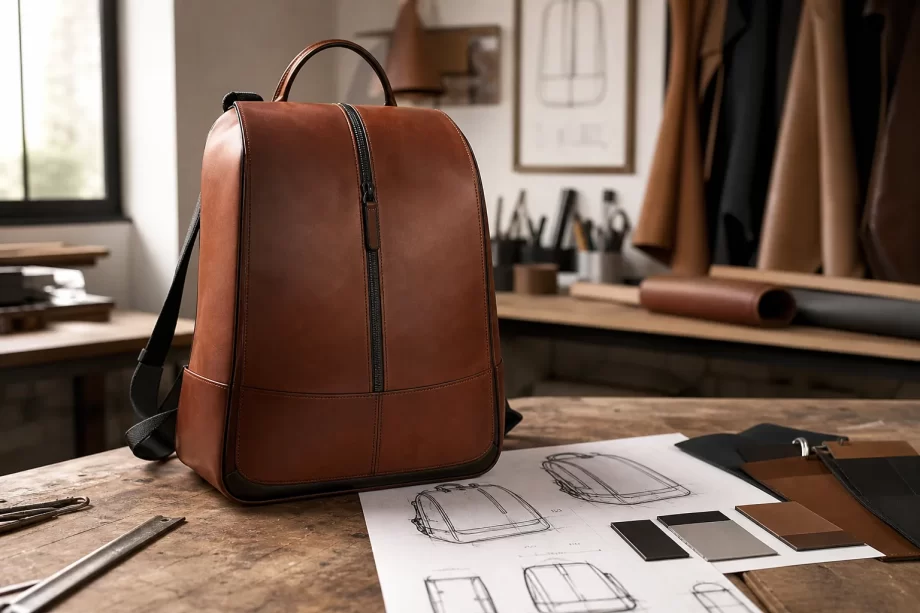
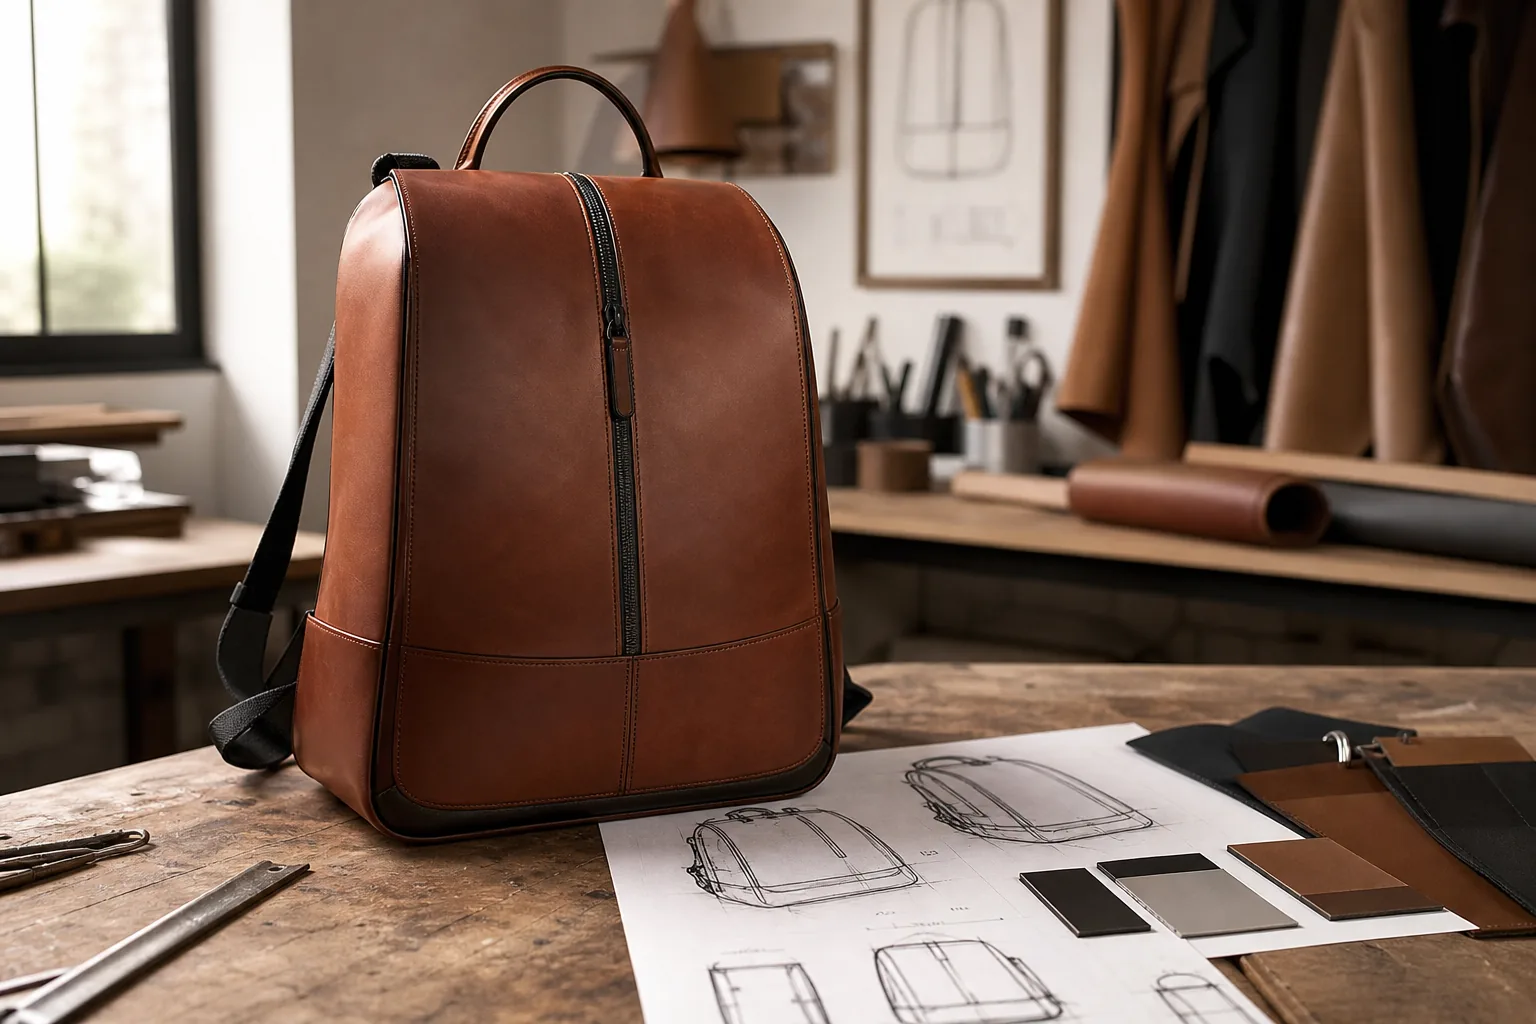
Leather backpack prototype on a designer workbench
This guide covers how leather backpack design balances structure and style in production — panel architecture, weight management, corner treatment, hardware language, and market alignment — with the specifications a factory needs to build what was designed.
The conflict is physical, not philosophical. Adding structure adds material, and material changes appearance.
The Structural Demands
Demand
Material consequence
Hold shape empty
Thicker leather or interlining
Carry load without sag
Reinforced panels and straps
Protect contents
Padded and stiffened walls
Stand upright
Rigid base and back
Keep form over years
Stable, dense fiber
The Stylistic Demands
Demand
Material consequence
Clean, simple surface
Fewer panels and seams
Soft drape
Thinner, softer leather
Visible craftsmanship
Exposed stitching and edges
Light carry
Lightweight materials
Refined silhouette
Precision panel shapes
The Trade-off Points
Design choice
Structural effect
Stylistic effect
More panels
Stronger shaping
More seams visible
Fewer panels
Cleaner look
Shape harder to hold
Thicker leather
Better rigidity
Less softness, more weight
Interlining
Structure without thickness
Can feel artificial
Extensive reinforcement
Load capacity
Bulk at junction points
Minimal reinforcement
Elegant lines
Earlier wear
The Four Design Archetypes
Archetype
Balance
Heritage briefcase style
Structure-led, formal
Minimalist daily pack
Style-led, soft
Technical outdoor pack
Structure-led, functional
Fashion-forward tote
Style-led, expressive
Factory note: The most expensive design disagreement in leather bags is “soft but structured.” A pack cannot be both unless the factory is given a specified interlining and panel architecture. If the brief asks for softness and shape without naming the materials, the sample room guesses — and the guess decides the product.
Structural Fundamentals for Leather Packs
Structure in a leather backpack comes from four systems working together.
The Four Structural Systems
System
Function
Panel architecture
Defines shape and seam lines
Reinforcement
Prevents stretch and sag
Base construction
Carries weight and abrasion
Harness attachment
Transfers load to the body
The Panel Architecture Options
Architecture
Character
Single front panel
Clean, curved, harder to control
Front plus side gussets
Structured, deeper volume
Multi-panel body
Precise shape, more seams
Folded construction
Minimal seams, softer
The Reinforcement Layer Guide
Layer
Purpose
Back panel stiffener
Prevents bowing
Base insert
Holds base shape
Laptop sleeve foam
Protection
Strap interlining
Prevents stretch
Hardware backing
Load spreading
Corner patches
Abrasion resistance
The Base Construction Types
Base type
Durability
Flat base, single layer
Lowest
Flat base with insert
Good
Folded base
Good
Double-layer base
High
Base with corner wrap
Highest
The Harness Attachment Decision
Attachment
Load capacity
Stitched to back panel
Moderate
Stitched to reinforced back
High
Stitched plus bar tack
High
Stitched plus rivet
Very high
Minimal hardware
Light use only
The Structural Specification Table
Component
Typical spec
Front panel leather
1.4–1.6 mm
Back panel leather
1.5–1.8 mm
Back stiffener
1.0–1.5 mm board
Base leather
1.8–2.4 mm
Base insert
2 mm PE or fiber board
Strap leather
1.8–2.4 mm
Strap interlining
Non-woven or webbing
Corner patch
1.6–2.0 mm
The Shape Retention Test
Test
Method
Empty stand test
Bag stands unaided
Loaded sag test
Panels measured under load
Cycle test
Shape after repeated use
Moisture test
Shape after humidity
Long-term check
Shape after weeks of loading
Factory note: A leather backpack that sags at the front panel almost always lacks a stiffener, not thickness. Adding 0.4 mm of leather increases cost and weight more than adding a 1.0 mm board insert — and the insert can be shaped to the design line rather than fighting it.
Weight Management in Leather Pack Design
Leather is heavy. A well-proportioned leather backpack still weighs more than its nylon equivalent, and the designer decides where that weight lives.
The Weight Budget
Set a total weight target before choosing materials, then allocate it by component.
Component
Share of weight
Body leather
40–50%
Straps and harness
15–20%
Hardware
8–15%
Lining and padding
10–15%
Stiffeners and inserts
5–10%
The Weight Reduction Levers
Lever
Saving
Trade-off
Thickness reduction
10–20%
Less structure
Panel count reduction
3–6%
Harder shaping
Lining change
3–8%
Less protection
Hardware substitution
5–10%
Different perceived quality
Skiving internal edges
2–4%
More labor
Insert material change
2–5%
Less rigidity
Where Weight Actually Hurts
Position
Effect on user
Away from body
Greater perceived weight
High on the back
Poor balance
Rigid base
Feels heavier than it is
Thick straps without padding
Pressure points
The Balance Test
Criterion
Target
Loaded feel
Stable, not top-heavy
Shoulder pressure
Distributed, no hot spots
Panel movement
Minimal swing when walking
Empty carry
Acceptable dead weight
The Perception Gap
Customers read weight as quality, up to a point. Beyond that point, the same weight reads as a problem.
Weight range
Perception
Very light leather bag
Thin, less premium
Moderate
Solid, well made
Heavy
Serious quality or uncomfortable
Excessive
Poor design
Factory note: Never reduce thickness to save weight without checking the structure system. Removing 0.2 mm of leather from the front panel and adding a shaped insert often reduces total weight while improving shape retention. The reverse — thinning the panel and adding a thicker insert — adds weight and can make the bag feel rigid and cheap.
Corner and Edge Design
Corners and edges are where leather bags look designed — or look rushed. They are also where most wear appears first.
The Corner Treatment Options
Treatment
Appearance
Durability
Simple sewn corner
Clean, minimal
Moderate
Reinforced corner patch
Structured
High
Wrapped and stitched
Craft
High
Riveted corner
Industrial
Very high
Folded corner
Soft
Moderate
The Edge Finishing Options
Finish
Character
Painted edge
Sharp, formal
Burnished edge
Natural, craft
Folded edge
Soft, rounded
Bound edge
Contrast, technical
Raw edge
Casual, deliberate
The Edge Consistency Rule
Rule
Reason
One finish per bag
Visual coherence
Edge width ±0.2 mm
Precision
Color matched or intentional
Avoid accidental mismatch
Seal all exposed edges
Prevent fraying
The Corner Reinforcement Table
Corner type
Reinforcement
Base corners
Patch or double layer
Flap corners
Skive and stitch
Gusset corners
Clip, hammer, reinforce
Hardware corners
Backing patch plus tack
The Wear Points Map
Point
Wear type
Base corners
Abrasion
Flap edge
Flex cracking
Strap fold
Creasing
Zipper end
Friction
Opening rim
Handling
The Design Decision Table
If the bag is…
Corner approach
Daily commuter
Reinforced corners
Fashion piece
Minimal, refined corners
Travel bag
Heavy reinforcement
Heritage briefcase
Wrapped and stitched
Hardware Style Language
Hardware communicates the bag’s identity more than any other single element. It also determines construction at every attachment point.
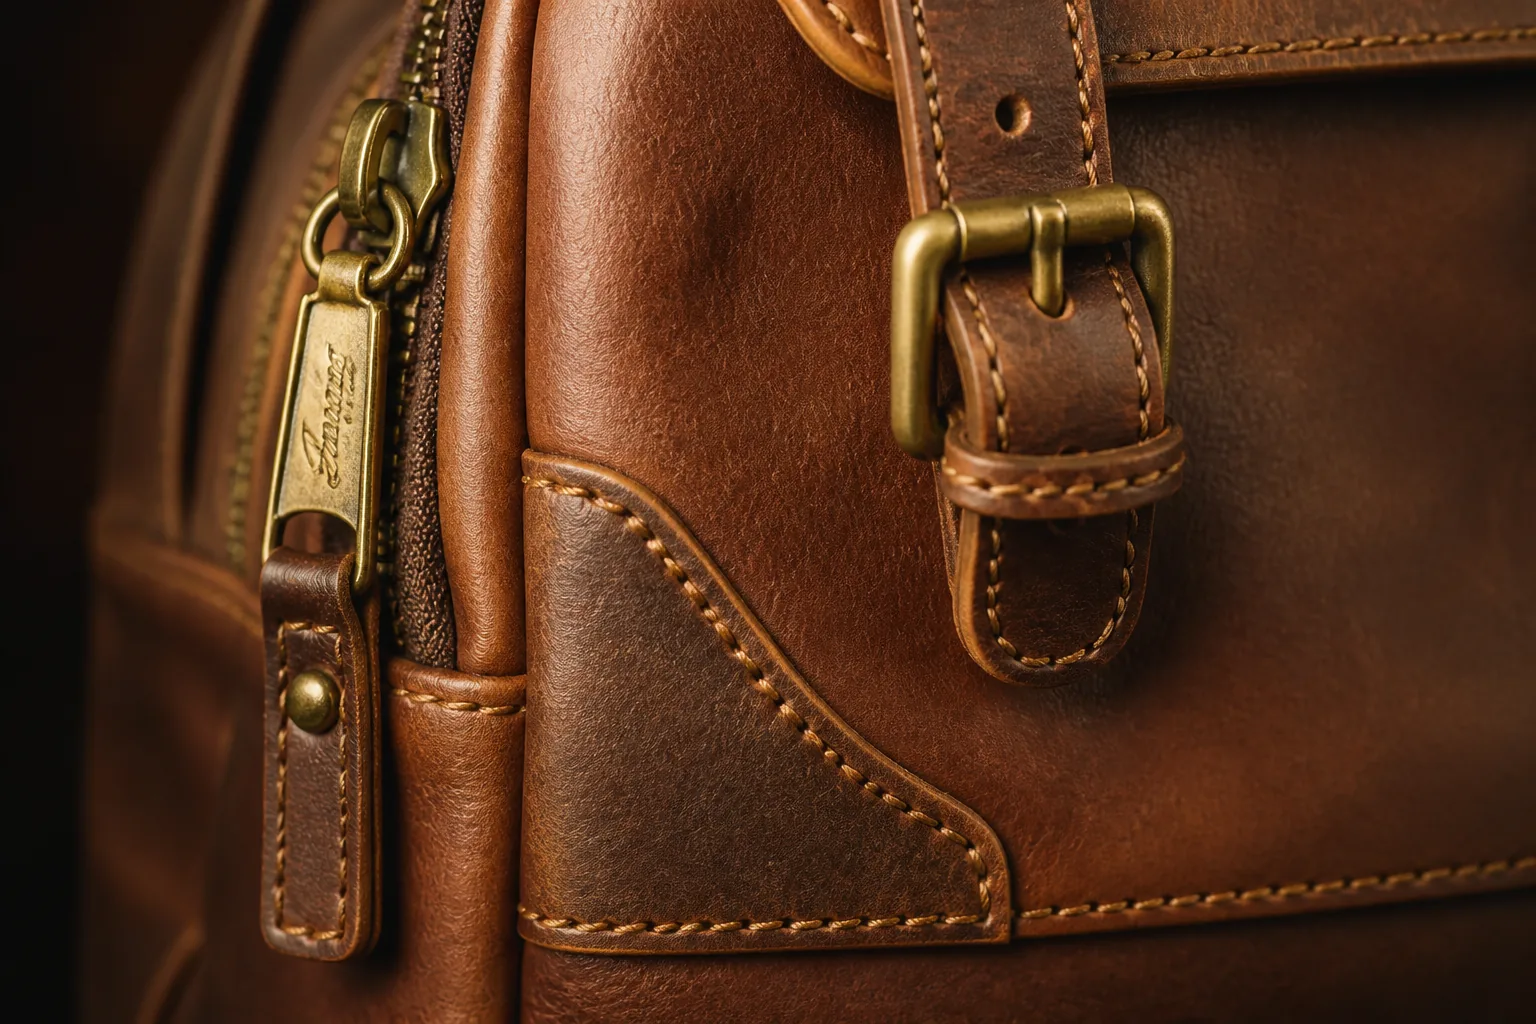
Antique brass hardware detail on leather backpack
The Hardware Finishes
Finish
Message
Antique brass
Heritage, warm
Polished nickel
Modern, precise
Matte black
Technical, urban
Gunmetal
Industrial, muted
Brushed brass
Contemporary classic
Copper
Craft, distinctive
The Hardware Types
Type
Function
Buckle
Flap closure
Magnetic snap
Quick access
Zipper
Opening control
D-ring
Strap attachment
Swivel hook
Removable straps
Ladder lock
Strap adjustment
Rivet
Structural fastening
The Consistency Rule
Element
Rule
Finish
One family per bag
Plating quality
Same grade throughout
Size language
Scaled, not random
Weight
Consistent feel
Branding
Subtle and consistent
The Hardware Weight and Cost Table
Hardware
Weight impact
Cost impact
Solid brass
High
High
Zinc alloy plated
Moderate
Moderate
Stainless steel
Moderate
Moderate
Aluminum
Low
Low
Acetal plastic
Very low
Very low
The Durability Question
Risk
Cause
Plating wear
Low-grade plating
Buckle breakage
Cast vs machined
Snap failure
Weak magnet
Zipper failure
Undersized for use
Rivet loosening
Poor backing
The Hardware Specification Table
Hardware
Specification
Buckle
Antique brass, 25 mm
Snap
Neodymium, 18 mm
Zipper
#8 metal, YKK or equivalent
D-ring
20 mm, solid
Rivet
8 mm, solid brass
Strap adjuster
25 mm, plated
Factory note: Hardware finish must be chosen before leather color approval. Brass and cognac leather read warm; the same leather with polished nickel reads cool and modern. Changing hardware after sample approval forces a re-review of every photo and marketing asset — and often a re-sample.
Aligning Design with the Target Market
Design that ignores its market produces beautiful samples nobody orders. Market alignment is a specification exercise, not a creative one.
The Market Profile Table
Market
Priority
Typical structure
Urban commuter
Organization, slim
Semi-structured
Heritage and classic
Craft, longevity
Structured, formal
Travel and weekender
Capacity, durability
Highly structured
Fashion and lifestyle
Silhouette, novelty
Style-led, soft
Corporate gifting
Consistency, branding
Clean, uniform
Outdoor and technical
Function, weather
Technical, rigid
The Regional Preference Table
Region
Preference
Europe
Refinement, subtle branding
North America
Practicality, capacity
Japan
Precision, detail finishing
Southeast Asia
Lightweight, humidity tolerance
Middle East
Luxury signals, larger hardware
Australia
Durability, casual structure
The Price Band Consistency
Band
Material and structure
Entry
Chrome leather, minimal inserts
Mid
Better leather, defined structure
Premium
Full-grain, crafted edges
Luxury
Selected hides, hand finishing
The Feature Priority Matrix
Feature
Commuter
Travel
Fashion
Laptop protection
Essential
Sometimes
Rarely
Multiple pockets
Essential
Essential
Minimal
Water resistance
Important
Important
Low
Lightweight
Important
Moderate
Moderate
Structured shape
Moderate
Essential
Low
Distinctive hardware
Low
Low
Essential
The Brand Positioning Question
Ask the brand three questions before drawing anything.
Who carries this bag, and for what?
What should it look like after two years of use?
Which of structure or style gives way when they conflict?
The answer to the third question prevents most late-stage redesigns. A brand that says “structure gives way” accepts softer panels and faster aging. A brand that says “style gives way” accepts visible reinforcement and heavier construction.
The Design Review Process
A factory-side design review catches problems that no drawing shows.
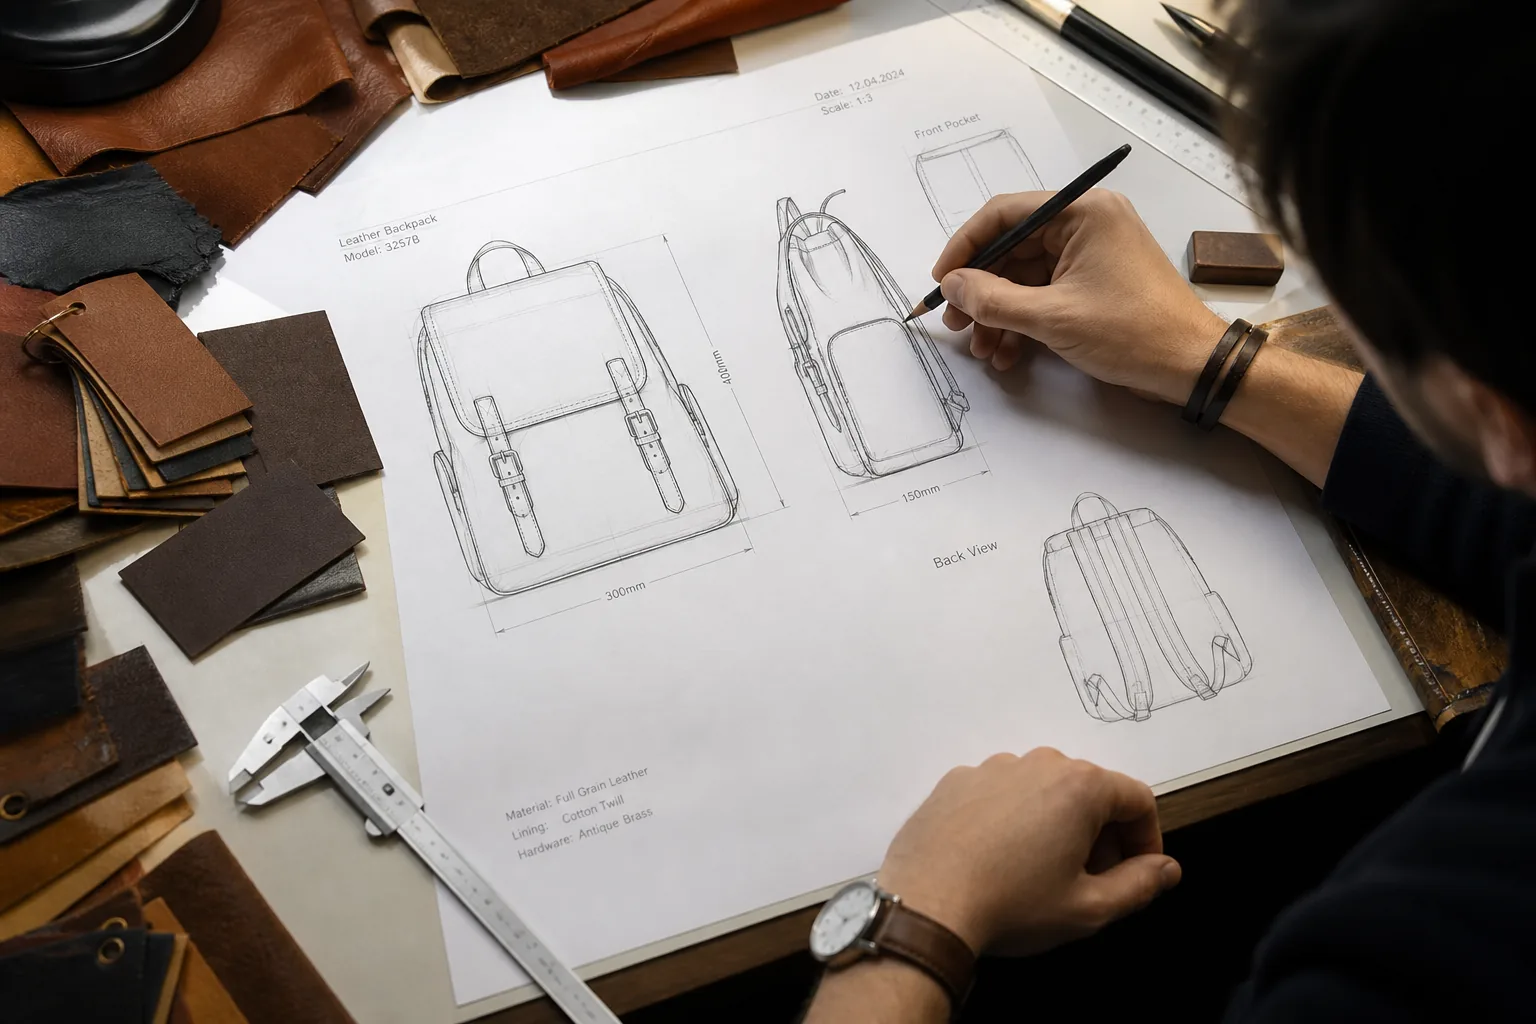
Bag designer sketching technical drawings at a drafting table
The Review Stages
Stage
Purpose
Concept review
Fit with market and price
Specification review
Materials and construction
Sample review
Physical evaluation
Production review
Line feasibility
Pre-bulk review
Final lock
The Specification Review Checklist
Item
Confirmed
Leather grade and thickness by part
☐
Panel count and architecture
☐
Reinforcement layers and positions
☐
Hardware type, finish, size
☐
Stitch and edge specifications
☐
Lining material and attachment
☐
Weight target
☐
Target retail price
☐
The Sample Review Criteria
Criterion
Question
Shape
Does it hold form empty?
Balance
Does it feel stable loaded?
Edges
Are finishes consistent?
Hardware
Does it coordinate?
Construction
Can it be built consistently?
Detail
Would it photograph well?
The Production Feasibility Questions
Question
Risk if ignored
How many layers at the thickest seam?
Machine stalls, rejects
Is any seam inaccessible on a flatbed?
Cylinder arm needed
Can hardware be set after assembly?
Rework and damage
Is edge finishing reachable?
Inconsistent finish
Does the pattern fit available hide sizes?
Excess waste
The Sign-Off Discipline
Stage
Who signs
Spec sheet
Design and production
Sample
Brand and factory
Photo set
Brand and factory
Production trial
QC and production
Bulk authorization
Brand
The Change Cost Curve
Stage of change
Relative cost
Concept
1×
Specification
3×
Sample
10×
Pre-bulk
30×
In production
100×
That curve is the argument for a disciplined review. Every question asked at the concept stage is nearly free. The same question asked during production is a recall.
Designing for Manufacturability
A design is only real when the line can reproduce it. Manufacturability is a design input, not a manufacturing constraint to be worked around later.
The Design-for-Manufacturing Rules
Rule
Reason
Limit layers at seams
Machine limits and bulk
Keep curves within machine capability
Consistent stitch quality
Standardize stitch lengths
Fewer setup changes
Reuse hardware sizes
Volume pricing and simplicity
Design reachable edges
Reliable finishing
Allow for hide variation
Realistic yield
The Panel Count Trade-off
Panel count
Effect
Very few
Clean look, hard to shape, high waste
Moderate
Balanced
Many
Precise shape, more labor
Excessive
Quality risk at junctions
The Seam Junction Planning
Junction
Design consideration
Body to base
Bulk management
Gusset to panel
Access angle
Flap to body
Stress and alignment
Strap to back
Reinforcement
Pocket to panel
Layer count
The Tolerance Design
Dimension
Design tolerance
Panel length
±2 mm
Seam allowance
±1 mm
Hardware position
±1.5 mm
Edge width
±0.2 mm
Stitch length
±0.5 mm
The Yield-Aware Design Table
Design choice
Yield effect
Large single panels
Lower yield
Many small pieces
Higher yield
Symmetric parts
Better nesting
Grain-critical parts
Lower yield
Curved shapes
Moderate
The Prototype Iteration Plan
Round
Focus
1
Proportion and silhouette
2
Structure and reinforcement
3
Detail and hardware
4
Construction refinement
Final
Pre-production approval
Factory note: Bring the cutting room into the design review. A pattern that looks efficient on screen can waste 15% more leather than necessary because of hide shape and grain direction. Ten minutes with the cutting supervisor at the concept stage is worth more than any late-stage cost negotiation.
Costing the Design Decisions
Every design choice carries a cost. Designers who understand the cost model make better trade-offs than designers who discover the price at quotation.
The Cost Drivers by Design Decision
Decision
Cost impact
Thicker leather
Material and weight
More panels
Cutting and sewing labor
More reinforcement
Material and assembly
Premium hardware
Material and setting time
Burnished edges
Labor intensive
Complex curves
Slower stitching
Padded laptop compartment
Material and assembly
Lining upgrade
Material cost
The Relative Cost Table
Element
Relative cost
Material
45–55%
Labor
30–40%
Hardware
8–12%
Packaging
3–5%
The Design-to-Cost Method
Step
Action
1
Set the target factory cost
2
Allocate material and labor shares
3
Sketch within the allocation
4
Cost each feature explicitly
5
Cut features that break the target
6
Confirm with a priced sample
The Feature Value Table
Feature
Cost
Perceived value
Reinforced base
Moderate
High
Padded sleeve
Moderate
High
Premium hardware
High
High
Contrast stitching
Low
Moderate
Multiple interior pockets
Moderate
Moderate
Burnished edges
High
High
Hidden magnetic closure
Moderate
High
Extra decorative stitching
Moderate
Low
The table is a design tool. Features with low cost and high perceived value belong in every design. Features with high cost and low perceived value belong in none of them.
The Volume Sensitivity
Volume
Cost effect
Sample
Highest per unit
Under 200
High
200–1,000
Moderate
1,000–5,000
Lower
Above 5,000
Lowest
The Design Lock Rule
Stage
Change allowed
Concept
Free
Specification
Free with review
Sample
Costly
Pre-bulk
Very costly
Production
Prohibited
Common Design Mistakes
The same mistakes appear across leather backpack programs. Each has a design-stage fix.
The Mistake Table
Mistake
Consequence
Specifying soft and structured
Sample disappoints
Too many layers at one seam
Machine and quality limits
Hardware chosen last
Re-sample and re-photograph
No weight target
Heavy product, weak reviews
Ignoring hide sizes
Excessive waste
Undefined edge finish
Inconsistent production
Curves beyond machine limits
Stitch quality failure
No reinforcement at load points
Early field failure
Design without market profile
No orders
Cheap hardware on premium leather
Mixed quality signal
The Prevention Table
Mistake
Prevention
Vague structure brief
Name interlining and inserts
Seam overload
Count layers at design stage
Late hardware decisions
Choose finish with leather
Weight creep
Set and track a budget
Yield loss
Review pattern on real hide shapes
Edge inconsistency
Specify finish per edge
Machine mismatch
Confirm routing with production
Field failure
Define reinforcement positions
Market mismatch
Profile the target buyer
Quality signal conflict
Match hardware grade to leather grade
The Design Audit Checklist
Check
Done
Structure system defined
☐
Weight target set and traced
☐
Panel count justified
☐
Corner treatment specified
☐
Edge finish specified per edge
☐
Hardware family chosen
☐
Load points reinforced
☐
Cost modelled per feature
☐
Market profile documented
☐
Cutting room reviewed the pattern
☐
Leather backpack sample lineup for design review
From Sample to Production
The gap between a beautiful sample and a repeatable product is where design meets discipline.
The Handover Package
Item
Purpose
Technical drawing
Dimensions and proportions
Bill of materials
Leather, lining, hardware
Construction sheet
Sequence and methods
Reinforcement map
Positions and materials
Edge finishing spec
Per edge
Hardware schedule
Type, finish, size
Weight record
Per component
Approved sample
Physical reference
The Production Trial
Step
Check
Pattern validation
Cut and assemble one unit
Machine routing
Feasibility and timing
Setup recording
Settings per station
First article
Comparison to sample
Photo set
Same light as approval
Review meeting
Sign-off or correction
The Consistency Levers
Lever
Effect
Standard setup records
Repeatable output
Photo standards
Visual comparison
Hardware lot control
Finish consistency
Leather lot control
Panel matching
Trained stations
Fewer deviations
The Long-Term Design View
Consideration
Design implication
Repairability
Accessible stitching
Hardware replacement
Standard sizes
Aging appearance
Finish choice
Warranty scope
Material and method
Brand continuity
Reusable design language
Designing for Repair and Longevity
A leather backpack can outlive its first owner. Design decides whether it can be repaired or must be replaced.
The Repairability Principles
Principle
Benefit
Accessible stitching
Seams can be opened
Standard hardware sizes
Replaceable parts
Replaceable straps
Wear part renewal
Modular lining
Easier refurbishment
Serviceable edges
Refinish rather than discard
The Wear Parts Table
Part
Service life
Zipper
3–7 years
Magnetic snap
5–10 years
Strap lining
2–5 years
Edge paint
1–3 years
Base corners
3–6 years
The Repair Access Design
Design choice
Repair effect
Lined interior seams
Harder access
Bound seams
Easy to open and re-close
Glued construction
Difficult and messy
Riveted hardware
Simple replacement
Molded components
Usually not repairable
The Design Decisions That Shorten Life
Decision
Consequence
Non-standard hardware
No replacement parts
Sealed construction
Cannot be opened
Very thin base
Early abrasion failure
Decorative stitching at load points
Weakens leather
Excess adhesive
Blocks repair
Sustainability as a Design Input
Sustainability in leather goods is decided mostly at the design stage, where material, weight, and repairability are fixed.
The Design Levers
Lever
Effect
Grade selection
Traceable, rated tannery
Thickness optimization
Less material, less weight
Panel efficiency
Higher yield, less waste
Repair design
Longer product life
Standard hardware
Replaceable components
The Material Decisions
Decision
Sustainability impact
Leather grade and tannery
Traceability and compliance
Lining material
Recycled options available
Interlining
Recyclable versus composite
Hardware plating
Durability and waste
Adhesives
Repair and recycling limits
The Longevity Equation
Factor
Effect on product life
Repairable construction
Adds years
Reinforced wear points
Adds years
Replaceable hardware
Adds years
Correct structure
Prevents early sag
Refinishable edges
Extends appearance
The Design Audit for Sustainability
Question
Purpose
Can this seam be reopened?
Repairability
Can this hardware be replaced?
Serviceability
Is the yield efficient?
Waste reduction
Is the tannery rated?
Compliance
Will it still look good in 5 years?
Longevity
Design choices made for repairability and yield are the same choices that reduce cost and waste. That alignment is what makes sustainable design commercially credible rather than aspirational.
Design Language and Brand Consistency
A single good backpack is a product. A consistent design language is a business.
The Reusable Design Elements
Element
Consistency value
Hardware family
Immediate recognition
Edge treatment
Signature finishing
Stitch spacing
Visual rhythm
Panel proportion
Family resemblance
Lining color
Interior surprise
Logo application
Controlled branding
The Brand Code Table
Code item
Specification
Hardware finish
Antique brass throughout
Edge finish
Burnished, 1.0 mm
Topstitch distance
3 mm
Stitch length
5 mm
Thread color
Matched, one shade darker
Logo
Debossed, 20 mm
Lining
Dark brown twill
The Line Consistency Check
Check
Question
Hardware
Same family across the range?
Edges
Same finish method?
Stitching
Same length and spacing?
Proportion
Recognizable silhouette?
Details
Shared vocabulary?
The Design Code Benefits
Benefit
Effect
Faster design cycles
Reusable decisions
Lower tooling cost
Standard components
Easier QC
Known standards
Stronger recognition
Repeat customers
Cleaner production
Fewer setup changes
A documented design code also makes onboarding easier. A new pattern maker, a new sample room operator, or a new factory can follow the code and produce a bag that belongs in the same family — without waiting for the original designer to explain it.
FAQ
How do you balance structure and style in a leather backpack?
Decide in writing which one gives way when they conflict. Structure is achieved with panel architecture, interlining, and reinforcement rather than thickness alone, which preserves the clean lines style demands. Then specify the interlining, insert, and reinforcement positions so the factory builds the same balance the design intends.
What leather thickness is best for a structured leather backpack?
Most structured leather backpacks use 1.4–1.8 mm leather for the body and 1.8–2.4 mm for the base and straps, with interlining or board inserts providing shape. Thickness alone rarely produces structure; a 1.4 mm panel with a shaped insert usually holds form better than a 1.8 mm panel without one, at lower weight and cost.
How can a leather backpack be made lighter without losing quality?
Reduce thickness selectively, replace heavy inserts with lighter shaped ones, choose lower-density hardware, simplify lining, and skive internal edges. Set a weight budget by component before material selection, since weight reduction applied to the front panel alone often has a greater effect than thinning every part.
Which hardware finish works best with leather?
Antique brass, brushed brass, and gunmetal read warm and suit most leather tones; polished nickel and matte black read cool and modern. Choose the hardware family before approving leather color, because the same hide reads differently against warm and cool metal. Keep one finish family per bag.
Why does a leather backpack sag even with thick leather?
Sagging usually indicates a missing or too-flexible stiffener rather than insufficient thickness. The back panel and front panel need inserts, and the base needs a shaped board. Adding leather thickness increases weight and cost while solving the problem less effectively than a properly specified insert.
How many prototypes should a leather backpack design go through?
Four rounds is typical for a production-bound design: silhouette and proportion, structure and reinforcement, detail and hardware, and construction refinement. Each round should end with a documented sign-off, because the cost of a change rises sharply after sampling — roughly 3× at specification, 10× at sample, and far more once production begins.
What corners wear out first on a leather backpack?
Base corners wear first, followed by flap edges, strap folds, zipper ends, and the opening rim. Design reinforcement at the base with a patch or double layer, skive and reinforce flap edges, interline straps to prevent creasing, and specify edge finishing that seals all exposed edges.
How should leather backpack design differ by market?
European buyers respond to refinement and subtle branding, North American buyers to capacity and practicality, Japanese buyers to precision and fine finishing, and Southeast Asian buyers to lighter weight and humidity tolerance. Confirm these preferences before drawing, then check that the price band, material grade, and structure choice all match the same market.
Conclusion
Designing a leather backpack is the work of resolving a structural argument without letting the customer see the argument. Structure needs material, reinforcement, and rigidity. Style wants clean surfaces, soft drape, and refined lines. The resolution lives in panel architecture, insert specification, weight budgeting, and hardware language chosen together.
For production teams, the practical rules are these. Define the structural system explicitly, naming interlining, inserts, and reinforcement positions. Set a weight target by component and track it from the first sketch. Specify edge and corner treatments per edge rather than in general.
Choose the hardware family before leather approval. Model cost feature by feature, and cut what fails the value test. Bring the cutting room into the concept review. Then lock the design before sampling, because the cost of change rises steeply the moment the first physical sample exists.
A design that survives all of that is one the factory can build precisely — and one that still looks like the idea when the customer picks it up two years later.