A backpack’s body carries the contents. Its harness carries the consequences. Two packs built from identical fabric and hardware can feel completely different on the same shoulders, because the difference sits in the straps — their curve, their foam, their width, their attachment, and how the load is spread.
For a bag manufacturer, the harness is the highest-risk assembly in the product. Every strap is a load path, and every load path ends at a stitch line, a webbing fold, or a plastic part. Design it well and the bag disappears on the wearer’s back. Design it poorly and the product returns with a torn anchor after three months.
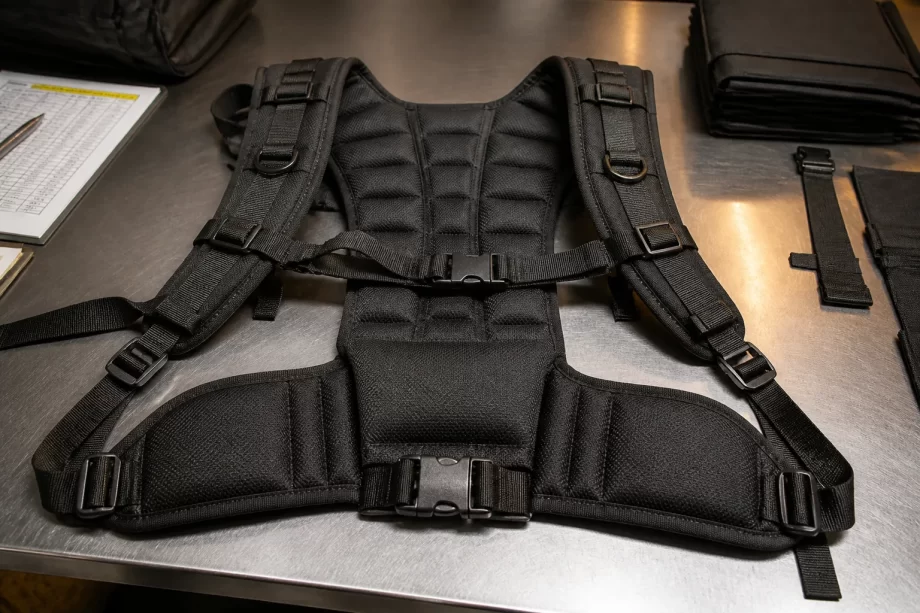
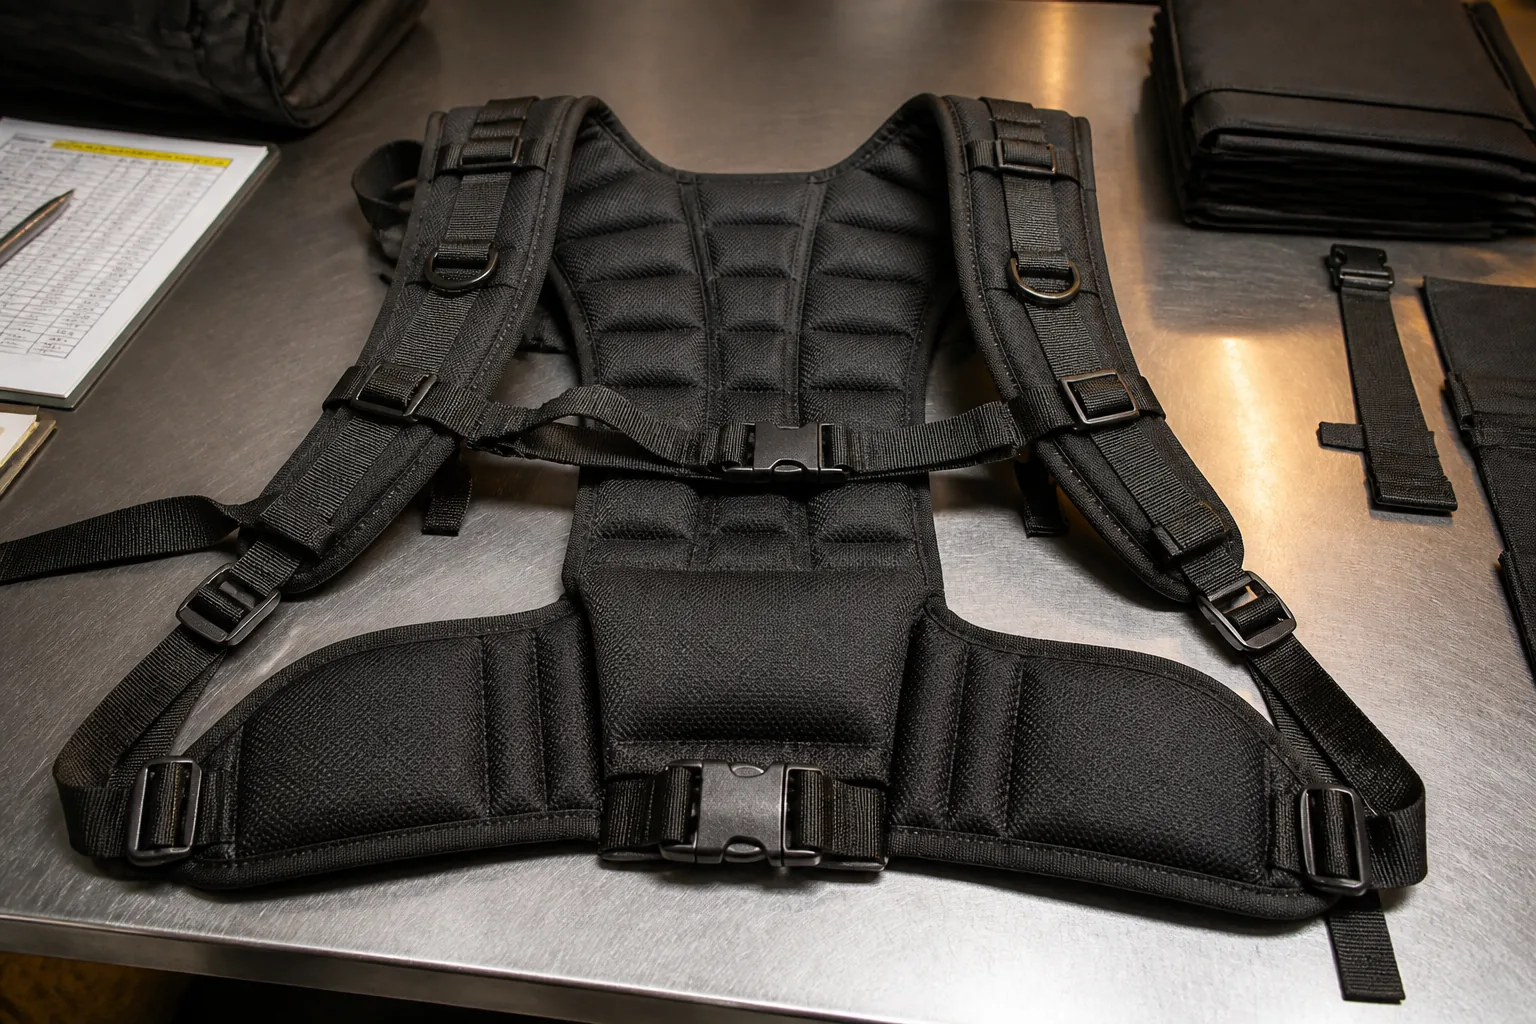
Backpack shoulder straps and padded harness on an inspection table
This guide covers the engineering behind backpack straps and harness systems: load transfer, material stack-up, foam specification, geometry, adjustment hardware, reinforcement, and the testing that proves the design holds.
Comfort complaints and structural failures both trace back to harness design. They are the two most expensive outcomes a backpack program can produce.
The Two Failure Categories
Category
Typical complaint
Comfort failure
Cutting into shoulders, pressure points, sweating
Structural failure
Torn anchor, stretched strap, broken buckle
Fit failure
Cannot adjust to body shape
Balance failure
Bag swings or pulls backward
Wear failure
Foam collapse, edge abrasion, seam fray
The Cost of Getting It Wrong
Outcome
Business impact
Returns
Reverse logistics and lost margin
Warranty claims
Replacement cost plus freight
Review damage
Conversion loss on marketplaces
Retail rejection
Order cancellation at inspection
Brand erosion
Lost repeat programs
Why Harnesses Fail in the Field
Root cause
Share of problems
Insufficient reinforcement at anchors
High
Foam too soft or too thin
High
Strap geometry not matched to load
Medium
Hardware undersized
Medium
Stitching not matched to load path
Medium
No adjustment range
Low but visible
The Design Responsibility Split
Decision
Owner
Load target and use case
Brand
Harness architecture
Designer
Material specification
Designer plus factory
Construction method
Factory
Testing protocol
Factory
Field feedback loop
Both
Factory note: Ask for the load target in kilograms before quoting a harness. A daypack rated for 8 kg and a travel pack rated for 18 kg can look nearly identical in a sketch but require different webbing, foam density, and reinforcement. Most harness disputes start with an unspecified load.
Load Transfer Fundamentals
A harness works by spreading force across the body. The engineering question is where that force concentrates — and whether the material can take it.
The Load Path
Stage
What happens
Contents load
Weight sits in the bag body
Body to anchor
Force reaches the strap attachment
Anchor to strap
Tension enters the webbing
Strap to shoulder
Force spreads across padding
Shoulder to torso
Remaining load distributes
Torso to hips
Belt takes the transfer
The Force Concentration Points
Point
Force type
Strap anchor
Tension, repeated
Strap fold at top
Bending fatigue
Foam compression zone
Cyclic compression
Buckle slot
Shear and abrasion
Stitch line
Shear across thread
Bar tack
Localized stress
The Load Sharing Target
Carrying mode
Shoulder share
Hip share
Light daypack
100%
0%
School or commuter
90%
10%
Day hiking
70%
30%
Trekking with belt
50%
50%
Heavy load with frame
30%
70%
The Pressure Rule
Shoulder pressure is force divided by contact area. Every harness improvement either reduces force or increases area.
Lever
Effect
Wider strap
Larger area
Thicker foam
Better distribution
Contoured shape
Area matched to anatomy
Sternum strap
Stabilizes and redistributes
Hip belt
Removes load from shoulders
Frame sheet
Transfers to hips
The Comfort Threshold Table
Load
Minimum strap width
Up to 5 kg
35–40 mm
5–10 kg
40–50 mm
10–15 kg
50–60 mm
15–25 kg
60–75 mm
Above 25 kg
75 mm plus hip belt
The Dynamic Load Reality
Factor
Load multiplier
Static carry
1.0×
Walking
1.3–1.5×
Stairs or hiking
1.5–2.0×
Running or cycling
2.0–3.0×
Sudden stop or fall
3.0× plus
A harness designed only for static load will fail in use. The dynamic multiplier is why reinforcement standards are written well above the rated carry weight.
The Strap Material Stack-up
A shoulder strap is a laminate. Each layer does one job, and removing any layer creates a specific failure.
The Layer Functions
Layer
Function
Outer shell fabric
Abrasion and appearance
Foam core
Pressure distribution
Inner lining
Friction and moisture contact
Webbing insert
Load bearing
Binding or edge finish
Prevents fraying
Stitch lines
Bonds layers
The Common Stack-ups
Configuration
Use
Foam plus webbing only
Light daypacks
Foam, webbing, single shell
Standard daypacks
Foam, webbing, shell and lining
Mid and premium
Multi-density foam plus shell
Loaded travel packs
Molded foam with spacer mesh
Technical packs
The Webbing Specification
Property
Typical spec
Material
Polyester or nylon
Width
25–50 mm
Thickness
1.0–2.5 mm
Breaking strength
1,000–4,000 N by width
Weave
Plain or twill
Stretch
Low, under 3%
The Shell Fabric Choice
Fabric
Strength
Cost
210D nylon
Moderate
Low
420D nylon
High
Moderate
600D polyester
High
Low
1000D nylon
Very high
High
Ripstop nylon
Moderate
Moderate
Spacer mesh
Low
Moderate
The Lining Choice
Lining
Character
Brushed tricot
Soft, warm feel
Spacer mesh
Breathable, bulky
Air mesh
Ventilated
Plain nylon
Light, less comfortable
Mesh with foam
Standard comfort option
The Layer Thickness Guide
Layer
Typical thickness
Shell fabric
0.3–0.6 mm
Foam core
6–12 mm
Lining
0.3–0.8 mm
Total assembly
8–15 mm
Factory note: The most common harness cost error is specifying a thick foam to fix a comfort problem caused by narrow straps. Increasing width from 40 mm to 50 mm adds less cost and weight than doubling foam thickness, and it distributes pressure more effectively. Check geometry before adding material.
Strap Geometry and Fit
Strap shape is anatomy translated into a pattern. A straight strap on a curved body creates pressure points no amount of foam will fix.
The Anatomical Reference Points
Point
Design implication
Shoulder crest
Strap must clear bone, not press it
Chest wall
Load spreads across the front
Armpit
Strap must not cut inward
Collarbone
Avoid direct pressure
Neck base
Strap should sit away, not choke
Shoulder blade
Free movement required
The Geometry Parameters
Parameter
Typical range
Strap width
40–75 mm
Radius of curve at top
80–140 mm
Strap length
450–750 mm
Taper at top
10–25 mm narrower
Attachment angle
15–35 degrees
Curve offset
5–15 mm
Thickness at shoulder
8–15 mm
The Attachment Angle Effect
Angle
Behaviour
Too shallow
Strap slips off shoulder
Correct
Strap sits and stays
Too steep
Strap cuts into neck side
Asymmetric
One-sided discomfort
The Width Decision Table
Product
Recommended width
Kids school bag
35–45 mm
Urban commuter
40–50 mm
Laptop backpack
45–55 mm
Travel pack
55–70 mm
Trekking pack
60–75 mm
The Taper Question
Taper
Effect
No taper
Simpler, can bulk at neck
Slight taper
Comfortable, standard
Strong taper
Elegant, less load area
Reverse taper
Unusual, rarely beneficial
The Curve Construction
Method
Character
Curved cut panels
Best anatomical fit
Straight panels with darts
Moderate fit, more seams
Straight panels sewn flat
Lowest cost, poorest fit
Heat-molded foam
Best shape retention
Pre-formed foam insert
Good fit, higher cost
The Gender and Body Variation Table
Consideration
Design response
Narrower shoulders
Shorter strap spacing
Broader chest
Longer sternum strap range
Curved upper back
Different attachment angle
Tall torso
Longer body and strap travel
Short torso
Shorter strap, lower anchor
The Sizing System Options
System
Advantage
Single size, wide adjustment
Lower inventory
Two sizes
Better fit per size
Torso length sizing
Best fit, complex retail
Adjustable back panel
Good fit, higher cost
Unisex plus women’s fit
Balanced coverage
Foam Specification for Shoulder Straps
Foam is where comfort is manufactured. Two foams of the same thickness can behave completely differently under load.
The Foam Types
Foam
Character
EVA
Firm, good support, durable
PE foam
Very firm, low rebound
PU foam
Soft, comfortable, ages faster
EPE foam
Light, low durability
Memory foam
Conforms, settles quickly
Spacer mesh plus foam
Ventilated comfort
Molded foam
Shaped support
The Specification Table
Property
Typical range
Density
25–60 kg/m³
Thickness
6–15 mm
Compression set
Under 10%
Resilience
40–60%
Hardness
20–45 Shore 00
Layers
1–3
The Density Decision Table
Load target
Suggested density
Light daypack
25–30 kg/m³
Commuter
30–35 kg/m³
Laptop pack
35–40 kg/m³
Travel pack
40–50 kg/m³
Heavy trekking
50–60 kg/m³
The Multi-Density Approach
Layer position
Foam role
Against body
Softer, comfort contact
Middle
Firm, load spreading
Outer
Structural, shape holding
Multi-density construction costs more but solves the classic conflict between soft feel and load support. A single-density strap must compromise: soft enough to feel pleasant but firm enough to carry weight.
The Failure Modes of Foam
Failure
Cause
Collapse
Low density under sustained load
Flattening
High compression set
Cracking
Poor aging performance
Bunching
Foam shifting inside shell
Hard spots
Uneven foam or glue lines
The Foam Handling Rules
Rule
Reason
Store flat
Preventing permanent creasing
Avoid moisture
Mildew and deterioration
Cut with sharp dies
Clean edges, no tearing
Control glue application
Avoid hard spots
Match batch density
Consistent feel
Factory note: Specify foam by density, hardness, and compression set — not by thickness alone. A 10 mm low-density foam collapses under a 15 kg load within weeks, while an 8 mm mid-density foam holds its shape for years. When a customer complains about shoulder discomfort on a mature product, the foam spec is usually the first place to look.
Adjustment Systems and Hardware
Adjustment is what turns a fixed pattern into a fitting product. The engineering challenge is providing range without introducing failure points.
The Adjustment Elements
Element
Function
Ladder lock
Sets strap length
Strap keeper
Manages loose end
Sternum strap
Stabilizes on chest
Hip belt
Transfers load
Load lifter
Angles the pack
Compression strap
Reduces volume
Quick release
Removes the pack
The Adjustment Range Table
Adjuster
Typical range
Shoulder strap
200–350 mm travel
Sternum strap
150–250 mm travel
Hip belt
200–400 mm travel
Load lifter
50–100 mm
The Ladder Lock Specification
Property
Requirement
Webbing width match
Exact, plus or minus 0.5 mm
Material
Acetal or nylon
Breaking load
Above strap rating
Teeth condition
Sharp, undamaged
Slip under load
None at rated weight
The Sternum Strap Design Table
Aspect
Recommendation
Width
20–25 mm
Track adjustment
100–200 mm
Attachment
Removable or fixed
Buckle type
Side release
Height placement
Upper chest, not throat
The Hip Belt Decision Table
Load
Hip belt need
Under 8 kg
Optional
8–12 kg
Simple webbing belt
12–18 kg
Padded belt
Above 18 kg
Padded belt with stabilizers
The Hardware Failure Risk Table
Risk
Prevention
Webbing slips through lock
Correct width, quality part
Buckle cracks
Impact-grade material
Strap end frays
Heat seal or fold
Keeper slides
Correct size, stitched keeper
Release jams
Debris tolerance, quality
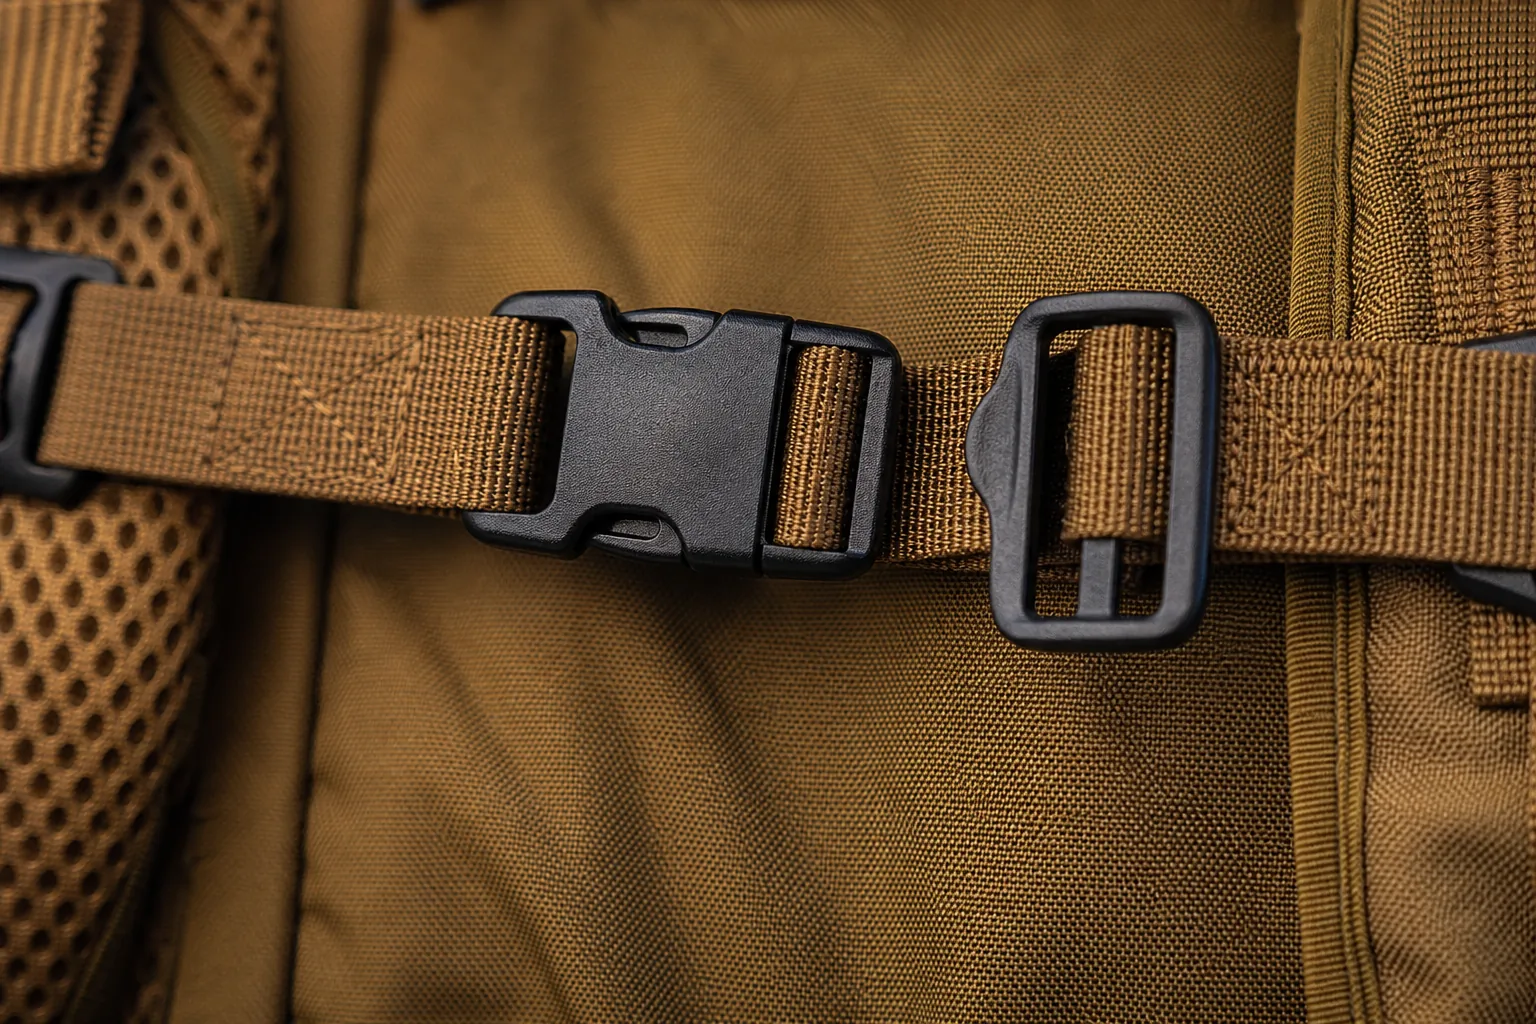
Sternum strap and adjustment hardware detail
The Loose End Problem
Solution
Trade-off
Elastic keeper loops
Cheap, can wear
Hook and loop tab
Clean, adds cost
Clip retention
Secure, adds part
Folded and stitched tip
Simple, permanent
Construction and Reinforcement
The harness is only as strong as its weakest stitch. Construction converts a material specification into a load-bearing system.
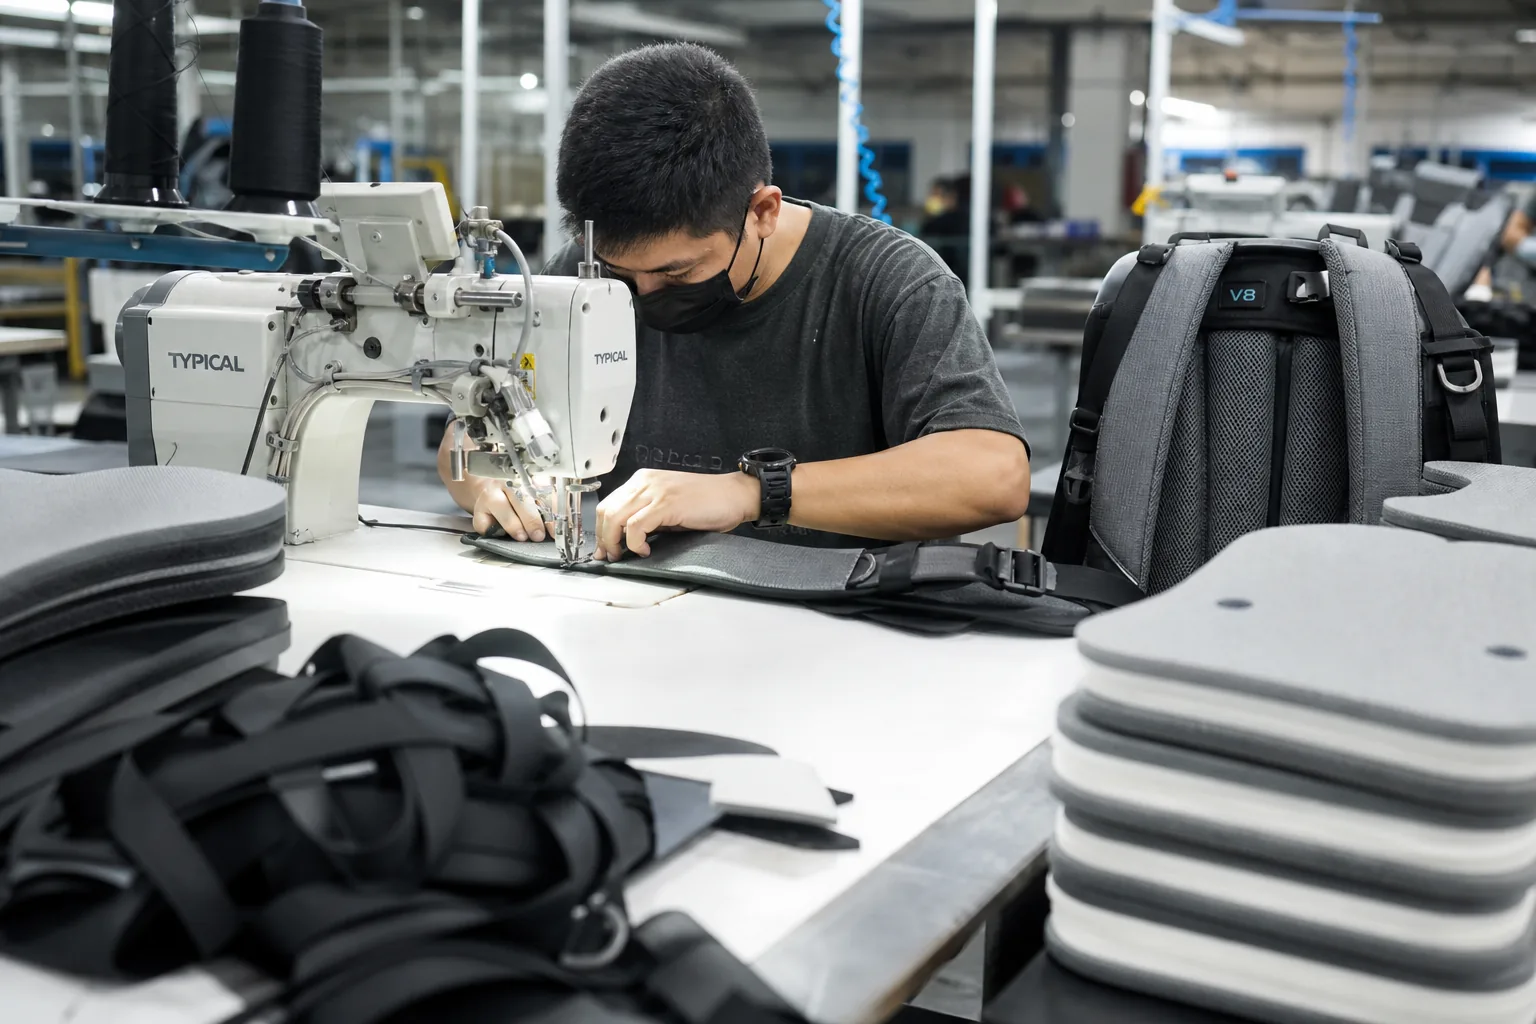
Harness assembly station sewing a padded shoulder strap
The Construction Sequence
Step
Operation
1
Cut shell, lining, foam, webbing
2
Laminate foam to shell
3
Insert webbing along load path
4
Join shell and lining
5
Topstitch and close ends
6
Attach hardware and stitch locks
7
Bar tack at load points
8
Trim, inspect, fold
The Stitch Specification Table
Parameter
Typical spec
Stitch type
Lockstitch
Stitch length
3.5–4.5 mm
Needle size
90/14 to 110/18
Thread
Bonded nylon, size 40–69
Seam allowance
6–10 mm
Stitch density
5–7 per cm
Backstitch
Not at load points
The Reinforcement Methods
Method
Function
Box-X stitch
Distributes anchor load
Bar tack
Reinforces short spans
Multiple stitch rows
Adds redundancy
Webbing extension
Moves load into panel
Double-layer anchor patch
Spreads force
Rivet or screw
Mechanical backup
The Box-X Detail
Aspect
Specification
Size
20–30 mm square
Stitch rows
Two, perpendicular
Thread
Bonded nylon, size 69
Placement
Every strap anchor
Extra tack
Center of X
The box-X pattern is the standard reinforcement for strap anchors because it converts a single failure line into a distributed one. If one leg of the X fails, the others still carry the load. A straight stitch line at the same point would fail completely and immediately.
The Stitch Row Comparison
Rows
Strength relative
1 row
Baseline
2 rows
1.6×
3 rows
1.9×
4 rows
2.0× plus risk
Excessive rows
Weakens material
Adding stitch rows improves strength only up to a point. Beyond three or four rows, the leather or coated fabric is perforated enough that the material tears along the stitch line instead of the thread failing. Balance matters more than maximum.
The Assembly Quality Points
Point
Check
Foam distribution
Even, no voids
Webbing alignment
Straight along load path
Stitch continuity
No skipped stitches
Anchor reinforcement
Box-X present
Hardware seating
Fully engaged
End finish
Sealed or folded
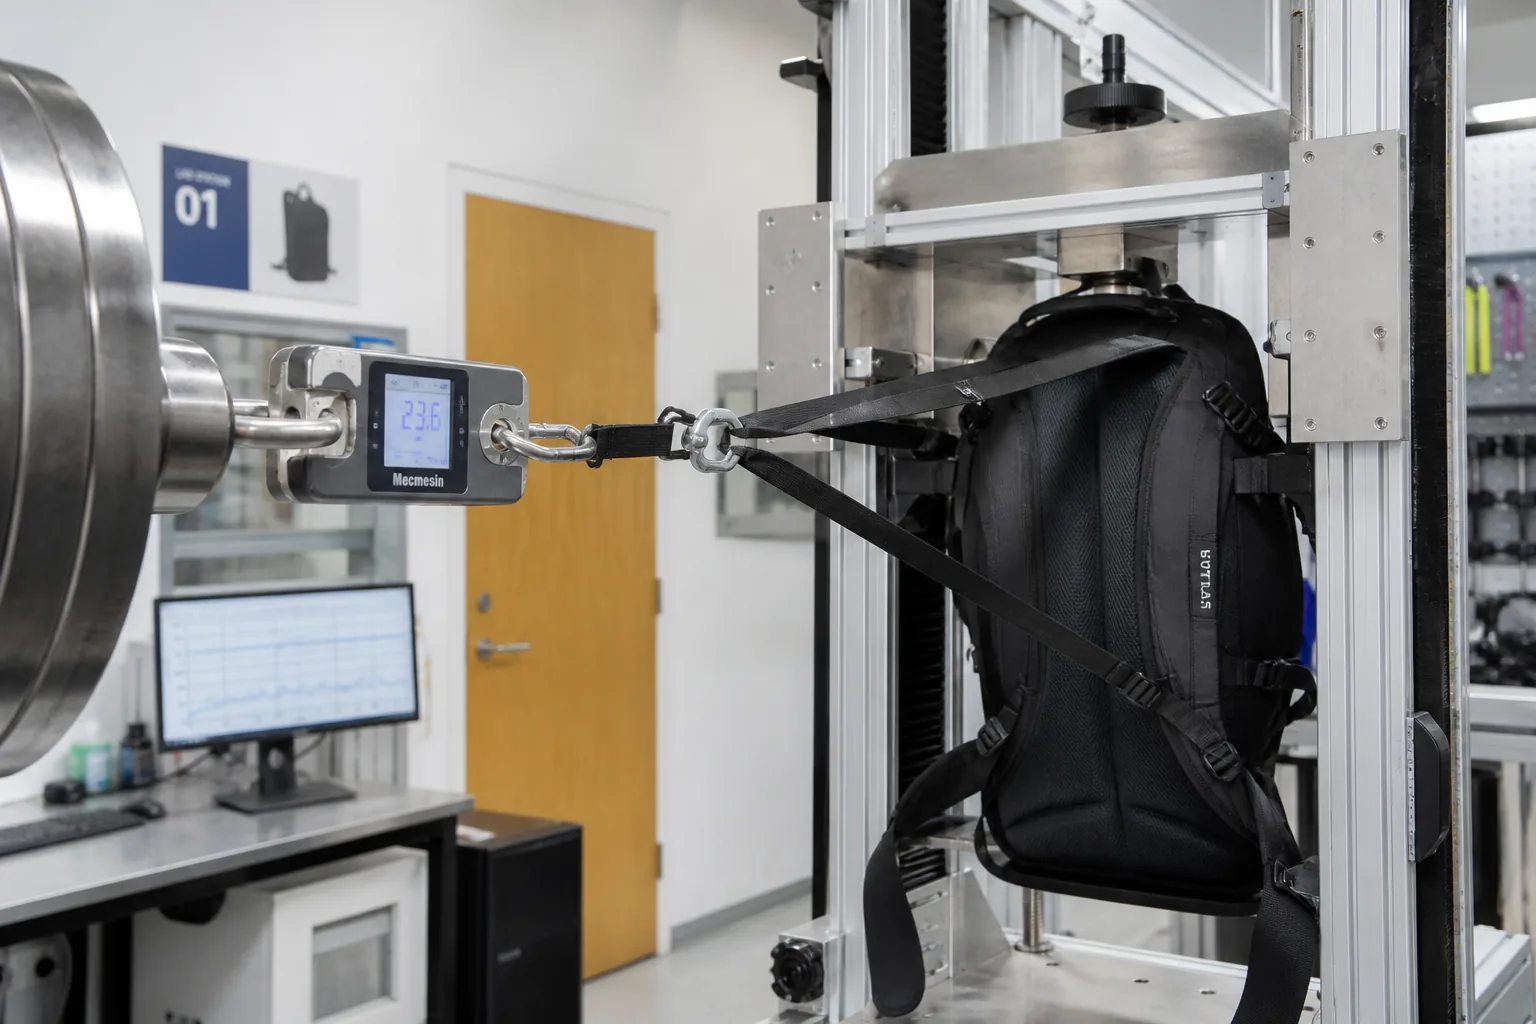
Load Testing and Verification
Testing converts design assumptions into evidence. A harness without test data is a hypothesis.
Load testing a backpack harness in the factory lab
The Test Protocol Table
Test
Method
Static load
Hang rated load, 24–72 hours
Dynamic load
Cycle to 1.5–2× rated weight
Strap pull
Pull at anchor to failure
Buckle cycle
Open and close 5,000–10,000 times
Abrasion
Rub webbing against webbing
Foam compression
Measure thickness after loading
Seam slip
Measure slippage under load
Field trial
Carried by testers for weeks
The Acceptance Criteria Table
Parameter
Typical requirement
Strap anchor strength
Above 3× rated load
Seam slippage
Under 3 mm at rated load
Foam thickness loss
Under 15%
Buckle retention
No release under load
Webbing stretch
Under 3%
Stitch failure
Thread breaks, not fabric tear
The Failure Interpretation Table
Observation
Meaning
Fabric tears before thread
Too many stitch rows or weak fabric
Thread breaks first
Thread undersized for load
Anchor pulls out
Insufficient reinforcement
Foam collapses
Density too low
Webbing slips
Wrong hardware size
Strap rotates
Attachment angle wrong
The interpretation matters as much as the test. A harness that fails by fabric tear at the anchor needs less stitch density and more anchor area — not stronger thread. A harness that fails by thread break needs the opposite. Reading the failure correctly is what turns a test result into a design improvement.
The Sampling Plan
Stage
Test scope
Prototype
Full static and dynamic
Pre-production
Static plus cycle
First bulk
Per-lot static
Ongoing
AQL sample plus periodic full test
The Documentation Package
Document
Purpose
Harness specification
Materials and dimensions
Construction sheet
Sequence and stitch data
Reinforcement map
Anchor positions and methods
Test report
Results against criteria
Approved sample
Physical reference
Photo set
Visual comparison standard
The Field Feedback Loop
Data source
Use
Claim reasons
Identify weak points
Return inspection
Confirm failure mode
Dealer feedback
Fit and comfort signals
Review themes
Early warning
Repair records
Long-term wear patterns
Field data closes the loop. A factory that records claim reasons per harness component can adjust foam density, anchor reinforcement, or hardware grade based on real failures rather than assumptions — and can prove the improvement in the next test round.
Factory note: Test the harness before approving the fabric. Harness failures account for a disproportionate share of warranty claims, and the cost of changing foam density or anchor reinforcement is lowest at the specification stage. Testing a sample that has already been photographed for marketing is too late.
Common Harness Failures and Fixes
Harness problems repeat across programs. Each has a specific cause and a specific design correction.
The Failure Table
Failure
Likely cause
Anchor tears out
Insufficient reinforcement
Strap stretches
Webbing grade or width too low
Shoulder pain
Narrow strap or collapsed foam
Strap slips off
Attachment angle or sternum missing
Foam flattens
Density too low for load
Buckle slips
Wrong webbing width
Strap twists
Poor laminate or construction
Seam frays
Edge finish missing
Neck chafing
Insufficient taper or offset
Bag swings
Poor load distribution or no belt
The Correction Table
Failure
Fix
Anchor tear-out
Box-X plus anchor patch
Strap stretch
Wider or higher-grade webbing
Shoulder pain
Increase width, upgrade foam
Strap slip-off
Adjust attachment angle, add sternum
Foam flattening
Higher density or multi-layer
Buckle slip
Match hardware to webbing size
Strap twist
Better lamination, stitch alignment
Seam fray
Bind or fold edges
Neck chafing
Increase taper and curve offset
Bag swing
Add hip belt or compression
The Design Review Questions
Question
Purpose
What is the rated load?
Sets all other specifications
How far will it be carried?
Determines comfort priority
Is a hip belt required?
Changes architecture
What body range must fit?
Sizing and adjustment
What is the cost ceiling?
Material and foam grade
What tests will be run?
Verification scope
The Five Rules for Harness Design
Rule
Reason
Specify load before materials
Everything follows from it
Widen before thickening
Pressure is area-based
Reinforce every anchor
All load passes through
Test before approving
Evidence over assumption
Record field failures
Continuous improvement
Specifying the Harness in a Tech Pack
A harness specification must be complete enough that two different factories would build the same strap.
The Required Specification Fields
Field
Example
Strap width
50 mm
Strap length
620 mm
Curve radius
110 mm
Attachment angle
25 degrees
Shell fabric
420D nylon
Lining
Brushed tricot
Foam
EVA, 40 kg/m³, 10 mm
Webbing
Polyester, 38 mm, 2,000 N
Stitch
Lockstitch, 4 mm, nylon 69
Reinforcement
Box-X at both anchors
Hardware
Acetal ladder lock, 38 mm
Load rating
12 kg
The Harness Drawing Requirements
Element
Required
Outline with dimensions
Yes
Curve radii
Yes
Attachment points
Yes
Stitch lines
Yes
Reinforcement zones
Yes
Hardware positions
Yes
Layer callouts
Yes
Tolerance notes
Yes
The Tolerance Table
Dimension
Tolerance
Strap width
±1 mm
Strap length
±5 mm
Curve radius
±3 mm
Foam thickness
±0.5 mm
Stitch length
±0.5 mm
Hardware position
±1.5 mm
The Cost Structure Table
Component
Share of harness cost
Foam
20–30%
Shell and lining fabric
20–25%
Webbing
10–15%
Hardware
15–20%
Labor
20–30%
The Cost Reduction Levers
Lever
Saving
Risk
Simplify panel count
Moderate
Fit quality
Reduce foam density
Moderate
Comfort and durability
Narrow the strap
Low
Pressure points
Single-density foam
Moderate
Feel and support
Reduce hardware grade
Moderate
Failure under load
Shorten adjustment range
Low
Fit complaints
The Value Balance
Feature
Cost
Perceived value
Padded straps
Moderate
Very high
Sternum strap
Low
High
Hip belt
Moderate
High on large packs
Molded foam
High
Moderate
Spacer mesh lining
Moderate
Moderate
Load lifters
Low
High on trekking
Padded straps and a sternum strap deliver the highest perceived value for their cost. Molded foam costs the most and is noticed the least — it improves feel without being visible, which makes it a poor marketing feature but a legitimate comfort upgrade for products sold on experience.
The Handover Checklist
Item
Done
Load rating documented
☐
All dimensions toleranced
☐
Materials fully specified
☐
Reinforcement map included
☐
Hardware sizes matched
☐
Test protocol attached
☐
Approved sample retained
☐
Photo standard recorded
☐
The Buyer’s Harness Checklist
A short checklist that prevents most harness problems before they reach production.
Before Sampling
Check
Done
Rated load confirmed in writing
☐
Carrying duration and use case defined
☐
Body size range documented
☐
Hip belt requirement decided
☐
Comfort versus cost priority set
☐
Test criteria agreed
☐
At Sample Review
Check
Done
Straps sit without cutting
☐
No pressure on collarbone
☐
Sternum strap reaches chest
☐
Adjustment range covers sizes
☐
Anchors reinforced as specified
☐
Foam density verified on certificate
☐
Hardware matches webbing width
☐
Load test passed at 3× rating
☐
Before Bulk Release
Check
Done
Approved sample on the line
☐
Stitch settings recorded
☐
Foam lot documented
☐
Box-X verified on first article
☐
Test report filed
☐
Photo standard available
☐
Work through the three stages in order. Most harness failures discovered at the bulk stage were already visible as unanswered questions at the first stage — the load rating that was never written down, the foam that was never specified by density, or the anchor that was never tested.
FAQ
How wide should backpack shoulder straps be?
Width follows load. Up to 5 kg, 35–40 mm is adequate; 5–10 kg calls for 40–50 mm; 10–15 kg for 50–60 mm; and 15–25 kg for 60–75 mm with a hip belt. Width increases contact area, which reduces pressure more efficiently than adding foam thickness.
What foam density is best for backpack straps?
Match density to load: 25–30 kg/m³ for light daypacks, 35–40 kg/m³ for laptop and commuter packs, and 40–60 kg/m³ for travel and trekking packs. Specify density, thickness, and compression set together, because a low-density foam can collapse under load within weeks even when it feels comfortable in the showroom.
Why do backpack straps slip off the shoulder?
Usually because of the attachment angle or a missing sternum strap. A shallow attachment angle lets the strap travel outward under load, and without a sternum strap the two straps spread apart. Correcting the angle, adding curve offset, and fitting a sternum strap with adequate adjustment range solves most cases.
What is a box-X stitch and why is it used on straps?
A box-X is a square stitch pattern with a cross through the middle, used at strap anchors. It distributes load across several directions instead of a single stitch line, so a partial failure does not release the anchor immediately. It is standard reinforcement for strap attachments on backpacks.
How much load should a backpack strap anchor hold?
Anchor strength is normally specified at three times the rated carry weight or higher, because dynamic loading while walking, climbing stairs, or hiking can temporarily multiply static load. Testing to failure at the anchor is the standard way to confirm the reinforcement is sufficient.
Is a hip belt necessary on a backpack?
It becomes necessary as load increases. Under 8 kg a hip belt is optional; 8–12 kg benefits from a simple webbing belt; 12–18 kg calls for a padded belt; and above 18 kg a padded belt with stabilizers should transfer most of the load to the hips.
Why does shoulder discomfort appear after months of use?
Foam compression set is the usual cause. Foam gradually loses thickness under sustained load, which reduces contact area and increases pressure. Specifying higher density, using multi-density foam, or adding a firmer layer against the load spread resolves it — and the fix belongs at the specification stage, not in customer service.
What should a harness specification include for a factory?
It should include strap width and length, curve radius, attachment angle, shell and lining fabric, foam type with density and thickness, webbing specification with breaking strength, stitch type and length, thread size, reinforcement method at anchors, hardware type and size, and the rated load. Without the load rating, the factory is guessing at every other number.
Conclusion
A backpack harness is an engineering system disguised as padding. Its job is to take a concentrated load at the anchor and spread it across the shoulders and hips without exceeding the material’s limits — and to keep doing that after thousands of cycles.
For production teams, the working rules are clear. Establish the rated load before choosing any material. Increase strap width before increasing foam thickness, because pressure is a function of area. Specify foam by density, thickness, and compression set rather than by thickness alone.
Angle the strap anchors so the straps stay on the shoulders, and give every anchor a box-X reinforcement. Match hardware to webbing width exactly. Test to failure and read the failure mode, because fabric tear and thread break require opposite corrections.
Then document the specification completely, retain the approved sample, and record field failures by harness component. A harness that is designed, specified, tested, and monitored this way stops being a recurring source of returns and becomes what it should be: the part of the backpack the customer never notices, because it works.