
How to Start a Backpack Production Line: Equipment, Layout and Staffing
Starting a backpack production line is one of the most capital-intensive and skill-demanding investments a manufacturer can make. Unlike simple assembly operations, backpack production combines fabric cutting, precision sewing, heat bonding, hardware fitting, and rigorous quality control into a single continuous flow. Every stage depends on the one before it, and the whole system lives or dies on three things: the right equipment, the right layout, and the right people.
Many entrepreneurs enter this business through trading — buying finished packs from established factories and selling them under their own brand. Moving from trading to production is a different game entirely. It means committing capital to machines, space, and training before a single pack is sold. It means absorbing the fixed costs of a facility that must run steadily to be profitable. And it means building the process knowledge that trading never required.
This guide covers, from the perspective of an operating backpack factory, what it actually takes to start a production line: the equipment you need, how to lay out the workshop for flow, how to staff and train the line, what it costs to get started, and the mistakes that sink new facilities.
- The Big Decision: What Kind of Line Are You Building?
- Step 1: The Equipment List
- Step 2: Workshop Layout for Flow
- Step 3: Staffing and Training
- Step 4: Production Planning for a New Line
- Step 5: Quality Systems from Day One
- Step 6: The Cost of Starting a Line
- Common Mistakes When Starting a Line
- From One Line to a Factory: The Growth Path
- Sourcing Materials for a New Line
- Building Process Documentation from the Start
- Compliance and Certification for New Factories
- The First Year: A Realistic Roadmap
- FAQ
- From Trading to Production: The Transition Most Entrepreneurs Face
- The Daily Rhythm of a Running Line
- Conclusion
The Big Decision: What Kind of Line Are You Building?
Before buying a single machine, define the product and scale. The equipment, layout, and staffing for a school backpack line are completely different from a hiking pack line.
The Three Line Profiles
| Line profile | Product | Scale | Investment level |
|---|---|---|---|
| Starter line | Simple school/casual packs | 50–150 units/day | Low |
| Mid-range line | Laptop, commuter, fashion packs | 150–300 units/day | Medium |
| Technical line | Hiking, tactical, heavy-duty packs | 80–150 units/day | High |
The Questions to Answer First
- What backpack categories will you make? (School, laptop, hiking, tactical?)
- What fabrics will you use? (Polyester, nylon, canvas, leather?)
- What is your target daily output? (This drives the number of stations.)
- What quality standard? (This drives QC investment.)
- What is your available floor space? (This constrains the layout.)
- What is your budget? (This determines how much you can automate.)
Manufacturer’s note: The most common startup mistake is buying a “standard” line and then discovering it cannot sew the products you actually sell. A line designed for lightweight school packs cannot handle 1000D nylon tactical packs — the machines, needles, and operator skills are different. Define the product first; buy equipment second.
Step 1: The Equipment List
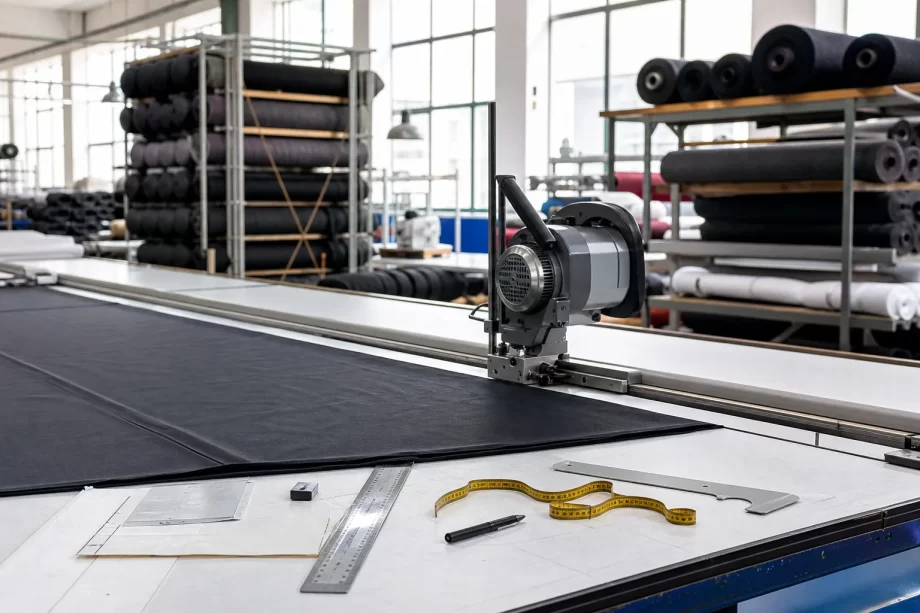
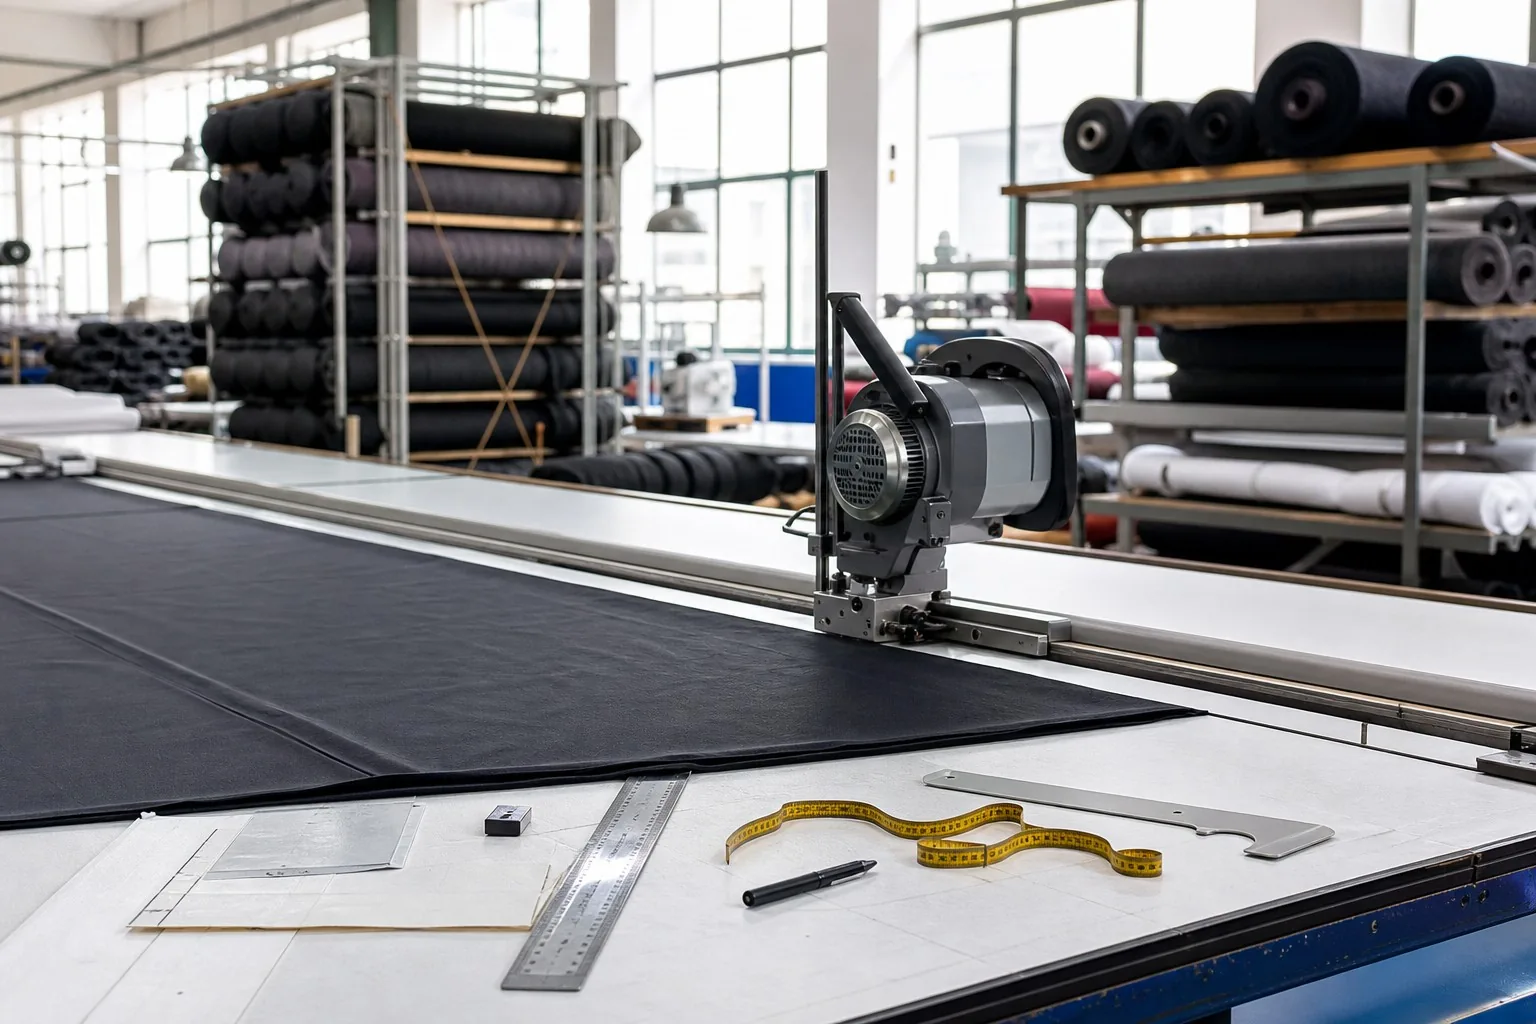
Backpack production needs equipment across five functions: cutting, sewing, pressing/bonding, finishing, and auxiliary operations. Here is what a functional line requires.
Cutting Equipment
| Equipment | Purpose | Starter option |
|---|---|---|
| Cutting table | Flat surface for spreading and cutting fabric | 2–3 tables, 6–12 m length |
| Straight knife cutter | Manual fabric cutting | Electric straight knife |
| Band knife machine | Precision curved cutting | Optional at startup |
| Clicker press + dies | Repeated identical small parts | Optional for high volume |
| Spreading equipment | Layering fabric stacks | Manual spreading initially |
| Pattern system | Marker making and templates | Digital markers + manual templates |
Sewing Equipment — The Heart of the Line
| Machine | Purpose | Priority |
|---|---|---|
| Single-needle lockstitch | Main seams | Essential |
| Walking-foot machine | Thick/multi-layer seams | Essential for most packs |
| Double-needle machine | Parallel stitch lines | Recommended |
| Bar-tack machine | Stress point reinforcement | Essential for quality |
| Overlock/serger | Edge finishing | Essential |
| Post-bed machine | Cylindrical parts | Recommended |
| Long-arm machine | Large panels | Recommended for big packs |
Manufacturer’s note: Do not economize on the bar-tack machine. It is the difference between a factory that can produce durable packs and one that produces packs that fail at the strap. A manual bar-tack substitute is slower, inconsistent, and will cost you more in warranty claims than the machine costs.
Pressing and Bonding Equipment
| Equipment | Purpose | When you need it |
|---|---|---|
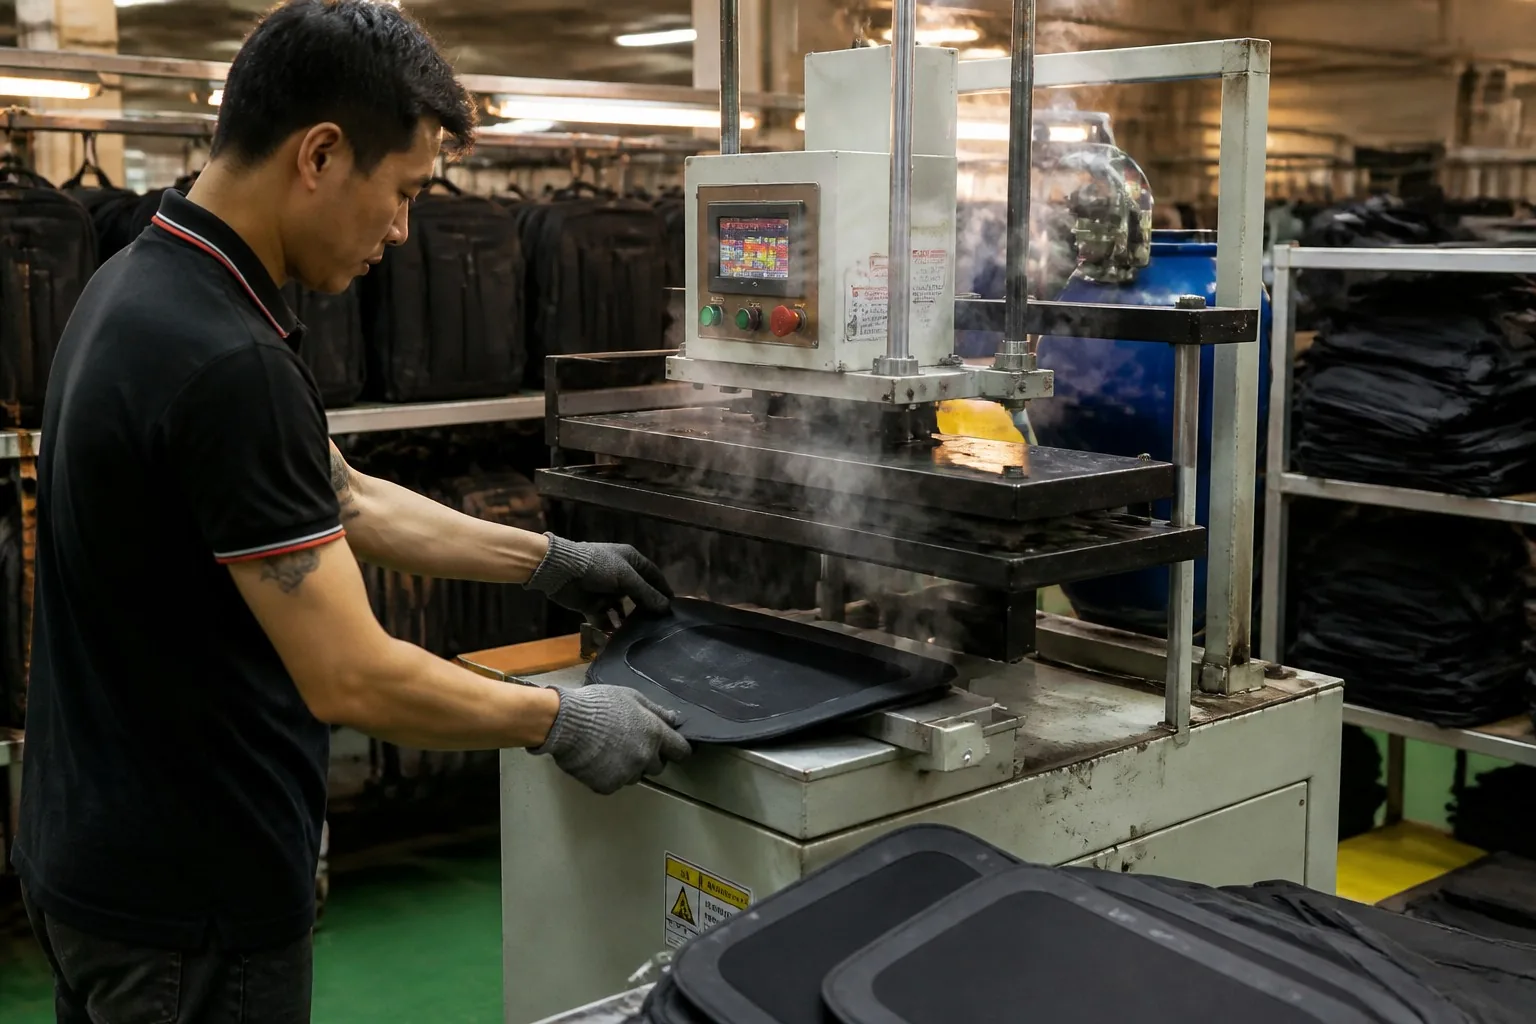
| Heat press | Fusing stiffeners, bonding layers, applying logos | Structured packs |
| Steam iron / pressing table | Wrinkle removal, seam setting | Always |
| Hot-air welder | Seam welding for TPU laminates | Waterproof/technical packs |
| RF welder | Waterproof seam welding | Advanced waterproof lines |
Finishing and Auxiliary Equipment
- Trimming and edge finishing tools — scissors, thread trimmers, edge binders.
- Marking tools — chalk, marking pens, templates.
- Eyelet/punch machines — for vents, drainage holes, and hardware mounting.
- Label printers or sourcing — care labels, hang tags, compliance labels.
- Packing station — folding tables, polybag sealers, carton sealing.
The Machine Count for a Starter Line
A realistic starter line (100–150 school packs/day) needs roughly:
| Machine | Quantity |
|---|---|
| Single-needle lockstitch | 6–8 |
| Walking-foot | 2–3 |
| Double-needle | 1–2 |
| Bar-tack | 1–2 |
| Overlock | 2 |
| Post-bed | 1–2 |
| Heat press | 1 |
| Straight knife + tables | 1–2 |
Step 2: Workshop Layout for Flow
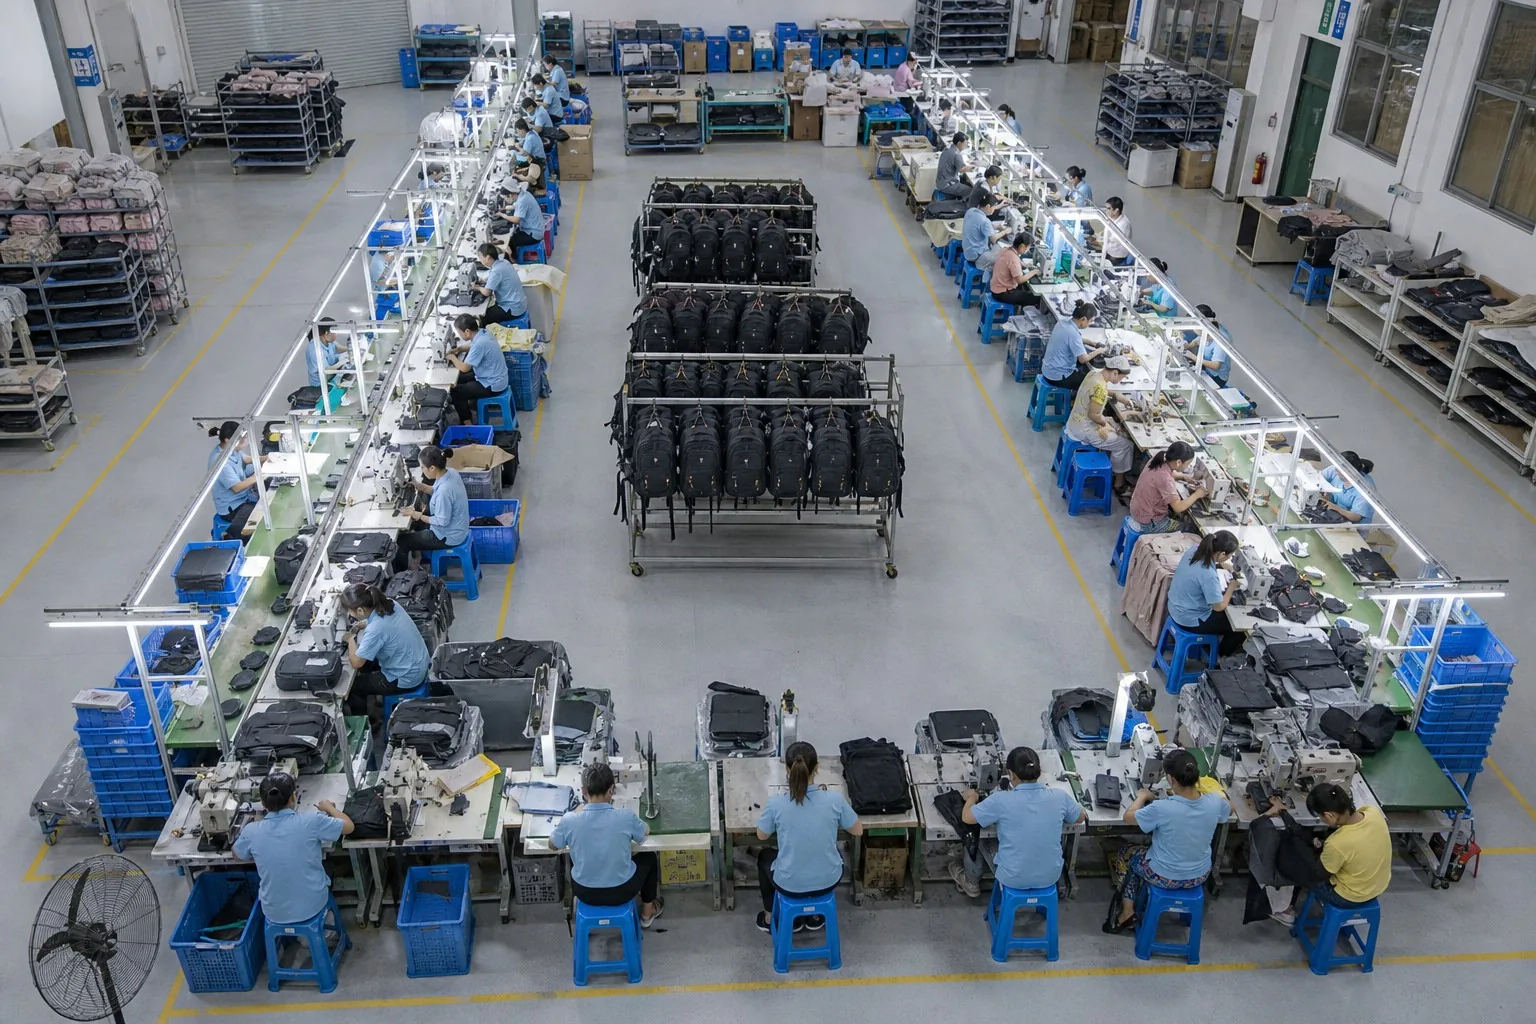
Layout is where new lines fail most often — not from bad machines, but from bad flow. The goal is a production line where materials move forward smoothly, work-in-progress stays low, and defects are caught early.
The Layout Principles
- One-way flow — materials move from receiving → cutting → sewing → assembly → QC → packing, without backtracking.
- Balanced stations — each station’s capacity is matched to the line’s target output; bottlenecks are designed out.
- Short material travel — cut panels should not travel across the whole factory to reach sewing.
- QC at the right points — inspection stations placed where defects are created, not only at the end.
- Clean aisles — material carts and people need clear paths; a cluttered floor is a safety and quality hazard.
The Classic U-Shape Layout
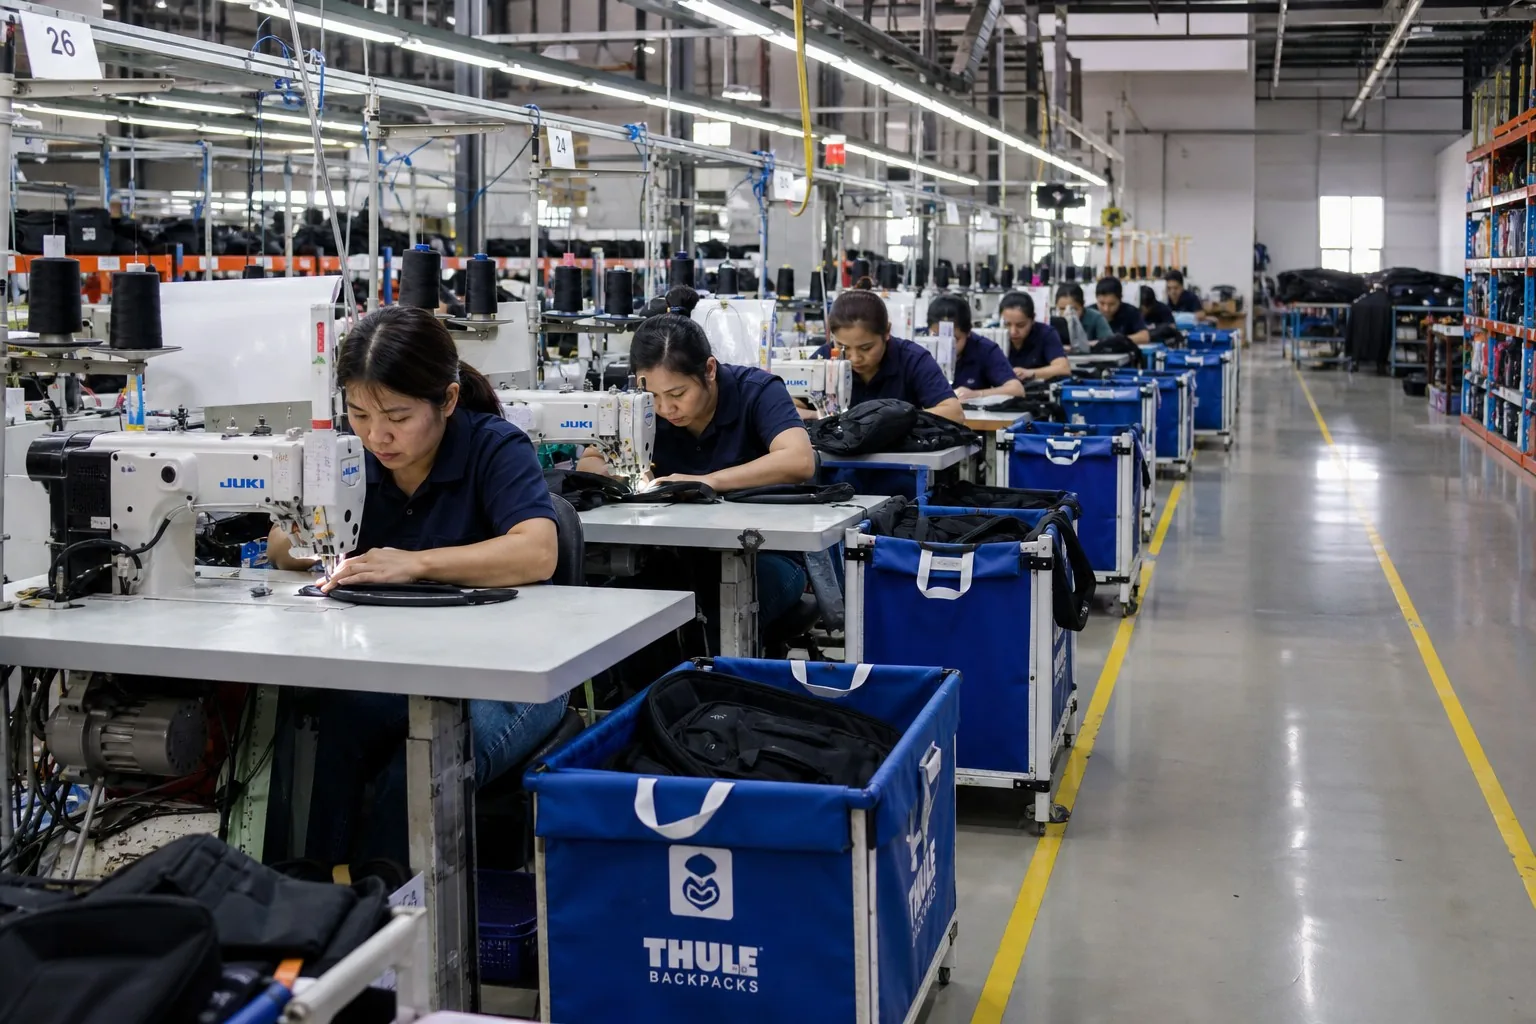
Most efficient backpack lines use a U-shape or modular U-shape:
“` ┌─────────────────────────────────────────────┐ │ Cutting → Sub-assembly → Main sewing │ │ ▲ │ │ │ ▼ │ Packing ← QC ← Hardware fitting ← Heat press │ └─────────────────────────────────────────────┘ “`
The U-shape lets one supervisor see the whole line, allows operators to move between stations as bottlenecks shift, and shortens material travel.
Space Requirements
A practical space estimate for a starter line:
| Function | Approximate space |
|---|---|
| Cutting room | 60–100 m² |
| Sewing line (15–20 stations) | 150–250 m² |
| Heat press / bonding | 40–60 m² |
| Assembly and hardware | 60–100 m² |
| QC and rework | 40–60 m² |
| Packing and storage | 100–200 m² |
| Total | 450–770 m² |
Utility Requirements
- Power — three-phase power for industrial machines; calculate total load and provide adequate supply.
- Lighting — bright, even lighting (500+ lux at work surfaces) is a quality tool, not a luxury; defects hide in shadows.
- Compressed air — for pneumatic presses and some machines.
- Ventilation — heat presses and welding generate fumes; ventilation protects workers and products.
Step 3: Staffing and Training
Equipment produces nothing without people. Staffing is the most underestimated part of starting a line — and the hardest to fix later.
The Staffing Structure
| Role | Count (starter line) | Responsibility |
|---|---|---|
| Production manager | 1 | Line management, scheduling, quality |
| Pattern engineer | 0–1 | Patterns, markers, spec sheets |
| Cutting operators | 2–4 | Spreading, cutting, kitting |
| Sewing operators | 12–20 | Sub-assembly and main sewing |
| Heat press operator | 1 | Fusing, bonding |
| Assembly/hardware operators | 3–5 | Zippers, buckles, final fitting |
| QC inspectors | 2–3 | In-line and final inspection |
| Packing operators | 2–3 | Folding, packing, cartoning |
| Maintenance | 0.5–1 | Machine upkeep |
The Skill Bottleneck: Sewing Operators
Sewing operators are the scarcest resource in the industry. A skilled sewing operator takes 3–6 months to train to acceptable quality and 1–2 years to reach full speed. This has two implications:
- Training investment — budget real time and supervisors for operator training; do not expect quality from week-one trainees.
- Retention — experienced operators are the factory’s most valuable asset; fair pay, stable work, and a safe environment keep them.
Manufacturer’s note: When we advise new factories, the single most common mistake is staffing the line with untrained operators and expecting samples-level quality. The first 2–3 months of a new line should be treated as a training period: lower output targets, heavy supervision, and acceptance of higher defect rates that shrink as skills grow.
The Training Program
A structured training path for sewing operators:
- Machine basics — threading, tension, needle change, safety (week 1–2).
- Straight seams on practice fabric — consistent SPI and seam allowance (week 2–4).
- Simple sub-assemblies — pockets, straps, linings (week 4–8).
- Main seams on real products — supervised, checked against spec (week 8–12).
- Speed development — gradually increase speed while maintaining quality (month 3+).
Supervision and Quality Ownership
Quality starts with the operator, not the inspector. The supervisor’s role:
- First-piece checks — every operator’s first piece of each operation is checked before they continue.
- Immediate feedback — defects are corrected at the station, not at final QC.
- Rework ownership — operators fix their own rework; this teaches the cost of defects.
- Clear standards — stitch density, seam allowance, and tension standards visible at each station.
Step 4: Production Planning for a New Line
A new line needs a ramp-up plan, not just a target output. The typical ramp:
| Phase | Duration | Output target | Quality focus |
|---|---|---|---|
| Setup and training | 1–2 months | 30–50% of target | Correct technique |
| Stabilization | Month 3–4 | 60–80% | Consistent quality |
| Ramp-up | Month 5–6 | 90–100% | Speed + quality |
| Full production | Month 7+ | Target | Continuous improvement |
The First Orders
For the first production orders, choose products that match the line’s capability:
- Start with simple styles (school packs, basic totes) before technical products.
- Keep styles stable — frequent style changes reset the learning curve.
- Run small first orders to validate the line before committing to large volumes.
Work-in-Progress Control
New lines tend to accumulate work-in-progress (WIP) between stations. Excessive WIP hides problems and slows defect detection. Control it by:
- Matching station capacity to line output (balanced line).
- Using small batch transfers between stations.
- Tracking WIP daily and investigating accumulations.
Step 5: Quality Systems from Day One
Quality systems are not an add-on — they must be built into the line from the start. Retrofitting quality is far more expensive than designing it in.
The Minimum Quality System
- Incoming inspection — fabrics, hardware, and zippers checked against spec before use.
- First-piece inspection — every operation’s first piece verified.
- In-line QC — roving inspectors at critical stations.
- Final inspection (AQL) — sampled inspection of finished packs.
- Documentation — defect records, rework rates, and test results tracked from day one.
- Traceability — lot numbers on cut kits so defects trace back to the source.
The Key Metrics to Track
- First-pass yield — % of packs passing inspection without rework (target 90%+ in steady state).
- Rework rate — % of units requiring rework (watch the trend).
- Defect categories — what fails most (seams? zippers? hardware?) and fix the top item.
- Output per day — actual vs target, and the gap analysis.
- Scrap rate — fabric waste at cutting (target under 5%).
The Testing Investment
Even a starter line should have basic testing capability:
- Spring scale for load tests
- Sample zipper cycle testing
- Simple measuring tools (calipers, gauges)
- Seam strength testing (can be contracted initially)
Step 6: The Cost of Starting a Line
Costs vary widely by country and scale. Here is a realistic budget picture for a starter line producing simple packs (approximate, mid-range market):
Capital Investment (One-Time)
| Item | Estimated cost |
|---|---|
| Sewing machines (15–20 units) | $15,000–40,000 |
| Cutting equipment | $5,000–15,000 |
| Heat press and pressing tools | $3,000–10,000 |
| Workshop fit-out (lighting, tables, utilities) | $10,000–30,000 |
| Tools, patterns, and auxiliary | $3,000–8,000 |
| Total capital | $36,000–103,000 |
Monthly Operating Costs
| Item | Estimated monthly cost |
|---|---|
| Rent (450–770 m²) | $2,000–8,000 |
| Labor (25–35 staff) | $15,000–40,000 |
| Materials (per production volume) | Variable, largest line item |
| Utilities and overhead | $1,500–4,000 |
| Maintenance and consumables | $500–2,000 |
The Break-Even Reality
A line producing 100–150 packs/day at a $8–12 factory cost has a monthly revenue potential of roughly $20,000–40,000 at full utilization. Against $20,000–50,000 in fixed monthly costs, the break-even point sits around 70–85% capacity utilization — meaning the line must run steadily, not in fits and starts.
Manufacturer’s note: The financial model only works with steady orders. Many new lines fail not because the machines are bad but because the factory built capacity before securing orders. Start with confirmed orders and build capacity to match — or build the line small and expand as orders grow.
Common Mistakes When Starting a Line
Mistake 1: Buying the Cheapest Machines
Cheap machines break, sew inconsistently, and cost more in downtime and rework than they save. Buy reliable brands from the start; used machines from reputable sources are a reasonable middle path.
Mistake 2: Skipping the Bar-Tack Machine
As noted, the bar-tack machine is not optional for quality production. Manual bar-tacking is slow and inconsistent, and the failures show up as warranty claims.
Mistake 3: Hiring Unskilled Operators at Full Speed
New operators need time and supervision. Staffing a line with untrained people and demanding full output produces exactly what you would expect: high defect rates, frustrated supervisors, and a quality reputation that is hard to rebuild.
Mistake 4: Overbuilding Before Orders Exist
Capacity costs money whether it is used or not. Match the line to confirmed demand and expand deliberately.
Mistake 5: No Quality Data
A line without defect tracking cannot improve. You cannot fix what you do not measure — start tracking first-pass yield and defect categories from day one.
Mistake 6: Ignoring the Pattern Engineering
Without proper patterns and markers, cutting waste climbs and assembly problems multiply. A good pattern engineer (even part-time) is worth more than several machines.
From One Line to a Factory: The Growth Path
A successful single line is the foundation for a real factory. The growth path looks like this:
| Stage | Scale | Focus |
|---|---|---|
| Single line | 100–150 units/day | Quality, training, process discipline |
| Multi-line | 300–600 units/day | Standardization, planning, supervision structure |
| Full factory | 600+ units/day | Supply chain, engineering, continuous improvement |
The Leap from Line to Factory
The jump from one line to multiple lines is not just more machines — it is a management step change:
- Standardization — every line must run the same process, or quality drifts between lines.
- Planning — multi-line scheduling, material planning, and capacity management become real functions.
- Supervision structure — line leaders, production managers, and QC managers replace the single-supervisor model.
- Supply chain — material procurement becomes a full-time function with buffer management.
Sourcing Materials for a New Line
A production line is only as reliable as its material supply. New factories often focus entirely on machines and staffing, then discover that fabric sourcing, hardware lead times, and quality consistency of incoming materials are equally critical to survival.
The Material Sourcing Map
| Material | Typical suppliers | Lead time considerations |
|---|---|---|
| Fabric (polyester/nylon) | Mills, trading companies, local distributors | Stocked colors 7–15 days; custom dye 3–6 weeks |
| Canvas / natural fabrics | Mills, specialty weavers | Seasonal availability; organic certifications add time |
| Zippers | Zipper manufacturers, distributors | Branded (YKK/SBS) 2–6 weeks; generic faster |
| Webbing | Webbing mills | 2–4 weeks for standard; custom colors longer |
| Hardware (buckles, rings) | Hardware manufacturers | Molded parts 3–8 weeks; stock items faster |
| Foam and padding | Foam suppliers | 1–3 weeks |
| Thread | Thread manufacturers | 1–2 weeks, low risk |
| Packaging | Local suppliers | 1–3 weeks |
Manufacturer’s note: For a new line, the safest sourcing strategy is to start with materials that are in stock or near-stock: standard 600D polyester in common colors, generic #5 zippers, and standard 25 mm webbing. Custom colors and custom hardware are where lead times stretch — add them to the product line only after the supply chain is proven.
The Two-Supplier Rule
Every critical material should have at least two qualified suppliers. A factory that depends on one fabric mill has no leverage on price and no backup when the mill’s capacity is full or a quality problem appears. Qualifying a second supplier early costs little and prevents expensive production stoppages.
Incoming Material Inspection
Materials must be checked on arrival, before they enter production:
- Fabric — verify style, denier, GSM, color against the master swatch, and coating integrity. Reject shading or defects before cutting.
- Zippers — sample-test function; verify size and slider brand.
- Webbing — check width, strength, and edge finish.
- Hardware — function-test buckles; check plating quality.
A new line should build incoming inspection into the routine from day one. Catching a bad fabric roll before cutting saves weeks of rework.
Building Process Documentation from the Start
Process documentation is the difference between a factory that can replicate quality and one that depends on the mood of individual operators. New lines should build documentation as they go — it is far harder to reconstruct later.
The Core Documents
- Product specification sheets — for each style: materials, construction, measurements, tolerances, packaging.
- Operation breakdowns — each product broken into numbered operations with machine, tools, and quality criteria per operation.
- Work instructions — station-level instructions with photos or samples of correct and incorrect output.
- QC checklists — in-line and final inspection checklists per product.
- Maintenance schedules — machine cleaning, oiling, and calibration routines.
Why Documentation Pays
- Consistency — the same process produces the same quality, regardless of shift or operator.
- Training — new operators learn from documents, not only from word of mouth.
- Traceability — when a problem appears, documentation lets you trace it to the operation, machine, or batch.
- Scalability — multi-line production requires documented processes; you cannot replicate undocumented knowledge.
Manufacturer’s note: The most successful factories we know treat documentation as production equipment, not paperwork. A documented process is the asset that lets a factory grow without losing quality. Start documenting the day the line starts — even simple checklists — and build the system over time.
Compliance and Certification for New Factories
Modern backpack production operates under a growing compliance burden. New factories that ignore compliance risk losing export opportunities before they start — buyers increasingly audit factories before placing orders, and many markets require documented compliance.
The Compliance Layers
| Layer | What it covers | Typical requirement |
|---|---|---|
| Product safety | Physical and chemical safety of the product | EN 71 (EU toys), CPSIA (US children’s products), REACH chemical compliance |
| Factory compliance | Working conditions, labor, safety | BSCI, Sedex, WRAP audits |
| Quality systems | Process control and traceability | ISO 9001 |
| Environmental | Materials and processes | OEKO-TEX, GRS (recycled content), PFAS restrictions |
| Labeling | Content, care, origin | Market-specific labeling rules |
What New Lines Should Prioritize
Not every certification is needed on day one. The practical priority order:
- Product safety basics — for children’s products (school packs), EN 71 / CPSIA testing is non-negotiable in regulated markets.
- Chemical compliance — REACH declarations and restricted substance testing for EU markets.
- Social audit readiness — even without certification, document working hours, wages, and safety; buyers will ask.
- Basic traceability — material certificates and batch records for the materials you use.
Manufacturer’s note: Buyers do not expect a new factory to hold every certification, but they do expect to see a compliance roadmap — documentation, a plan, and honesty about what is in place. A factory that says “we will handle it” without specifics loses the order. A factory with basic documentation and a clear plan wins trust.
The Cost of Compliance
Budget realistically for compliance:
- Product testing: $200–800 per style per market
- Social audit: $1,000–3,000 per audit
- Chemical testing: $300–1,500 per material
- Certification maintenance: ongoing
These costs are small relative to the export opportunities they unlock — but they must be in the startup budget, not discovered after the first order.
The First Year: A Realistic Roadmap
A realistic first-year roadmap for a new backpack production line:
| Quarter | Focus | Milestones |
|---|---|---|
| Q1 | Setup and training | Line installed, operators trained, first orders running at reduced output |
| Q2 | Stabilization | Quality systems live, defect tracking producing data, first reorders |
| Q3 | Ramp-up | Output at 80–100% target, first new product style, supplier base broadened |
| Q4 | Growth planning | Second line decision, documentation system mature, compliance baseline complete |
The Success Indicators
By the end of year one, a healthy line shows:
- First-pass yield consistently above 85–90%
- Output within 10–20% of target on steady orders
- Two or more repeat customers
- Incoming inspection catching problems before production
- Defect data driving real process improvements
FAQ
How much does it cost to start a backpack production line?
A starter line producing 100–150 simple packs per day typically requires $36,000–103,000 in capital (machines, cutting, pressing, fit-out) plus $20,000–50,000 monthly operating costs. The exact figure depends heavily on location, machine quality, and scale.
What machines do I absolutely need?
At minimum: single-needle lockstitch machines, a walking-foot machine, a bar-tack machine, and an overlock machine for edge finishing. A heat press is needed for structured packs. Cutting tables with a straight knife cutter are essential for fabric preparation.
How long does it take to train a sewing operator?
Acceptable quality typically takes 3–6 months, and full production speed 1–2 years. New lines should plan a 2–3 month training period with reduced output targets and heavy supervision before expecting full production quality.
How many people do I need for a starter line?
A functional starter line (100–150 packs/day) typically requires 25–35 people: 2–4 cutters, 12–20 sewing operators, 1 heat press operator, 3–5 assembly workers, 2–3 QC inspectors, 2–3 packing staff, and management.
What is the best workshop layout for a backpack line?
A U-shaped modular layout with one-way flow: cutting → sub-assembly → main sewing → heat press → assembly → QC → packing. The U-shape lets one supervisor oversee the whole line, shortens material travel, and supports flexible operator movement.
What is the biggest mistake in starting a production line?
Building capacity before securing orders. A line that runs at 40% utilization loses money every month. Start with confirmed orders, build the line to match demand, and expand deliberately as orders grow.
From Trading to Production: The Transition Most Entrepreneurs Face
Many new factories come from trading — buying finished packs from established manufacturers and reselling them. The transition to production looks attractive (higher margins, more control) but carries risks that trading never exposed.
The Differences That Surprise Traders
- Cash flow — production absorbs cash continuously: materials, wages, and overhead are paid before any revenue arrives. Trading ties up cash only in inventory; production ties it up in the entire operation.
- Quality accountability — a trader can blame the factory for defects; a producer owns every defect. There is no one upstream to push back to.
- Fixed costs — a trading operation’s costs scale with orders; a factory’s costs are mostly fixed. Utilization below break-even loses money every month.
- Skill requirements — trading needs sales and logistics skills; production needs process management, machine knowledge, and operator training capability.
- Customer relationships — traders often serve customers who buy small volumes; factories need volume customers to run lines efficiently.
The Hybrid Start
The safest transition path is hybrid: continue trading while building production capability slowly.
- Start with a small line (30–50 packs/day) for the styles you know sell.
- Use trading revenue to fund the production build-out.
- Keep the trading relationships as a buffer during the line’s ramp-up.
- Move production volumes progressively as quality and cost competitiveness prove themselves.
Manufacturer’s note: The factories that survive the trading-to-production transition are the ones that treat production as a separate business — with its own capital, its own quality standards, and its own timeline — rather than a side extension of trading. Mixing the two without separation is how both fail.
The Daily Rhythm of a Running Line
Once the line is established, its success comes down to daily discipline. A well-run line has a predictable rhythm that keeps quality and output stable.
The Daily Cycle
- Morning — line briefing: yesterday’s output and defect data, today’s targets, any material or machine issues. First-piece inspections at every station before production starts.
- Mid-morning — the production manager walks the line, checks WIP levels at each station, and rebalances operators if a bottleneck is forming.
- Afternoon — in-line QC reports the defect trend; problem stations get coaching; rework is processed through the dedicated rework station.
- End of day — output counted, defects categorized, tomorrow’s materials confirmed at the cutting room, and the daily record updated.
The Weekly Review
A weekly review of the production data drives continuous improvement:
- First-pass yield trend (up or down?)
- Top three defect categories (what to fix next?)
- Output vs target and the gap analysis
- Machine downtime events (maintenance issues?)
- Material consumption vs plan (waste creeping up?)
Manufacturer’s note: The daily rhythm is boring by design — and that is the point. Consistency is the whole game in production. The factories with the best quality are rarely the ones with dramatic innovations; they are the ones that run the same disciplined cycle every single day, catch small problems early, and never let defects accumulate into crises.
Conclusion
Starting a backpack production line is a serious commitment of capital, space, and — most importantly — people. The equipment list is well understood: cutting tables, lockstitch and walking-foot machines, a bar-tack machine, a heat press, and the finishing and packing stations. The layout is a U-shaped flow that moves material forward without backtracking. The staffing is a team of 25–35 people led by a manager who understands that operator skill, not machine count, is the real production capacity.
The hard truth is that most new lines fail on economics, not engineering: they overbuild before orders exist, staff with untrained operators at full speed, skip the quality systems that catch defects early, and run below break-even utilization. The factories that survive start small, train deliberately, track quality data from day one, and expand only as confirmed demand justifies it.
If you are planning to start a production line, we would be glad to share more detail on our own equipment setup, line layout, and training program — and to talk through the product mix and volumes that make a new line viable in today’s market.