
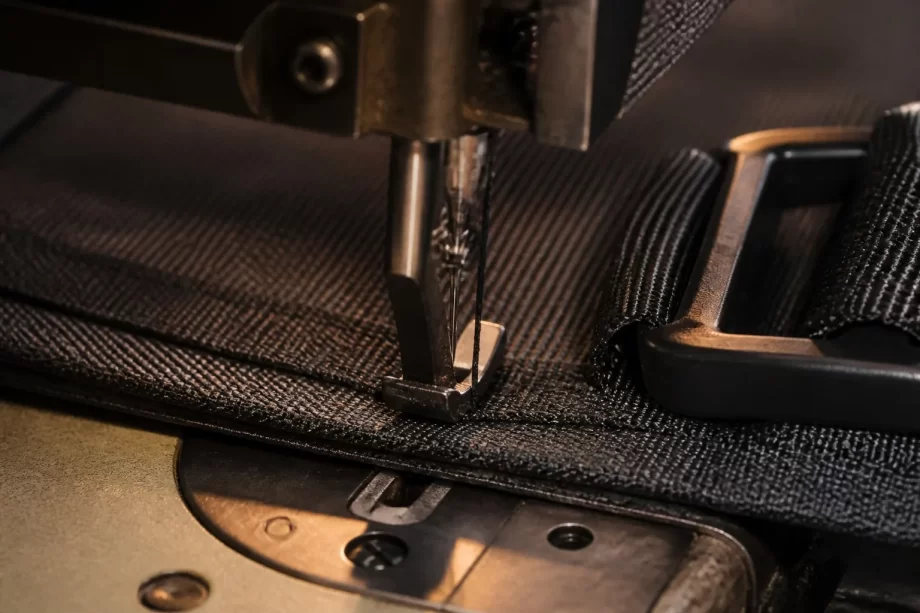
The Role of Stitching and Seam Strength in Backpack Durability
Look at a backpack that has survived five years of daily use and one that failed in five months, and the difference is rarely the fabric. Both may be made from the same nylon, the same polyester, the same hardware. The packs that fail do not wear through — they come apart. A seam pops. A strap pulls out. A zipper tears away from the body. In almost every case, the failure happened at the stitches.
Stitching is the invisible skeleton of a backpack. The fabric provides the surface, but the seams hold the structure together under load, day after day. A seam is a joint: it transfers stress from one panel to the next, and like any joint in any engineered product, it is where fatigue concentrates and where failure begins. Yet stitching is also the most overlooked part of backpack specification. Buyers spend hours debating denier and water column ratings, then write “good stitching” in a single line and move on.
This guide explains stitching from a manufacturer’s perspective: what makes a strong seam, how stitch density and thread choice affect durability, where backpacks actually fail, how factories control sewing quality, and how to specify and test stitching so your packs last the way your brand promises.
- Why Seams Are the True Load Path
- The Anatomy of a Backpack Seam
- Stitch Density: The Number That Tells the Story
- Thread Choice: The Unseen Load Carrier
- Where Backpacks Actually Fail: The Stress Points
- How Factories Control Sewing Quality
- Specifying Stitching: A Buyer’s Checklist
- Testing Seam Strength in the Factory
- The Cost of Stitching Quality
- Common Stitching Mistakes and How to Avoid Them
- Sewing Machines and Workshop Techniques That Matter
- Field Durability: What Years of Warranty Data Show
- FAQ
- Conclusion
Why Seams Are the True Load Path
Understanding durability starts with understanding where the forces go. When you lift a loaded backpack by its handle, the load does not stay in the handle — it travels down the webbing, through the stitches that attach the handle to the body, into the fabric panels, and across the sewn seams that connect the panels. Every one of those transfer points is a seam, and every seam is a series of stitches carrying load.
The Load Chain of a Backpack
The main load path of a typical pack looks like this:
- Handle or shoulder strap (webbing)
- Attachment stitches (bar-tacks) joining webbing to the pack body
- The fabric panel at the attachment point (reinforced or not)
- Main body seams joining panels (gusset seams, side seams)
- Zipper attachment seams (zipper tape sewn into the opening)
- Internal attachment points (dividers, pockets, compression straps)
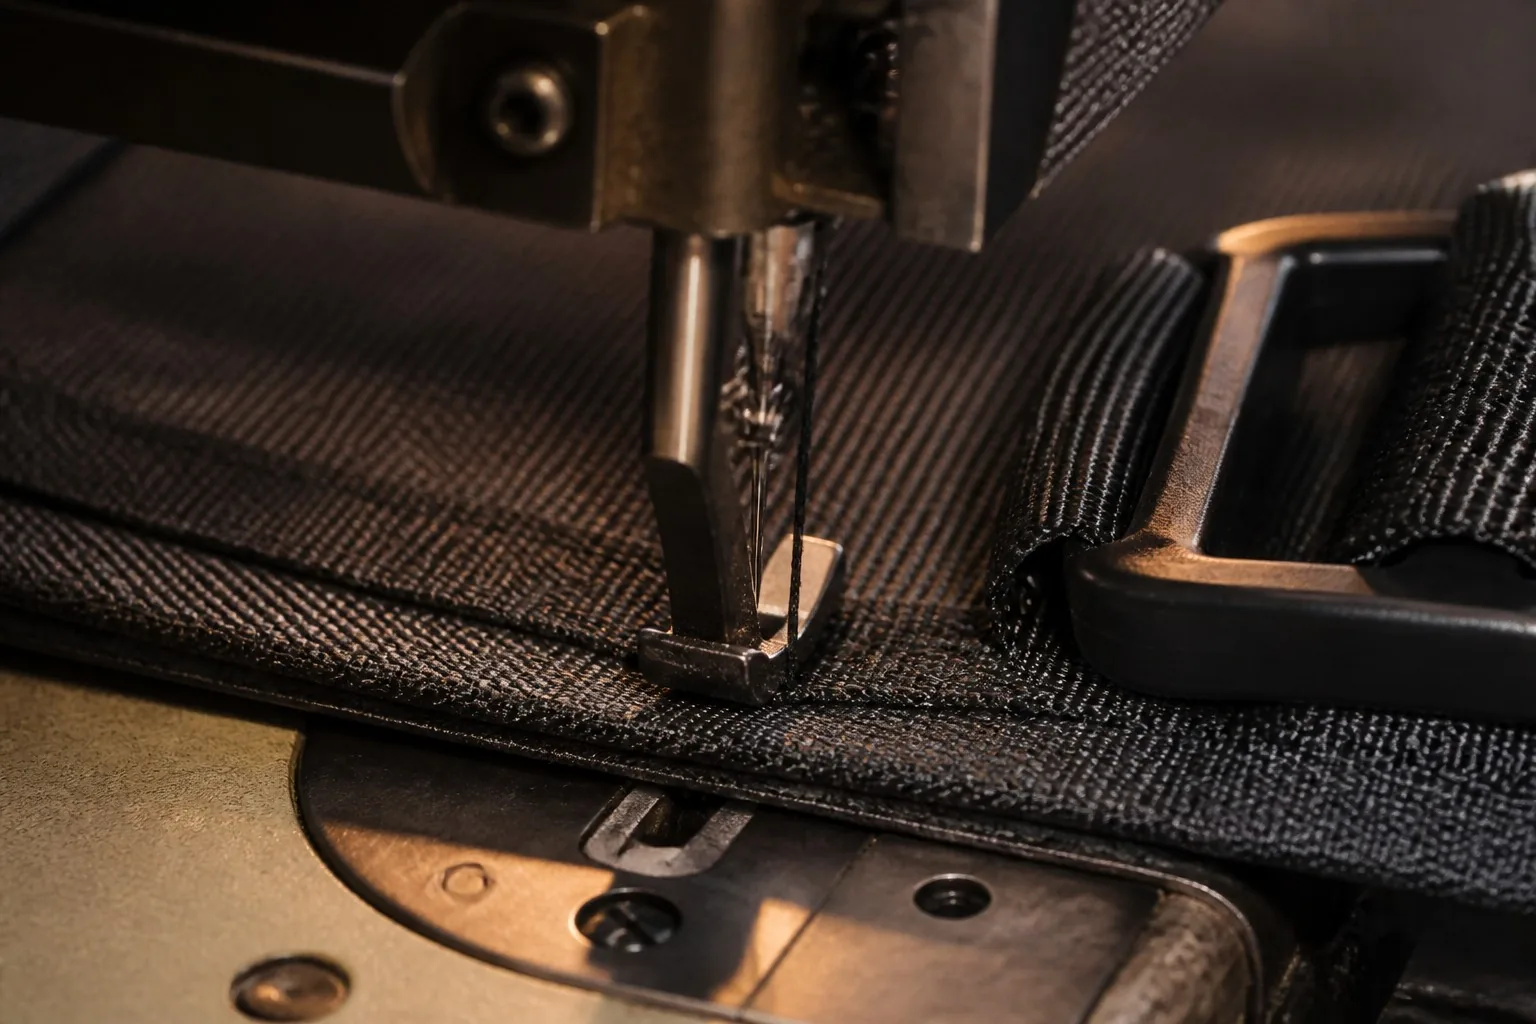
A failure at any link in this chain compromises the whole system. A strap that is attached with weak stitches will pull out even if every other seam is perfect. This is why stitching quality is not a cosmetic concern — it is a structural engineering concern.
Manufacturer’s note: When a customer returns a pack with a “broken strap,” the strap itself almost never failed. What failed is the seam attaching the strap — the stitches, the seam allowance, or the reinforcement. Diagnosing which one tells us exactly where the factory cut corners.
The Mechanics of a Seam Under Load
A sewn seam transfers load through a combination of mechanisms:
- Friction — the clamped layers grip each other.
- Interlock — the thread loops physically tie the layers together.
- Fabric holding power — the fabric must resist the thread pulling through it (tear-out resistance).
- Thread strength — the thread must not break under the load.
If any of these is weak — low stitch density, wrong thread, or weak fabric at the seam — the seam becomes the failure point. The strongest seam is not the one with the most stitches; it is the one engineered so that every part of the system is balanced.
The Anatomy of a Backpack Seam
Before comparing quality, it helps to understand the parts of a seam.
Seam Allowance
The seam allowance is the distance from the stitch line to the fabric edge. In backpack manufacturing, typical seam allowances run 8–12 mm, though heavier constructions use more. The allowance matters because:
- Holding power — the wider the allowance, the more fabric the stitches grip before the thread can tear through.
- Edge fraying — a narrow allowance means raw fabric edges sit closer to the stitches; fraying can reach the seam line faster.
- Lining coverage — allowances must be wide enough for seam finishing (binding, overlocking, or taping).
Stitch Types Used in Backpacks
| Stitch type | What it looks like | Typical use |
|---|---|---|
| Lockstitch (301) | Two threads interlocked in the middle of the layers | Most main seams |
| Chainstitch (401/101) | One or two threads in a chain; faster, but unravels if cut | Some high-speed operations, hemming |
| Overlock / serger | Looped thread wrapping the raw edge | Edge finishing, preventing fray |
| Flatlock | Flat, interlocking exposed threads | Sportswear-style seams, some linings |
| Bar-tack | Dense zigzag or satin stitch cluster | Reinforcement at stress points |
| Zigzag | Stretchable diagonal stitch | Elastic seams, some bindings |
Lockstitch vs Chainstitch: The Durability Question
This is one of the most important technical distinctions in backpack sewing:
- Lockstitch — two threads (needle and bobbin) interlock inside the layers. If a lockstitch breaks, the seam usually stays intact because each stitch is independent. This is the standard for load-bearing backpack seams.
- Chainstitch — the thread forms a chain that can unravel from the end. It is faster and cheaper to sew (used in high-volume garment production), but a broken chainstitch seam can run out completely. Reputable backpack factories use lockstitch for structural seams and chainstitch only for non-load-bearing operations.
Manufacturer’s note: If you see a claim of “cheaper because of faster sewing,” ask which stitches are chainstitch. A factory that uses chainstitch on structural seams is trading durability for speed — and the failures will show up in the field, not on the production floor.
Stitch Density: The Number That Tells the Story
Stitch density — the number of stitches per inch (SPI) or per 3 cm — is the single most informative number in backpack sewing quality. It is easy to measure, easy to specify, and a reliable proxy for how much effort a factory puts into construction.
Standard Densities for Backpacks
| Application | Typical stitch density | Notes |
|---|---|---|
| Main body seams | 4–6 SPI | Balance of strength and flexibility |
| Stress points (straps, handles) | 6–8 SPI | Denser for reinforcement |
| Bar-tacks | Satin-stitched, dense cluster | Reinforcement, not counted in SPI |
| Edge binding | 5–7 SPI | Clean, secure binding |
| Zipper attachment | 4–6 SPI | Must hold zipper tape firmly |
| Lining seams | 5–6 SPI | Interior, lighter duty |
What SPI Actually Controls
- Strength — more stitches per inch means more thread crossings per unit length, and more holding power against seam separation.
- Flexibility — very high density makes the seam stiff and can cause puckering; very low density makes it weak. The right density balances the two.
- Water behavior — more needle holes means more potential water entry at the seam (relevant for weather-resistant packs).
- Cost — higher density means slower sewing and more thread consumption. This is where cost-cutting factories save money.
How to Check SPI on a Sample
Checking stitch density takes ten seconds and requires no equipment:
- Lay the seam flat.
- Count the stitches visible over one inch (or 2.5 cm).
- Compare against the spec.
- Check a stress-point seam and a main seam — both should meet spec.
If the sample’s SPI is below spec, the production will be too. Stitch density is one of the first things a cost-cutting factory reduces because it is invisible in photos.
Thread Choice: The Unseen Load Carrier
The thread is the actual material holding the pack together, yet it is almost never specified by buyers. Thread quality and size matter enormously.
Thread Materials
| Thread type | Properties | Typical use |
|---|---|---|
| Polyester | Strong, UV-resistant, low stretch, economical | The standard for most backpack sewing |
| Bonded nylon | Very strong, slightly stretchy, tough | Heavy-duty seams, load-bearing reinforcement |
| Cotton | Soft, natural look | Heritage/leather goods, decorative |
| Polyester core-wrapped | Strong core + polyester wrap | Premium packs, smooth appearance |
Thread Sizes and Weights
Thread is sized by weight or number (denier or tex):
- #40–#50 polyester — standard for main seams on mid-weight packs.
- #69 bonded nylon — heavier, for straps and load-bearing seams.
- #92–#138 bonded nylon — heaviest, for extreme-duty tactical and work packs.
The needle must match the thread and the fabric: a heavy thread in a fine needle causes thread breakage; a light thread in a heavy needle leaves loose, weak stitches.
Thread Tension
Thread tension is the most adjustable and most commonly wrong parameter in sewing:
- Balanced tension — the needle thread and bobbin thread interlock in the middle of the layers, producing flat, even stitches on both sides.
- Too tight — the fabric puckers; stitches are pulled in; the seam looks “drawn.”
- Too loose — loops appear on one side; the seam has no holding power and will separate under load.
Manufacturer’s note: Puckered seams are the easiest tension defect to spot — and the most commonly ignored. A slightly puckered seam on a sample is a warning sign, not a nitpick. If the factory cannot control tension on a sample, they will not control it across 5,000 units.
Thread Degradation
Thread also ages. The two main enemies:
- UV — prolonged sun exposure weakens thread (polyester resists UV better than nylon).
- Abrasion — thread at seam edges rubs against surfaces; bonded threads resist abrasion far better than uncoated ones.
For packs used outdoors or in harsh environments, specify bonded thread and higher-grade polyester. The cost difference is pennies per pack; the durability difference is measured in months of extra life.
Where Backpacks Actually Fail: The Stress Points
Durability problems cluster at specific locations. Knowing where failures occur tells you where to reinforce — and where to inspect.
The Top Failure Locations
| Location | Failure mode | Root cause |
|---|---|---|
| Strap attachment points | Webbing pulls out of the pack body | Insufficient bar-tacking, weak seam allowance |
| Handle attachment | Handle tears away | Missing reinforcement, low SPI at anchor |
| Zipper ends | Zipper tape tears from the seam | Weak zipper attachment, missing bartacks at stops |
| Gusset corners | Corners split open | Insufficient seam strength, sharp stress concentration |
| Compression strap anchors | Straps rip off | Missing bar-tacks, undersized attachment patches |
| Bottom seam | Bottom seam opens under load | Heavy load + weak seam or low SPI |
| Shoulder strap seams | Strap layers separate | Poor layer joining, thread failure |
Why Bar-Tacking Is Non-Negotiable
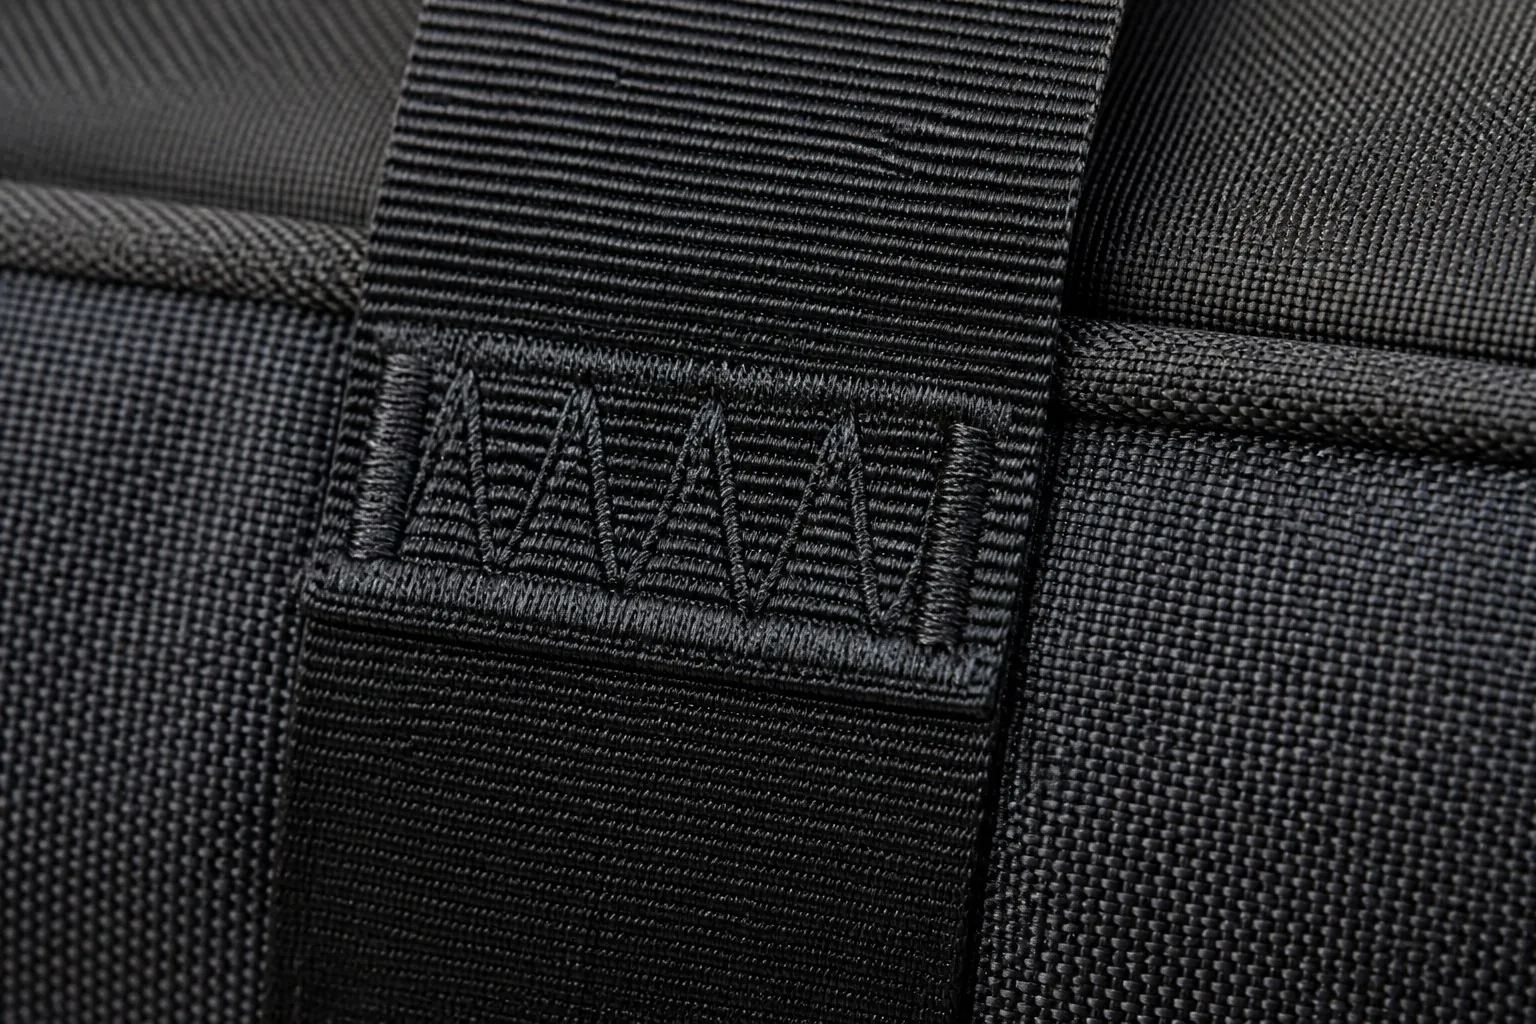
Bar-tacks are dense clusters of satin stitching applied at stress points. They serve one purpose: to stop the seam from tearing under repeated load. A strap attached with a straight stitch line will eventually pull out; the same strap with bar-tacks at the anchor will hold.
The bar-tack spec matters:
- Placement — both sides of the webbing, at the edges of the attachment.
- Size — the bar-tack should span the full width of the webbing.
- Density — a bar-tack is a dense cluster; a sparse one is decorative, not functional.
- Count — two bar-tacks at each anchor is standard for load-bearing attachments.
Manufacturer’s note: The fastest way to judge a factory’s quality culture: open a sample pack, find the strap attachments, and look for the bar-tacks. A factory that skips bar-tacks is saving seconds per pack and will be paying for it in warranty claims — with your brand’s name on the product.
Seam Reinforcement Techniques
Beyond bar-tacks, factories reinforce seams in several ways:
- Reinforcement patches — extra fabric or webbing patches sewn at stress points.
- Double stitching — two parallel stitch lines at critical seams.
- Seam tape — bonded tape over the seam (adds strength and water resistance).
- Gusset reinforcement — corner patches at the base of gusset seams.
- Box-X stitching — a box-shaped stitch pattern with an X inside, used at high-stress anchors (common in climbing and tactical gear).
How Factories Control Sewing Quality
Consistent sewing quality does not happen by accident. It is the product of machine maintenance, operator training, and inspection discipline.
Machine Setup and Maintenance
- Needle selection — the needle must match fabric weight and thread size; wrong needles cause skipped stitches and fabric damage.
- Tension calibration — machines are calibrated at line setup and checked during production.
- Regular maintenance — a well-maintained machine sews consistently; a neglected one produces intermittent defects that are hard to catch.
- Machine type — heavy fabrics need walking-foot machines (which feed thick layers evenly); standard machines struggle with thick stacks.
Operator Training
Sewing quality is ultimately operator skill:
- Speed control — experienced operators maintain consistent speed, producing consistent stitch density.
- Edge guiding — consistent seam allowance requires the operator to guide the fabric to the same distance from the edge every pass.
- Fabric handling — stretching or easing the fabric while sewing distorts the seam; skilled operators handle the material correctly.
- Defect awareness — trained operators stop and report problems instead of sewing through them.
The Quality Inspection Chain
| Inspection point | What is checked | When |
|---|---|---|
| Incoming materials | Thread, fabric, hardware meet spec | Before production |
| First-piece inspection | The first unit of each operation is checked against the spec | Line setup |
| In-line QC | Random checks at stations during production | Continuous |
| Sub-assembly inspection | Pockets, straps, and components checked before assembly | Between stages |
| Final inspection | Full AQL inspection of finished packs | Before packing |
| Pre-shipment inspection | Sample of finished goods per AQL | Before shipping |
The AQL Approach to Seams
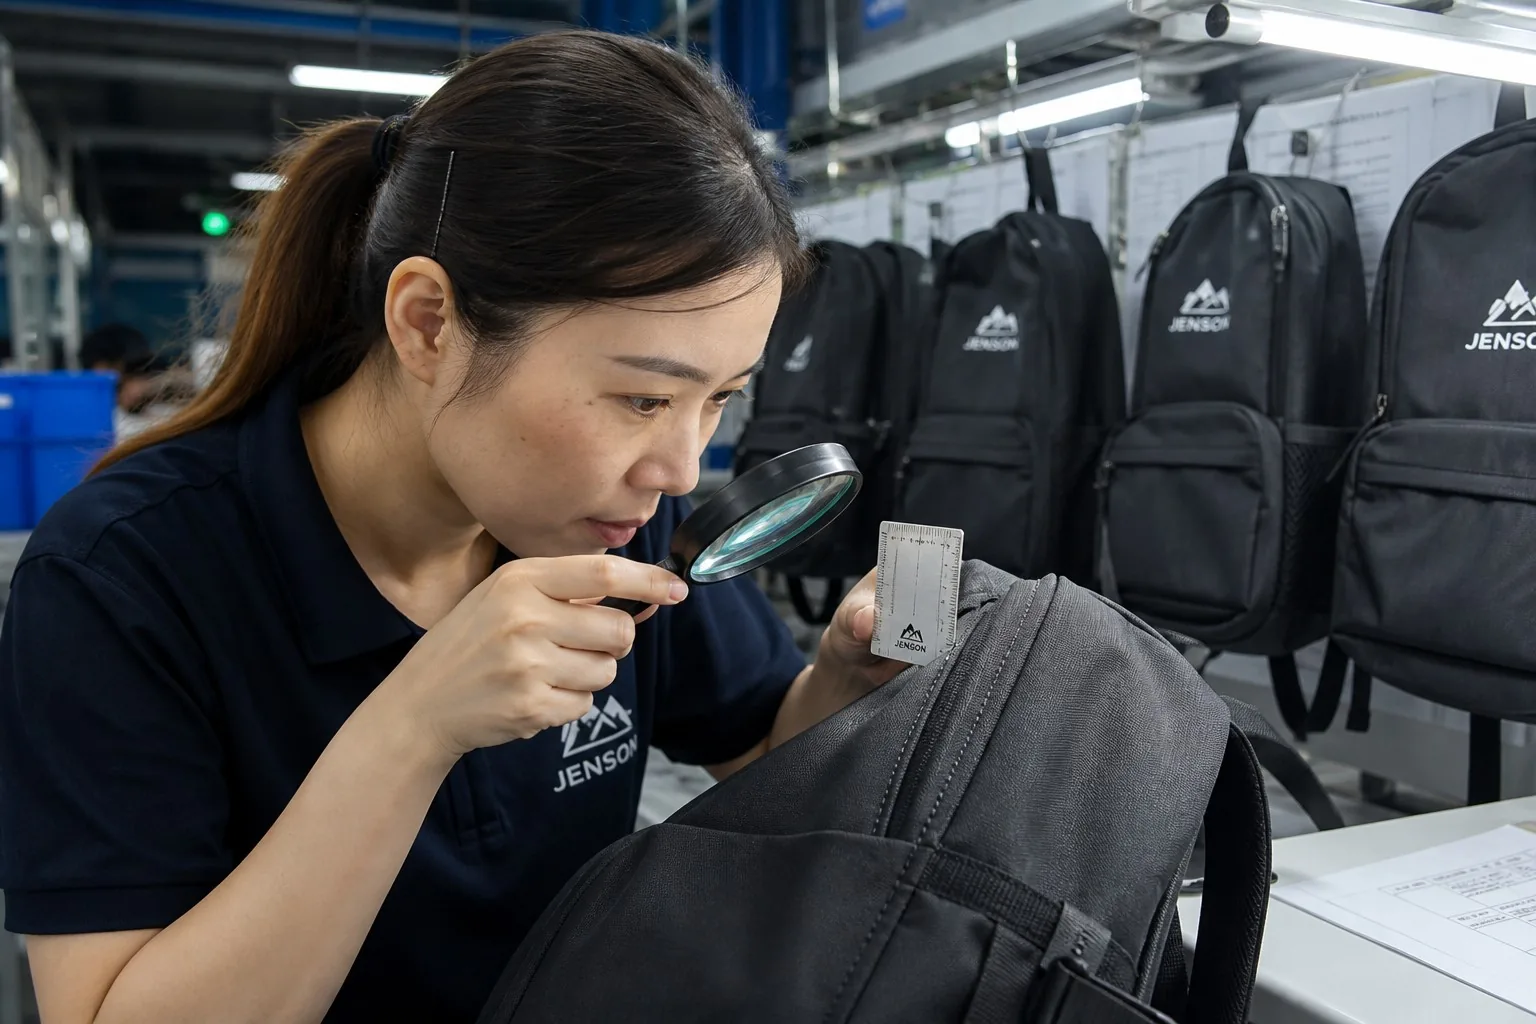
Final inspection uses Acceptable Quality Limit (AQL) sampling. For stitching, the inspection criteria typically include:
- Stitch density within spec (count on a sample)
- No skipped stitches on visible or structural seams
- No open seams or seam gaps
- Bar-tacks present and correctly placed at stress points
- Seam allowance within tolerance
- No puckering, looper, or tension defects on visible seams
Specifying Stitching: A Buyer’s Checklist
When you write the specification for your next backpack, stitching deserves its own section — not a line item inside “construction.” Here is what to include:
The Stitching Spec Sheet
| Parameter | Example specification |
|---|---|
| Main seam stitch | Lockstitch 301, 5 SPI |
| Stress point stitch | Lockstitch 301, 6–7 SPI |
| Thread | #69 bonded nylon at stress points; #40–#50 polyester elsewhere |
| Seam allowance | 10 mm minimum |
| Bar-tacks | Required at all strap/handle anchors, both sides of webbing, zipper stops |
| Reinforcement | Gusset corner patches, reinforcement patches at handle anchors |
| Edge finishing | Overlock or binding on all raw edges |
| Tension standard | Balanced — no puckering, no loops |
Questions to Ask the Factory
- What SPI do you use on main seams and stress points?
- Which seams are lockstitch and which are chainstitch?
- What thread do you use at strap attachments?
- Where do you place bar-tacks on this style?
- What is your seam allowance?
- How do you check tension during production?
- Can I see the first-piece inspection records?
Manufacturer’s note: A factory that answers these questions with specifics is a factory that controls its process. A factory that answers with “we do quality” is describing hope, not a system. The questions cost nothing to ask and separate real capability from marketing language.
Testing Seam Strength in the Factory
Seam strength is measurable, and the tests are simple enough to run on samples. The key tests:
Seam Slippage Test
Measures how far the fabric layers shift apart at the seam under a given load. Excessive slippage means the seam will open under use. Standard: ISO 13936 or ASTM D4034.
Seam Strength (Breaking Force) Test
Pulls the seam apart until it fails, recording the force required. This tests the combined strength of thread, stitch, and fabric at the seam. Standard: ISO 13935.
Tear Strength Test
Measures resistance to tearing from a cut or puncture. A pack with strong seams but fabric that tears easily will still fail. Standard: ISO 13937.
Load Cycling / Fatigue Test
Repeatedly loads and unloads the pack (or a strap assembly) to simulate months of use. This catches failures that static tests miss.
The Field-Simulating Test
The most practical test: fill the pack to its rated load, lift by each handle and strap, drop it from a defined height, and repeat. This is not a lab standard — it is simply how the pack will be treated by users.
| Test | What it verifies | Typical standard |
|---|---|---|
| Seam slippage | Layers stay together under load | ISO 13936 |
| Seam strength | Seam resists breaking force | ISO 13935 |
| Tear strength | Fabric resists tear propagation | ISO 13937 |
| Bar-tack retention | Strap anchor holds under pull | Factory protocol |
| Load cycling | Seams survive repeated loading | Factory protocol |
The Cost of Stitching Quality
Strong stitching costs more — but the cost is small compared to the returns it prevents. Here is the reality:
| Quality element | Cost impact per pack | Failure cost if skipped |
|---|---|---|
| Higher SPI (5 vs 4) | +$0.10–0.30 | Seam failures, returns |
| Bonded thread at stress points | +$0.05–0.15 | Strap pull-outs |
| Bar-tacks at all anchors | +$0.10–0.25 | Strap/handle failures |
| Seam reinforcement patches | +$0.15–0.40 | Corner splits, handle tears |
| Proper tension control | Minimal (process) | Puckering, weak seams |
| In-line QC | +$0.05–0.20 | Defects reaching final inspection |
Total: roughly $0.50–1.50 per pack for a structurally sound construction. Against a typical retail price of $40–150, that is a rounding error — and it is the difference between a pack that comes back and a pack that builds your brand.
The Hidden Cost of Cheap Stitching
The real cost of weak stitching is not the $1 saved — it is:
- Returns and refunds — a failed seam is a return, plus shipping, plus restocking.
- Warranty claims — a “lifetime warranty” on a pack with weak seams is a liability, not a feature.
- Brand damage — one visibly broken pack in a review photo is worth more negative influence than a hundred good reviews.
- Retailer penalties — retailers track defect rates; a high rate costs you shelf space and terms.
Common Stitching Mistakes and How to Avoid Them
Mistake 1: Specifying Only “Strong Stitching”
“Strong stitching” is not a specification. SPI, thread type, seam allowance, bar-tack placement, and tension standard are specifications. Write them down.
Mistake 2: Judging by Eye Alone
A seam can look perfect and be structurally weak — low SPI, thin thread, no bar-tacks. Measure the SPI, check the thread, pull on the seams. Visual inspection is the beginning of quality control, not the end.
Mistake 3: Forgetting the Stress Points
It is easy to check the visible seams and miss the anchors: strap attachments, handle bases, zipper stops, and gusset corners are where packs actually fail. Inspect those first.
Mistake 4: Accepting the Sample, Skipping Production Checks
A sample is made by the best operator under special attention. Production runs are where standards slip. First-piece inspection, in-line QC, and AQL final inspection exist for exactly this reason — use them.
Mistake 5: Ignoring Tension Problems
Puckering and loops are not cosmetic — they indicate incorrect tension, which means weak seams. Reject them, don’t accept them “for now.”
Mistake 6: Not Testing
Static inspection cannot verify seam strength. Run the seam strength, slippage, and load tests on samples — they take minutes and reveal what months of field failures would otherwise take to expose.
Sewing Machines and Workshop Techniques That Matter
The machines on the factory floor determine what kind of seams a factory can produce well. Machine capability is one of the fastest ways to assess whether a factory can handle your product’s construction.
The Core Machine Types
| Machine type | What it does | Backpack relevance |
|---|---|---|
| Single-needle lockstitch | Standard straight seams | The workhorse for most seams |
| Walking-foot machine | Feeds thick layers evenly from both sides | Essential for heavy fabrics, multi-layer seams |
| Double-needle machine | Two parallel stitch lines at once | Decorative and reinforcing seams |
| Bar-tack machine | Automatic dense reinforcement stitches | Consistent bar-tacks at anchors |
| Overlock / serger | Edge finishing, fray prevention | Raw edge control |
| Post-bed machine | Sews on raised surfaces | Cylindrical parts, straps, small openings |
| Long-arm machine | Extra throat space | Large panels, awkward shapes |
Why Machine Choice Affects Quality
A factory that tries to sew heavy multi-layer straps on a standard single-needle machine will produce skipped stitches and uneven seams — not because the operator is bad, but because the machine cannot feed thick stacks evenly. A walking-foot machine solves the problem mechanically.
When evaluating a factory for your product:
- Match the machine to the material — heavy canvas or multiple fabric layers require walking-foot capability.
- Check the bar-tack machines — a factory without dedicated bar-tack machines will do bar-tacks manually, with inconsistent results.
- Ask about post-bed machines — needed for small openings and cylindrical construction.
Manufacturer’s note: Machine capability is a ceiling on quality. You can train operators, but you cannot train a standard machine to feed a 12-layer strap stack evenly. If your product needs heavy construction, verify the factory has the machines before you discuss price.
Needle Selection and Fabric Damage
The needle is the interface between machine and fabric, and it damages fabric when mismatched:
- Too large a needle — leaves visible holes; weakens the fabric at the seam line (a hidden durability problem).
- Too small a needle — breaks thread or deflects, causing skipped stitches.
- Wrong point type — ball-point needles are for knits, sharp points for wovens; using the wrong type damages fibers.
Edge Finishing Techniques
Raw fabric edges fray, and fraying migrates toward the seam. Professional finishing prevents this:
- Overlocking — looping thread wraps the raw edge.
- Binding — a fabric tape covers the raw edge (common on pack openings and seams).
- Pinking / edge sealing — some coated fabrics are heat-sealed at cut edges.
- Taping — seam tape covers the seam from the inside (adds strength and water resistance).
The finishing method should be in the spec — “finished edges” is another vague phrase that leaves the factory free to choose the cheapest option.
Field Durability: What Years of Warranty Data Show
After years of handling warranty claims and field failures, patterns emerge. The data points are consistent across brands, price points, and markets:
The Failure Timeline
- 0–3 months (early failures) — almost always tension defects, skipped stitches, or missing bar-tacks: quality-control escapes from production.
- 3–12 months (mid-life failures) — seam fatigue at stress points: straps pulling out, gusset corners splitting, zipper tape tearing. These are design and specification failures — the seam was never strong enough for the actual use.
- 12+ months (wear-out) — fabric abrasion, thread degradation, and general wear. This is the natural life cycle; the goal is that the pack reaches this stage before it fails.
The Two Biggest Warranty Drivers
Across every category we have seen, two failures dominate warranty claims:
- Strap and handle attachment failures — the webbing pulls out of the pack. Root cause: insufficient bar-tacking or weak seam allowance at the anchor.
- Main compartment seam separation — the pack opens at a main seam under load. Root cause: low SPI, light thread, or seam allowance that is too narrow for the fabric.
Both are entirely preventable with the specifications and inspections described in this guide. Neither is caused by the fabric, the zipper, or the hardware — they are stitching failures, and stitching is fully controllable.
The Lesson for Buyers
Warranty data is the ultimate scoreboard for seam quality. If your brand tracks returns, look at the failure reasons — if seam and strap failures dominate, the fix is in the stitching spec, not in a fabric upgrade or a marketing campaign. A $1-per-pack investment in stitching quality routinely cuts warranty costs by multiples of that amount.
FAQ
What is the most important factor in seam durability?
The combination of stitch density (SPI), thread quality, and reinforcement at stress points. No single factor dominates — a dense seam with thin thread or no bar-tacks will still fail. The system must be balanced.
How can I tell if a backpack has good stitching?
Count the stitches per inch (4–6 SPI is typical for main seams), check the thread at stress points (bonded nylon #69 is the standard), verify bar-tacks at all strap and handle anchors, and pull on the seams to feel for give. Then check the seam allowance is adequate (8–12 mm).
What is the difference between lockstitch and chainstitch?
Lockstitch interlaces two threads inside the layers and holds even if a stitch breaks — the standard for load-bearing seams. Chainstitch forms a chain that can unravel from the end if cut or broken; it is faster and cheaper but not suitable for structural seams.
Why do straps pull out of backpacks?
Usually because the strap attachment lacks proper bar-tacking, uses weak thread, or has insufficient seam allowance. The strap itself rarely fails — the attachment stitches do. Reinforcement at the anchor is the fix.
How many stitches per inch should a backpack have?
For main body seams, 4–6 SPI is standard. Stress points should be denser (6–7 SPI or more), and bar-tacks are applied separately as dense reinforcement clusters at anchors. Higher SPI costs slightly more and is worth it on load-bearing seams.
Can a factory improve stitching quality on my order?
Yes — if you specify it. Write the SPI, thread, seam allowance, bar-tack placement, and tension standard into the specification, and verify with first-piece inspection and AQL checks. Factories build to the spec they are given.
Conclusion
Stitching is the true load path of a backpack, and seam strength is where durability is won or lost. The fabric and hardware get the attention, but the stitches carry the load — and when they fail, the whole pack fails, usually in the field, months after the sale.
The good news is that stitching quality is entirely controllable. It is a matter of specification and verification: specifying the right SPI, thread, seam allowance, and bar-tack placement, and verifying them with inspection and testing at every stage. The cost of doing it right is pennies per pack; the cost of getting it wrong is measured in returns, warranty claims, and brand reputation.
When you plan your next production run, put stitching at the center of the specification, not the margin. Ask the factory the questions in this guide, inspect the stress points first, and test the seams before you commit. The packs that survive five years of daily abuse are built on seams you never see — but you will feel the difference in your brand’s reputation.
If you are developing a new backpack line, our factory team can walk you through our stitch specifications, show you our bar-tack standards and inspection process, and produce samples you can pull on, load up, and abuse before you commit to production.