Modular Backpack Design: How Do Factories Build One Bag, Many Uses?
Modular Backpack Design: How Do Factories Build One Bag, Many Uses?
A modular backpack is a commercial promise that the same product can be a commuting pack on Monday, a camera bag on Wednesday, and a weekend travel bag on Friday. The promise is easy to make in a design presentation and difficult to keep in a factory, because every additional configuration multiplies the number of connections that must hold, the number of components that must fit, and the number of ways a unit can be assembled incorrectly.
This guide covers modular and convertible backpack design from a manufacturer’s perspective: why modularity changes the production problem, how a modular architecture is structured, which conversion modes exist and what each demands, how the attachment interface is designed, how components are standardised, what materials and hardware are required, how connections are tested, and how the added complexity is priced and controlled.
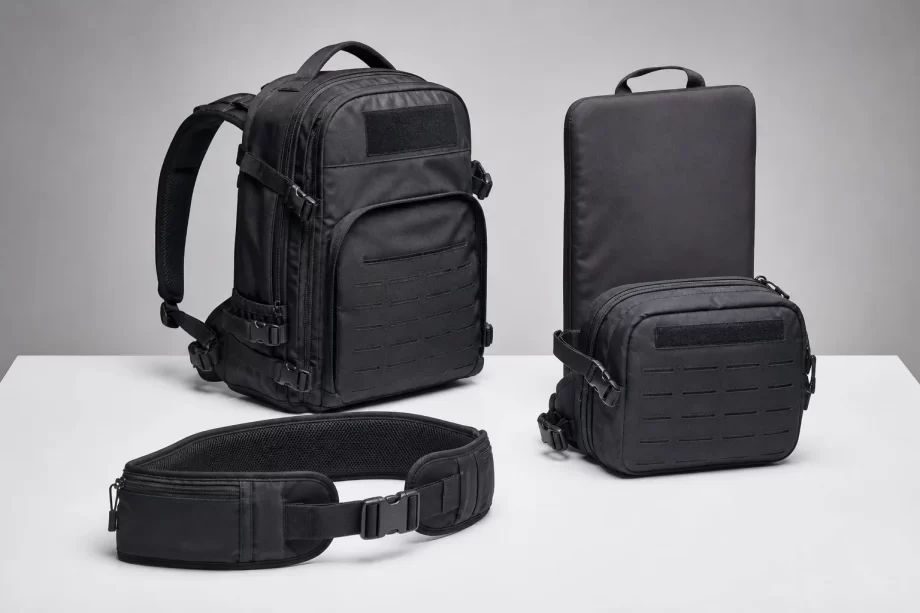
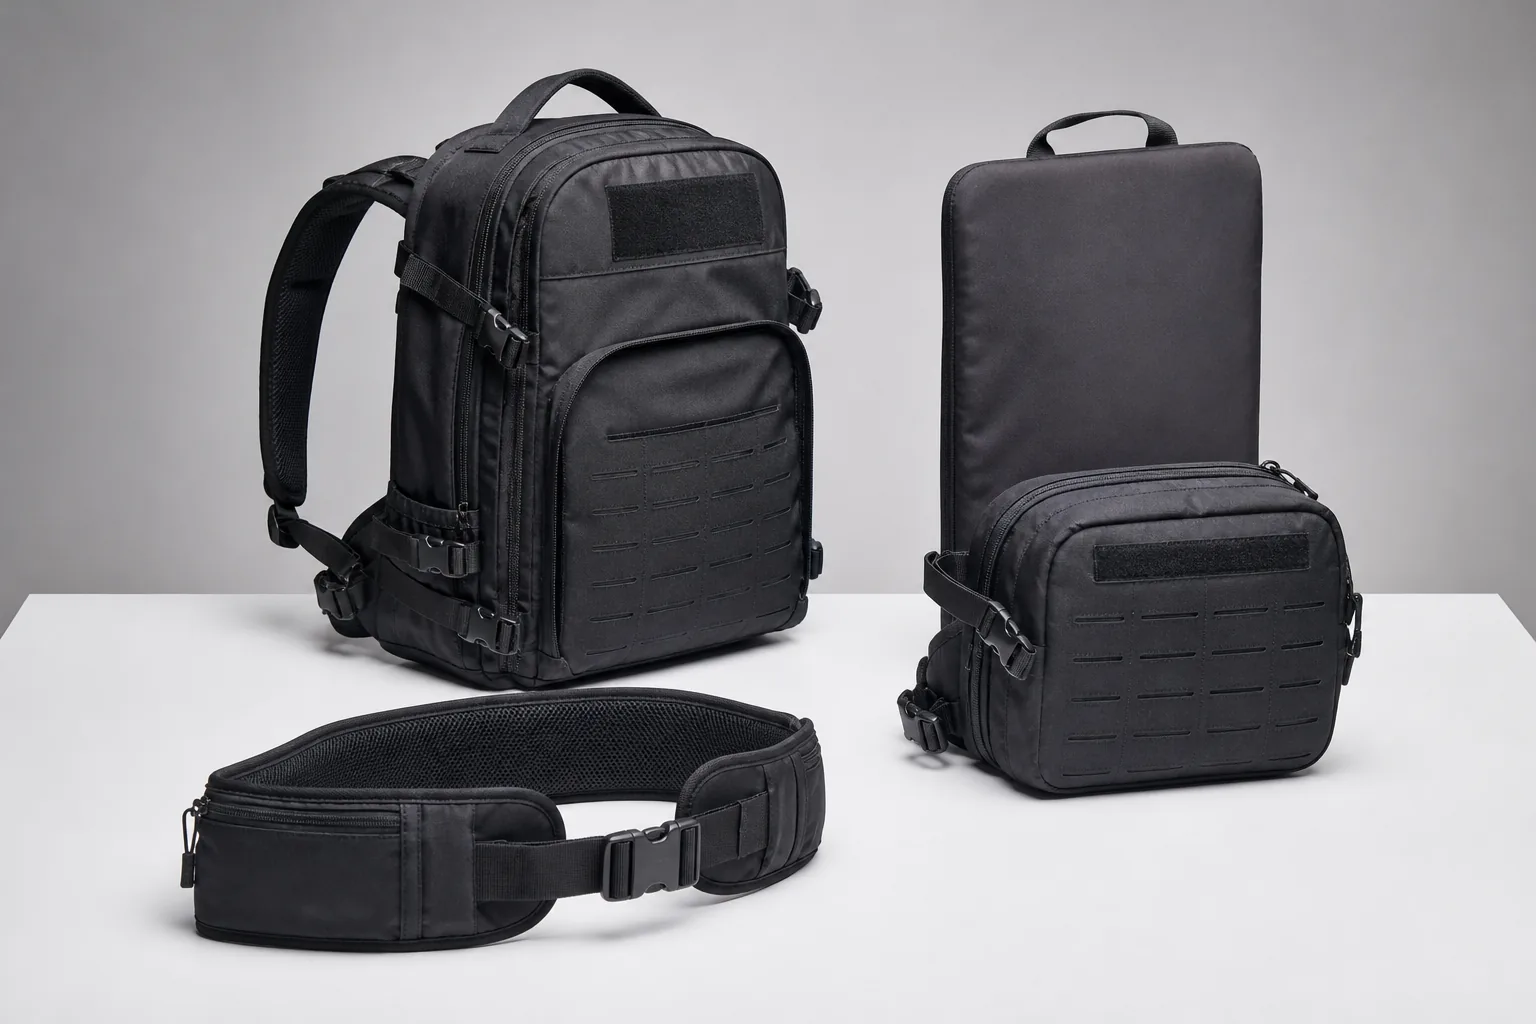
A modular backpack with detachable pouch, removable sleeve and separate hip belt laid out around the main body
Modularity is not a feature added to a bag. It is a structural decision that determines how the bag is engineered, how it is cut, how it is assembled, how it is tested, and how many stock-keeping units the brand has to manage. A factory that treats it as a design flourish will produce a bag that converts on the sample table and fails in the field.
Why Modular Design Changes the Manufacturing Problem
A conventional backpack is a closed assembly: panels are joined into a single body, and the configuration is fixed at the pattern stage. A modular bag is an open assembly, where separate modules are joined by interfaces that must be strong, repeatable, and foolproof in the hands of a user.
The Structural Difference Table
Aspect
Conventional bag
Modular bag
Assembly
Fixed at pattern
Variable at assembly
Connections
Permanent seams
Releasable interfaces
Component count
Lower
Higher
Tolerance stack
Single chain
Multiple chains
Failure points
Seams and hardware
Interfaces and hardware
Configuration
One
Several
The Complexity Table
Complexity source
Effect
More components
More cutting, kitting, tracking
More interfaces
More hardware, more testing
More configurations
More assembly variants
More SKUs
More planning and forecasting
More instructions
More user error
More testing
Longer qualification
The Value Table
Benefit
Mechanism
Higher price point
Perceived versatility
Repeat purchase
Accessory modules
Market coverage
One platform, several uses
Reduced range
Fewer base styles
Inventory flexibility
Modules stocked separately
Differentiation
Configuration choice
The Risk Table
Risk
Consequence
Interface failure
Module detaches in use
Tolerance stack
Modules do not fit
Incompatibility
Wrong module sold
Assembly error
Wrong configuration shipped
Cost overrun
Complexity unpriced
User confusion
Returns and complaints
The Decision Table
Question
Implication
How many modules?
Complexity and SKU count
How many interfaces?
Testing and hardware cost
Releasable or fixed?
Strength and cost
User-facing or factory-facing?
Error tolerance
Cross-compatible?
Platform vs one-off
Sold together or apart?
Inventory model
The Manufacturer’s View Table
Concern
Practical response
Assembly time
Design for sequence
Training
Standard work instructions
Kitting
Pre-kitted module sets
Inspection
Interface check points
Rework
Reversible connections
Warranty
Interface test evidence
Manufacturer note: The commercial case for a modular bag is usually built on the buyer’s side, where versatility justifies a price. The manufacturing case is built on the number of variants the line must handle, and the two are rarely reconciled before the design is fixed. A bag with three modules and two conversion modes can require eight assembly variants, eight sets of work instructions, and eight inspection routines. Counting the variants before approving the design is the single most effective cost control in a modular programme, because it is much cheaper to remove a module than to administer one.
The Modular Architecture
Architecture is the decision about which parts of the bag are fixed and which are separable, and it determines almost everything downstream. The three common architectures behave very differently in production.
The Architecture Table
Architecture
Description
Platform plus modules
Fixed body, add-on modules
Reversible panels
Exchangeable faces
Convertible structure
One body, several carry modes
Nested system
Modules stored inside each other
Hybrid
Combination of the above
The Architecture Comparison Table
Criterion
Platform plus modules
Convertible structure
Complexity
Moderate to high
Moderate
Component count
High
Moderate
SKU count
High
Low
Interface count
High
Low
User flexibility
High
Moderate
Failure exposure
Many interfaces
Fewer interfaces
The Layer Table
Layer
Function
Core body
Load carrying and structure
Attachment layer
Interface for modules
Module
Function-specific volume
Carry system
Straps and harness
Conversion element
Strap stowage or re-routing
Trim and closure
Access and finish
The Fixed Versus Variable Table
Element
Recommended
Body construction
Fixed
Carry system
Fixed with adjustment
Module position
Variable by interface
Module size
Fixed per module
Conversion hardware
Fixed
Colour and trim
Variable at order
The Variant Count Table
Configuration
Variants
Base only
One
Base plus one module
One per module
Base plus two modules
Combinations
Converted mode
One per mode
Colour variants
Multiplied
Market variants
Multiplied
The Generation Table
Generation issue
Approach
Interface change
Keep old modules usable
Hardware upgrade
Same footprint, new finish
Module resizing
Retain the interface position
Colour refresh
Palette change only
Cost-down revision
Do not alter the interface
Discontinuation
Stock spares first
A platform that is revised each season without regard for the previous one stops being a platform after two years. Keeping the interface position fixed while the aesthetics and hardware finish move is what allows a module bought in one season to fit a bag bought in the next.
The Platform Table
Platform principle
Benefit
Shared interface
Modules interchangeable
Shared hardware
Volume pricing
Shared pattern block
Faster development
Shared testing
Reduced qualification
Shared instructions
Reduced training
Shared spares
Serviceability
Conversion Modes and Transformation Logic
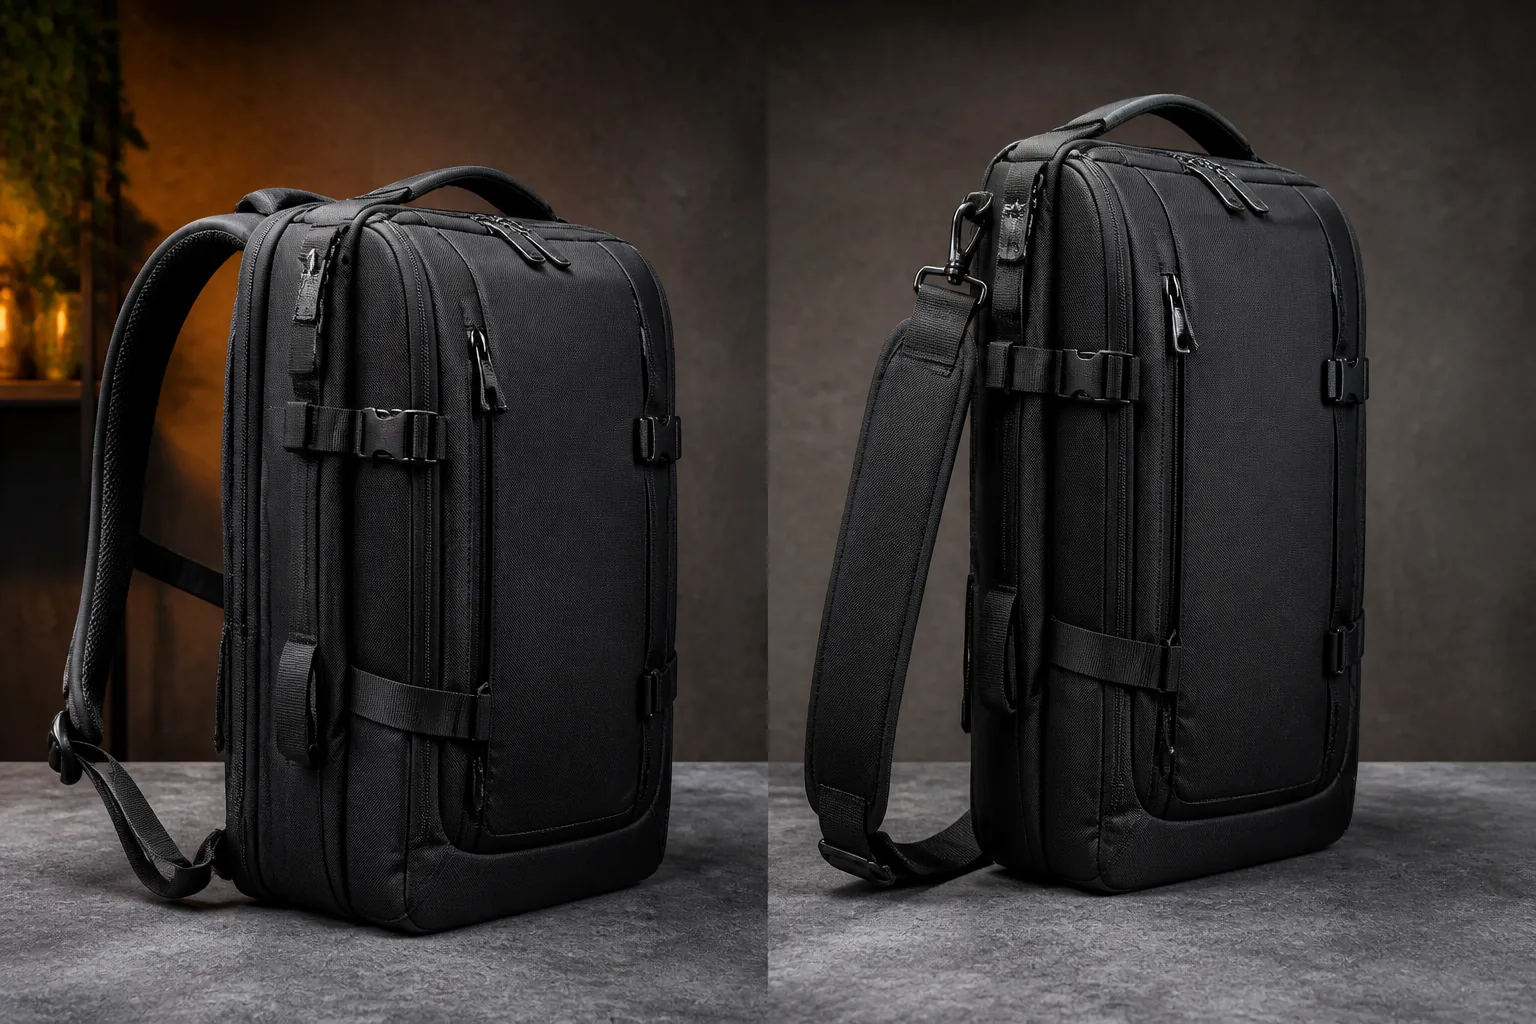
A convertible bag changes carry mode rather than adding volume, and the engineering challenge is where the unused hardware goes. A strap that is comfortable in backpack mode becomes a loose end in sling mode unless the design provides a home for it.
A convertible backpack shown as a backpack and converted into a shoulder sling with the straps stowed
The Mode Table
Mode
Conversion requirement
Backpack
Two straps, framed back
Sling
Single diagonal strap
Shoulder bag
Strap repositioned
Duffel
Straps stowed, handle used
Tote
Straps stowed, top handles
Hip pack
Belt only
The Conversion Mechanism Table
Mechanism
Character
Strap stowage pocket
Hidden when unused
Reversible strap routing
Same strap, new path
Detachable strap
Removed and stored
Convertible hardware
Swivel and clip
Zip-away harness
Panel folds away
Magnetic or clip panel
Quick change
The Stowage Table
Element
Requirement
Strap ends
Contained and retained
Buckles
Flat when stowed
Excess webbing
Managed
Padding
Does not bunch
Zipper garage
Protects the opening
Closure
Secure in both modes
The Comfort Trade-off Table
Mode
Trade-off
Backpack
Best load transfer
Sling
Asymmetric load
Shoulder
Point loading
Duffel
Limited distance carry
Tote
Hand carry only
Hip
Low volume only
The Conversion Failure Table
Failure
Cause
Strap loose in converted mode
No stowage
Hardware digs in
Unpadded contact
Mode change difficult
Poor sequencing
Loose webbing
No retainer
Zipper strained
Wrong opening direction
Confusing instruction
Ambiguous design
The Instruction Table
Element
Purpose
Diagram sequence
Shows the steps
Label on the bag
Prompts the action
Consistent hardware
Reduces confusion
Obvious stowage
Self-explanatory
Reversible steps
Allows recovery
Care note
Protects the mechanism
Manufacturer note: The conversion is where a convertible bag is judged, and the judgement happens in the first thirty seconds of use. A mode change that requires the user to remove a strap, thread it through a loop, and re-buckle it in the correct orientation will be performed once in the shop and never again. The design test is to hand the bag to someone who has not seen it and time the conversion without instruction. If the sequence is not obvious, the mechanism is wrong, not the instruction sheet.
The Attachment Interface
The interface is the component that makes modularity possible and the component most likely to fail. It has to carry load, tolerate repeated connection and release, resist misalignment, and communicate its correct use without an instruction.
Close detail of a modular attachment interface with webbing loops, side release buckle and zipper joining two panels
The Interface Type Table
Type
Character
Zipper
Continuous, strong, directional
Side release buckle
Fast, limited load
Cam or ladder lock
Adjustable, webbing
Hook and loop
Fast, wears out
Magnetic
Convenient, limited load
Webbing loop system
Configurable, tool-free
The Interface Comparison Table
Criterion
Zipper
Buckle
Webbing loops
Hook and loop
Load capacity
High
Moderate
Moderate
Low
Cycle life
High
High
High
Low
Alignment tolerance
Low
Low
High
High
Speed of change
Slow
Fast
Moderate
Fast
Cost
Moderate
Low
Low
Low
Failure mode
Partial open
Release
Loop wear
Grip loss
The Load Table
Interface position
Load character
Top attachment
Lifting and hanging
Side attachment
Shear and peel
Base attachment
Compression and abrasion
Front attachment
Peel under movement
Harness junction
Highest cyclic load
The Tolerance Table
Stack element
Contribution
Panel cutting
Position variation
Sewing
Seam placement
Hardware placement
Template accuracy
Module construction
Independent variation
Fabric thickness
Interface gap
Coating
Fit interference
The Fail-Safe Table
Principle
Application
Secondary retention
Backup strap or tab
Directional closure
Only one correct path
Visual confirmation
Obvious when engaged
Load path continuity
Force into structure
Redundancy
Two independent points
Controlled release
Deliberate action needed
The Usability Table
Attribute
Requirement
One-hand operation
Where practical
Glove use
Considered for outdoor
Visual cue
Shows engaged state
Tactile cue
Felt engagement
Force level
Within user capability
Error recovery
Reversible without damage
Component Standardisation
Standardisation is what turns a collection of modules into a platform. Without it, each module becomes its own product with its own pattern, hardware, testing, and instructions.
The Standard Table
Element
Standardised
Interface position
Yes
Interface spacing
Yes
Hardware family
Yes
Strap width
Yes
Module footprint
Yes, in increments
Colour palette
Yes
The Module Table
Module
Function
Front pouch
Quick access volume
Laptop sleeve
Protected electronics
Camera insert
Padded organisation
Hip belt
Load transfer
Rain cover
Weather protection
Daypack
Detachable volume
The Compatibility Table
Compatibility level
Meaning
Within a platform
Full interchange
Within a family
Partial interchange
Across generations
Backward compatible
Across markets
Region-specific
None
One-off module
The Hardware Table
Hardware
Standardisation benefit
Buckle family
One supplier, one test
Zipper type
Consistent behaviour
Slider finish
Uniform appearance
D-ring size
Interchangeable modules
Cord diameter
Common accessories
Webbing width
Shared tooling
The Colour Table
Strategy
Effect
Single palette
Simple inventory
Seasonal accents
Limited variants
Module-specific colours
Higher SKU
Neutral base
Broad compatibility
Print modules
Complex matching
The Spares Table
Part
Service consideration
Buckle
User-replaceable
Zipper slider
Replaceable
Strap
Replaceable module
Module
Sold separately
Interface hardware
Stocked
Instruction
Available online
Manufacturer note: Standardisation is usually negotiated as a constraint on design and should be argued as a saving in production. One buckle family across a platform means one incoming inspection routine, one strength test, one spare part, and one line-side bin. Six buckle variants across the same platform mean six of each, and the cost lands in the factory rather than in the design presentation, which is why the conversation is easier to have with the cost sheet open.
Material and Hardware Implications
Modularity changes what the materials are asked to do. A panel that carries a zipper interface must resist seam elongation, a webbing loop must resist abrasion from repeated threading, and a strap that is folded into a stowage pocket must recover its shape rather than crease permanently.
The Material Table
Requirement
Material response
Interface seam strength
Higher stitch density, reinforcement tape
Abrasion at loops
Denser weave or coated webbing
Crease recovery
Strap with padding separation
Dimensional stability
Low-shrink fabric
Coating adhesion
Compatible coating system
Colour consistency
Lot control across modules
The Reinforcement Table
Point
Reinforcement
Zipper end
Bar tack and patch
Loop base
Box-X stitch
Buckle anchor
Multi-layer webbing
Module corner
Turned and stitched
Stowage pocket edge
Binding
Harness junction
Load-bearing patch
The Hardware Selection Table
Criterion
Consideration
Rated load
Exceeds the intended load
Cycle life
Meets the conversion count
Material
Compatible with the bag
Finish
Matches the hardware family
Release force
Within user capability
Availability
Stable supply
The Webbing Table
Property
Effect
Width
Load spread and hardware fit
Thickness
Buckle grip and sewing bulk
Weave density
Abrasion and stiffness
Coating
Friction and water resistance
Elongation
Load retention
Colour fastness
Appearance over time
The Strap Table
Design
Behaviour
Padded with separated foam
Recovers after stowage
Padded with laminated foam
Creases permanently
Thin webbing only
Packs well, carries poorly
Removable pad
Best of both
Convertible with folded pad
Compact, moderate comfort
Air mesh backing
Ventilation, less durable
The Trim Table
Trim
Modular consideration
Zipper tape colour
Shared across modules
Puller style
Consistent for recognition
Cord ends
Standardised length
Reflective trim
Continuous when combined
Binding tape
Same width platform-wide
Labels
Position consistent
Testing Modular Connections
A permanent seam is tested once and trusted. A releasable interface is tested repeatedly, because its condition changes with every cycle and because the user, not the factory, performs the connection.
A technician running a cyclic pull test on a modular attachment with the bag module clamped in a fixture
The Test Type Table
Test
Purpose
Static pull
Ultimate strength
Cyclic pull
Fatigue over use
Connect and release
Mechanism durability
Misalignment
Tolerant misuse
Drop test
Loaded module retention
Abrasion
Interface wear
The Test Parameter Table
Parameter
Consideration
Load level
Related to intended use
Cycle count
Related to conversion frequency
Cycle rate
Avoids heating effects
Direction
Matches the load path
Environment
Temperature and humidity
Acceptance
Defined before testing
The Test Sequence Table
Stage
Sample
Design validation
Prototype
Material validation
Production material
Pre-production
Line-made unit
Production audit
Periodic sampling
Field return
Complaint analysis
Change validation
After any revision
The Failure Mode Table
Failure
Indication
Stitch failure
Broken thread at the anchor
Webbing tear
Fibre rupture at the loop
Buckle release
Unintended opening
Zipper separation
Slider disengagement
Loop deformation
Permanent elongation
Hardware corrosion
Surface degradation
The Acceptance Table
Criterion
Requirement
Static strength
Above the specified load
Cyclic retention
No failure within the count
Release force
Within the usable range
Retention after cycles
Still functional
Appearance
No visible damage
Documentation
Recorded against the batch
The Field Feedback Table
Signal
Interpretation
Returns for detachment
Interface under-designed
Complaints about difficulty
Mechanism over-complex
Wear at the loop
Abrasion underestimated
Module misfit
Tolerance stack too wide
Colour mismatch
Lot control failure
Lost modules
Retention design weak
Manufacturer note: A modular interface has two different life requirements and they are often confused. The mechanical requirement is a cycle count, which the laboratory can test against a stated number. The behavioural requirement is that the user connects it correctly every time, which no laboratory can test and which the design either achieves or does not. A buckle that holds four thousand cycles and is closed incorrectly by a third of users has a field failure rate set by its usability, not by its strength.
Manufacturer note: Testing a module in isolation answers the wrong question. The interface is loaded through the module, so the relevant test is the assembled system: the module fitted to the body, loaded to the intended weight, and cycled in the orientation it will be used. A loop that passes a straight pull and fails when the module swings is a loop that was tested in the wrong direction.
Cost, SKU and Inventory Implications
Modularity is usually justified by price and almost never costed properly. The base bag carries the structure, but the modules, the interfaces, the instructions, and the variants each add cost that a conventional bag does not incur.
The Cost Driver Table
Driver
Where it lands
Additional components
Material and cutting
Interface hardware
Component cost
Assembly time
Labour
Kitting
Warehouse labour
Instructions
Design and print
Testing
Qualification cost
The Hidden Cost Table
Cost
Why it is missed
Variant administration
Not a material cost
Work instruction maintenance
Absorbed in supervision
Inspection points
Absorbed in quality
Rework from wrong assembly
Irregular, unbooked
Spare parts inventory
Capital tied up
Module-specific packaging
Outside the bag BOM
The SKU Table
Model
SKU count
Single bag
One
Bag plus three modules sold separately
Four
Bag plus three modules, three colours
Twelve
Two conversion modes, three colours
Six
Platform with sizes
Multiplied
Market-specific variants
Multiplied
The Inventory Table
Strategy
Character
Assemble to order
Flexible, longer lead time
Assemble to stock
Fast, higher inventory
Module-only stocking
Flexible, kit risk
Full kit only
Simple, less flexible
Consignment
Lower capital, less control
Drop-ship modules
Lowest capital, service risk
The Pricing Table
Approach
Basis
Bundle price
Whole system value
Base plus add-on
Anchored low, upsell
Module parity
Module priced by function
Cost plus
Simple, ignores value
Competitive reference
Market-anchored
Platform licence
Long-term value capture
The Lead Time Table
Model
Lead time character
Full kit assembled to stock
Shortest, highest inventory
Base assembled, module added at pick
Moderate, flexible
Assembled to order
Longest, lowest inventory
Module shipped separately
Split delivery risk
Platform plus local kitting
Variable by market
Spares held at distributor
Service-dependent
Lead time is the part of a modular programme that buyers notice first, because a platform sold as a system invites the expectation that every combination is available immediately. The factory that assembles to stock meets that expectation at the cost of inventory across many variants, and the factory that assembles to order protects its capital at the cost of a lead time the buyer may not accept.
The Control Table
Control
Purpose
Variant matrix
Prevents unplanned SKUs
Kit checklist
Correct module set
Picking verification
Correct variant shipped
Barcode per variant
Traceability
Assembly record
Which configuration
Spares plan
Serviceability
The Modular Design Checklist
Architecture
Item
Done
Architecture chosen
☐
Fixed and variable elements defined
☐
Variant matrix counted
☐
Module count justified
☐
Platform principles agreed
☐
Generation compatibility stated
☐
Interface
Item
Done
Interface type selected
☐
Load path defined
☐
Tolerance stack analysed
☐
Fail-safe provision made
☐
Engagement confirmed visually
☐
Release force checked
☐
Conversion
Item
Done
Modes defined
☐
Stowage designed
☐
Sequence documented
☐
Timing tested unaided
☐
Comfort assessed per mode
☐
Reversible without damage
☐
Components
Item
Done
Hardware family standardised
☐
Webbing width standardised
☐
Module footprint set
☐
Colour palette limited
☐
Spares identified
☐
Compatibility matrix published
☐
Materials
Item
Done
Interface seams reinforced
☐
Abrasion points specified
☐
Strap recovery tested
☐
Shrinkage controlled
☐
Coating compatibility checked
☐
Colour lots controlled
☐
Testing
Item
Done
Static strength tested
☐
Cyclic life tested
☐
Connect and release tested
☐
Misalignment tested
☐
Assembled system tested
☐
Results recorded per batch
☐
Production and Cost
Item
Done
Assembly sequence defined
☐
Work instructions written
☐
Kitting method set
☐
Inspection points placed
☐
Variant cost calculated
☐
SKU count approved
☐
The Eight Rules
Rule
Reason
Count the variants before approving the design
Complexity is the real cost
Design the interface before the module
The module is fitted to it
Give every strap a home
Converted modes fail on loose ends
Test the assembled system, not the part
Load path passes through both
Standardise hardware across the platform
One test, one spare, one bin
Time the conversion without instructions
Usability is a design property
Define the tolerance stack explicitly
Modules must fit every unit
Publish the compatibility matrix
Prevents wrong module sales
Manufacturer note: The most common financial failure in a modular programme is not a cost overrun on any single component. It is a SKU explosion that nobody counted. A platform with one body, four modules, three colours, and two conversion modes can present as a manageable design and arrive at the warehouse as dozens of orderable combinations, each needing its own forecast, pick face, and packaging. Counting the combinations at the design stage, and deciding deliberately which ones will actually be sold, is worth more than any individual material saving.
FAQ
What is the difference between a modular and a convertible backpack?
A modular bag gains capability by adding or removing separate components, so the bag is a platform and the modules are the variable. A convertible bag keeps a single body and changes the way it is carried, usually by re-routing, detaching, or stowing the straps. The manufacturing consequences differ sharply. Modularity multiplies the number of components and the number of orderable variants, while conversion multiplies the number of assembly and inspection sequences for a single product. Many commercial bags combine both, which is why a design can look simple on a specification sheet and be complicated on a line.
How many modules should a backpack platform have?
Fewer than the design proposal usually suggests. Each module adds a pattern, a hardware set, a test routine, an instruction step, a spare part, and at least one orderable variant, and those costs are carried by the factory and the warehouse rather than by the drawing. A platform with three well-chosen modules is usually easier to sell and much easier to produce than one with six overlapping modules. The practical filter is to ask what each module does that no other module in the platform does, and to remove any module that cannot answer that question clearly.
Which attachment system is strongest for a detachable module?
A zipper is generally the strongest releasable interface because the load is distributed along a continuous track rather than concentrated at a single point, and it also keeps the module aligned across its whole edge. Buckles and clips are faster to operate and better where the attachment is a single point, such as a hip belt or a small pouch. Webbing loop systems offer the most configuration flexibility at moderate load. The right choice follows the load path: a module carrying significant weight should be attached along its perimeter, and a module that is light and frequently removed can use a point attachment.
Why do the straps become a problem on convertible bags?
Because the design usually concentrates on how the bag converts and not on where the unused hardware goes. In backpack mode both straps are loaded and positioned; in sling or tote mode one or both are redundant, and unless the bag provides a dedicated, sized, closable stowage space, the strap ends hang, the buckles swing, and the padding bunches. The stowage has to be designed as a compartment with a defined volume, not as a gap behind a panel, and the conversion should be timed on a user who has not seen the bag before to confirm that the strapping actually disappears when it is meant to.
How does modularity affect the tolerance stack?
It multiplies it. A conventional bag has one chain of tolerances running from the pattern through cutting and sewing to the finished dimension. A modular bag has that chain for the body, another for the module, and a third for the interface between them, and the three combine at the point where the module has to fit. The practical consequence is that the interface position needs a tighter tolerance than the bag’s overall dimensions, and that the module should be designed with adjustment built in, because a fixed interface position against a fixed module can only be assembled if every unit lands within a narrow band.
Can a modular bag be tested the same way as a normal bag?
Not entirely, because the interface is a moving connection rather than a permanent seam, and its condition changes with every use. A normal bag is tested for seam strength and finished dimensions, and once those pass, the construction is trusted. A modular system needs those tests plus cyclic connection and release, misalignment tolerance, loaded drop retention, and abrasion at the loop or track. The most important difference is that the assembled system has to be tested as a system, with the module fitted and loaded in the orientation it will actually be carried, because a part that passes in isolation can still fail when the module swings.
Does modular design always increase production cost?
It increases some costs and can reduce others, and the balance depends on how the platform is structured. Costs rise through additional components, more assembly steps, kitting labour, more inspection points, more work instructions, and a larger number of orderable variants. Costs can fall through shared hardware purchased in volume, a shared pattern block that shortens development, a single test programme covering several modules, and a reduced number of base styles covering more end uses. The programmes that win are the ones where standardisation is deliberate, and the ones that lose are the ones where each module was developed as an independent product.
How should we decide which configurations to actually sell?
Count them first, then choose deliberately. Write out every combination of body, module, colour, and mode that a customer could order, and treat that number as a design output rather than an operational surprise, because each combination needs a forecast, a pick face, a package, and a price. Most programmes find that a small number of bundles cover the great majority of demand and that the long tail exists only because nobody decided to stop offering it. Publishing a compatibility matrix, and limiting the sold combinations to those the factory can kit and inspect reliably, is what keeps a modular platform profitable.
Conclusion
Modular and convertible backpacks are attractive for the same reason they are difficult to manufacture: the product is no longer a single object but a system of objects joined by interfaces. The design presentation shows the configurations, and the factory inherits the connections, the tolerance stacks, the variants, and the instructions that make those configurations real.
The work divides into four decisions. The first is architecture: decide which elements are fixed and which are separable, count the variants that result, and justify each module by the function it performs that no other module performs.
The second is the interface: choose the type from the load path rather than from convenience, analyse the tolerance stack explicitly, provide a fail-safe, and make engagement visible so that a user can confirm it without an instruction.
The third is the conversion and the components. Every strap that becomes redundant needs a designed home, and the conversion should be timed on someone who has not seen the bag before, because a sequence that is not obvious is a mechanism that is wrong. Hardware families, webbing widths, and module footprints should be standardised across the platform, since one buckle family means one inspection routine, one strength test, and one spare part.
The fourth is testing and cost. A releasable interface is a moving connection, so it needs cyclic and misalignment testing as well as static strength, and it must be tested as an assembled system in the orientation it will be carried.
On cost, the decisive number is not the price of any single component but the count of orderable combinations, and the programme that limits that count deliberately will be more profitable than the one that discovers it at the warehouse.
For buyers, the practical questions are how many variants the platform actually creates, which attachment system carries the load, where the straps go when they are not in use, and what evidence exists that the interface survives repeated connection.
For factories, the return is a platform that can be sold in several markets from one base structure, provided the standardisation and the variant count are decided before the patterns are cut rather than after the first order arrives.